
Ultimate Workbench with YouTube Play Button!
I built my dream workbench! I have used the same workbench since I started woodworker over four years ago. I threw together a 2x4 and plywood assembly table and while it worked great, I wanted a nice table that was also bigger, had storage and clamping options. My vision was to have a walnut frame and ambrosia maple drawer fronts. I wanted it to be special and specific to me so I embedded my silver YouTube Play button into the top! This is my realization of that vision. The table is a full 4 feet by 8 feet (actually just a little larger than that with the edge trim). It features t-track on the top and lots of storage!
Build plans for this project are available here: https://www.731woodworks.com/storeworkbench-plans
A full list of tools and supplies used in this build can be found here: https://www.731woodworks.com/outfeed-table-tools-and-supplies
Below you will find full resolution pictures of the completed bench, drawers, etc as well as the bench build process and some notes about the steps. You can also watch the build video below.
The first step was milling down all of the walnut to make my legs and aprons. Other than building the drawers, this was the step that took the longest time. Getting everything cut down, planed, jointed and glued up takes a lot of time, so be prepared!
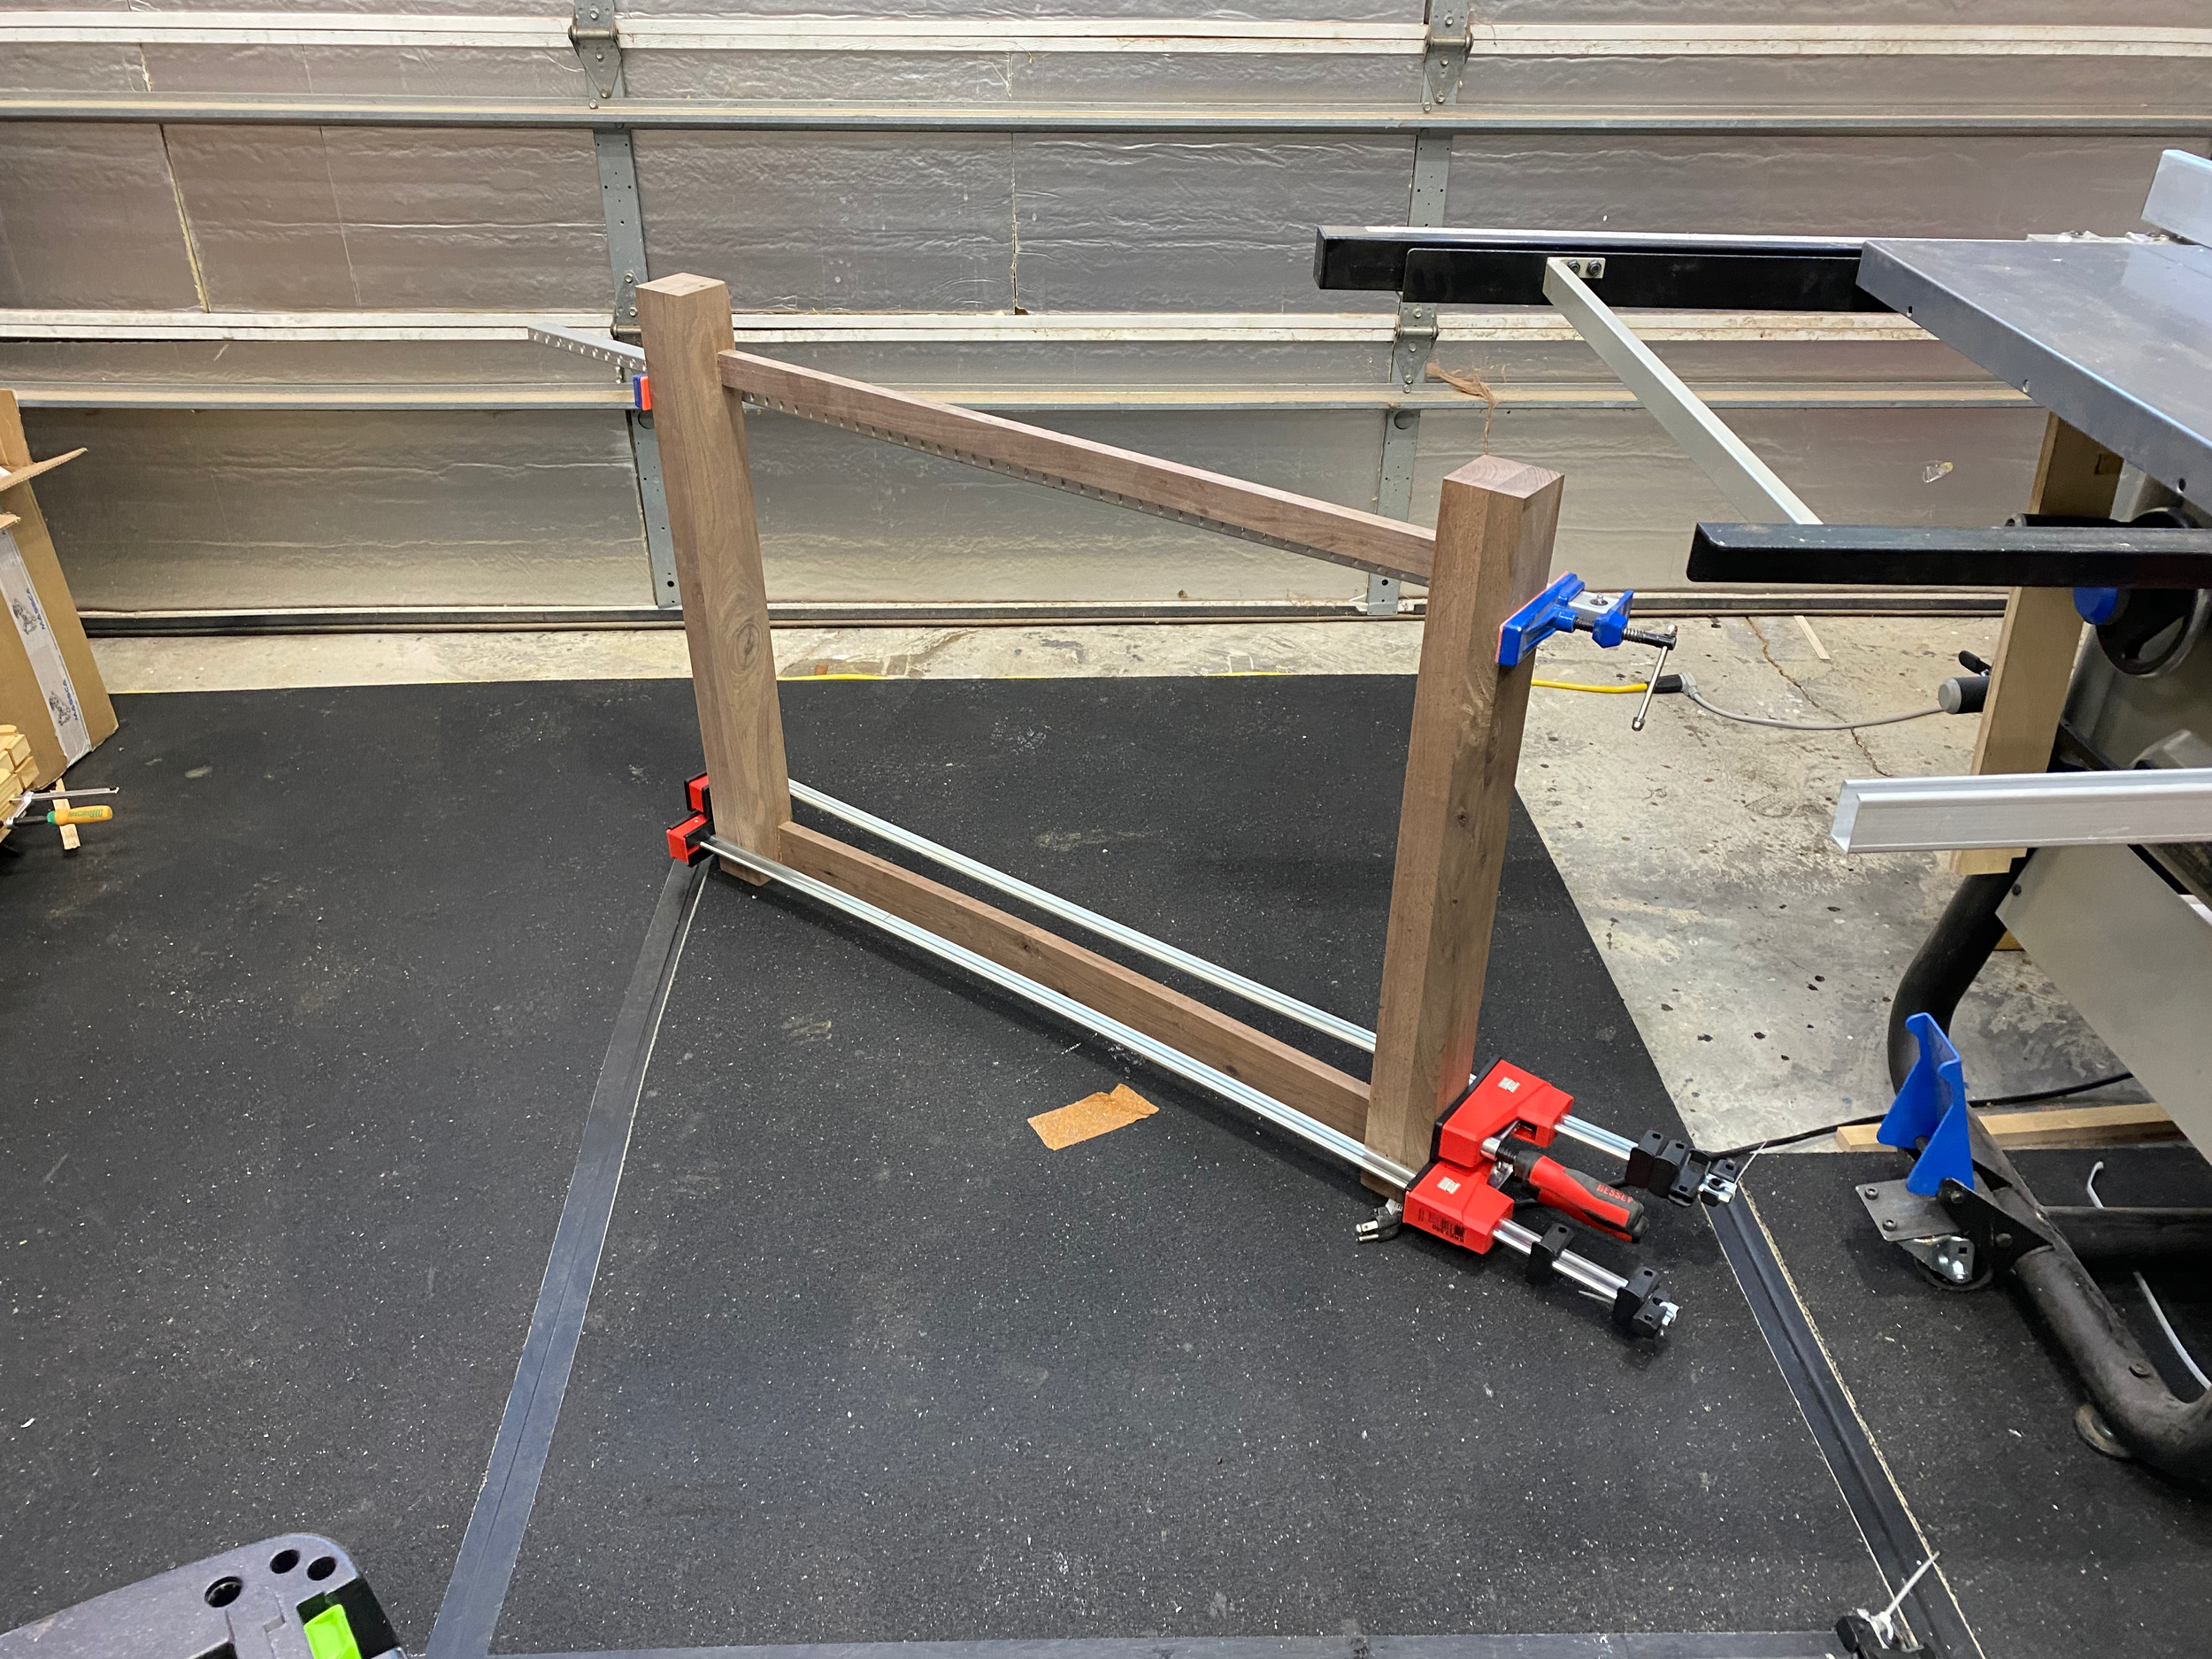
I used the DowelMax for my joinery method. You can use domino, mortise and tenon and even pocket holes if you so choose.

There are a lot of glue ups in this project. From gluing up the legs to the frames, it’s going to be a time consuming process, but it is so worth it in the end to have an awesome outfeed table!

Pro Tip! Wipe the glue off while it is still wet. I let this dry on several joints and it took me forever to get it all cleaned up with chisels and sandpaper!

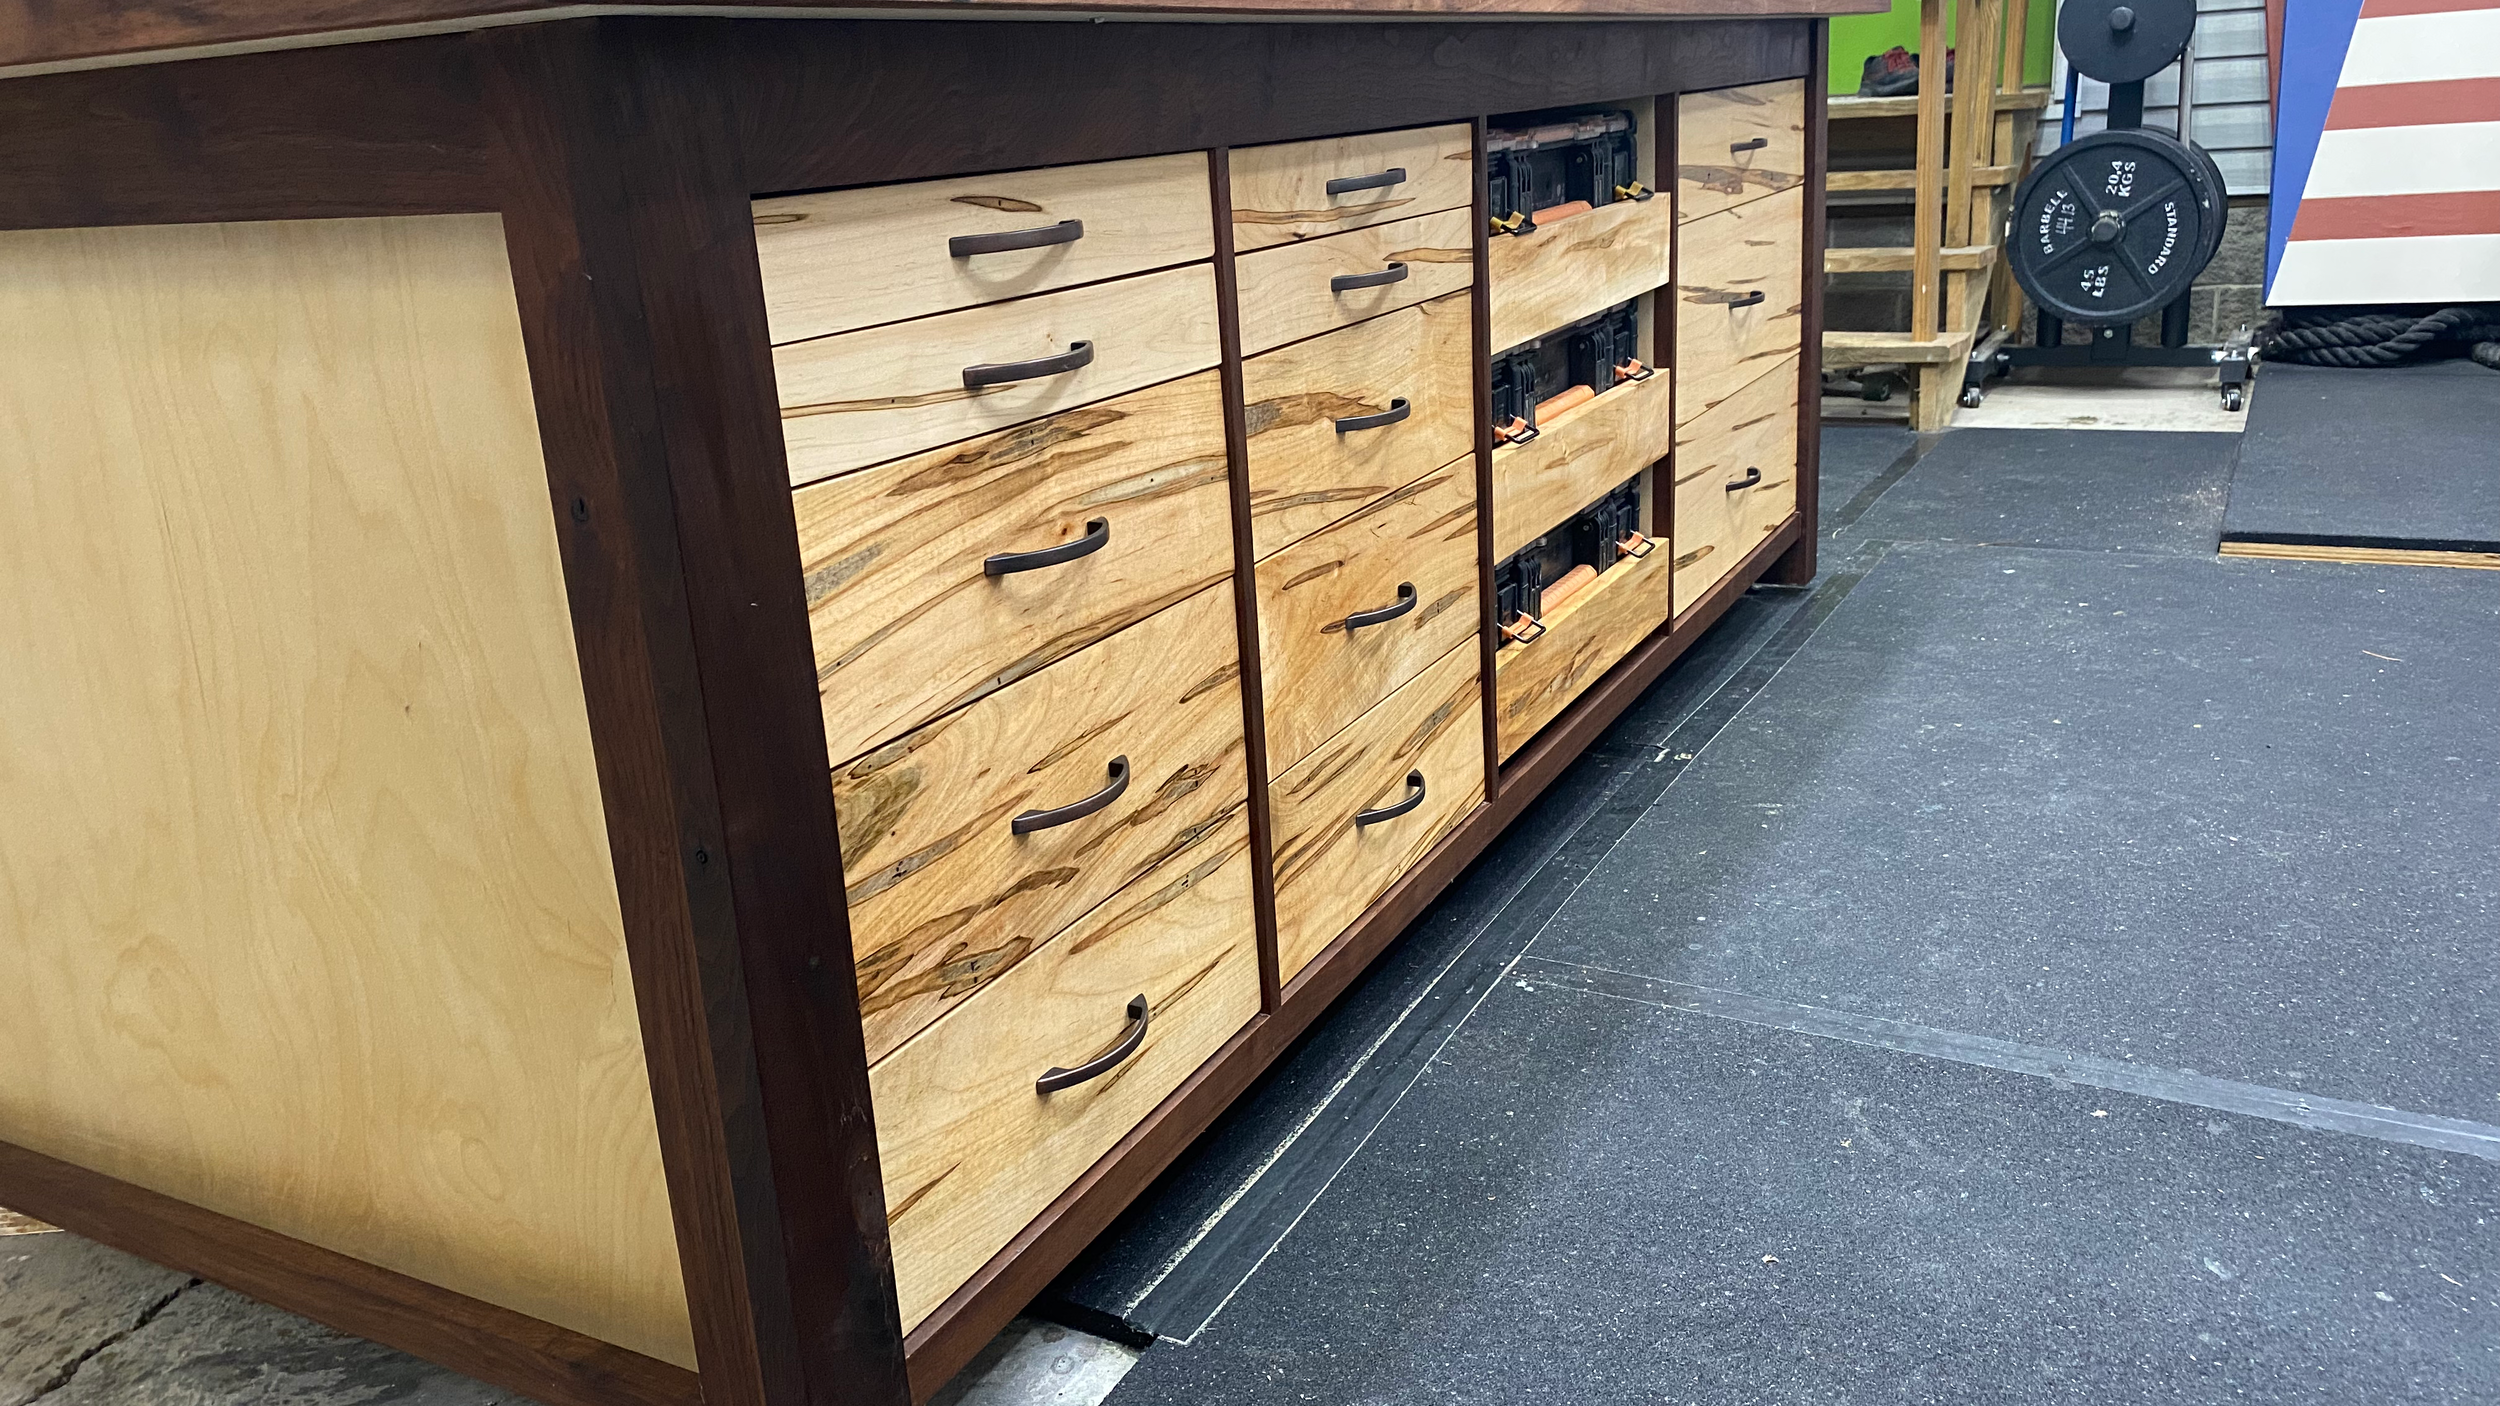
Building 16 drawers of various sizes took me quite a while because I had to figure out how big to make them as I went along. I’ve documented all of that for you so you can breeze right through that if you get the build plans! I used 1/4” maple plywood for the drawer bottoms and I really love how it looks!
I’ve used ball bearing drawer slides on my miter station for a couple years and like how well they still work even with all the dust and debris.


Having four deep drawers is awesome. I can even pack in my circular saw, routers, and other large tools so they are put away and not laying on shelves.

I had to have shelves in my workbench. Some people don’ like shelves, but having a storage area for a cross cut sled, jointing jig, and other boxes and tools is awesome!


When I built my miter stand (I’ll be remaking it soon) I added some parts trays that pull out and I love them so much, I knew I had to put them in the workbench build! Having quick access to screws, bolts, nails, etc is great!


I bought these oil rubbed bronze metal drawer pulls. I actually test made some out of walnut and maple that I actually liked a lot, but at this point in the build process, I was just ready to be done with the build so this was the easier / faster route. I actually like how these look too so it worked out.

You’ll have to be careful not to fill up the deep drawers with too much stuff. I wanted these to store larger items. I have been slowly working on better shop organization over the last couple years.

I wanted this outfeed table to be level so I bought these leveling feet. They hold a bunch of weight and are easily adjustable.


Ambrosia maple is such a beautiful wood, especially contrasting with the walnut.

I got this dust extractor storage idea from John Malecki’s workbench build. But if you don’t have a dust extractor, use this area to store a shop stool!

Finally! I have t-track! And I picked up several t-track accessories!


The most stressful part of the entire build was this YouTube play button embed. I literally lost sleep over this. From the time I started thinking about doing this project, I couldn’t stop obsessing over how to do this right. I had multiple concerns, but the main one was getting it back flat with the surface so I could have a functional table. This was a process but WOW is it beautiful! If you have a chance to see it in person, it is really cool!
If you don’t know, YouTube awards you with a silver play button when your channel reaches 100,000 subscribers. We wanted to do something special with the play button. Embedding it in the workbench was the perfect place. Each time I work on a project, I can see the play button and remember the support you have shown us! It means so much to us that you watch our content, thank you!


If you made it this far, thank you! Use code SUPPORTER in my store to receive 20% off of anything. Thank you for supporting us. It is a dream come true and would not be possible without you.