
Mini Table Top Workbench For Under $20 in Lumber
Affiliate links used in this blog post to help support our website.
PLANS for this workbench here: https://www.731woodworks.com/store/tabletopworkbench
Build details, photos and more information below the video.
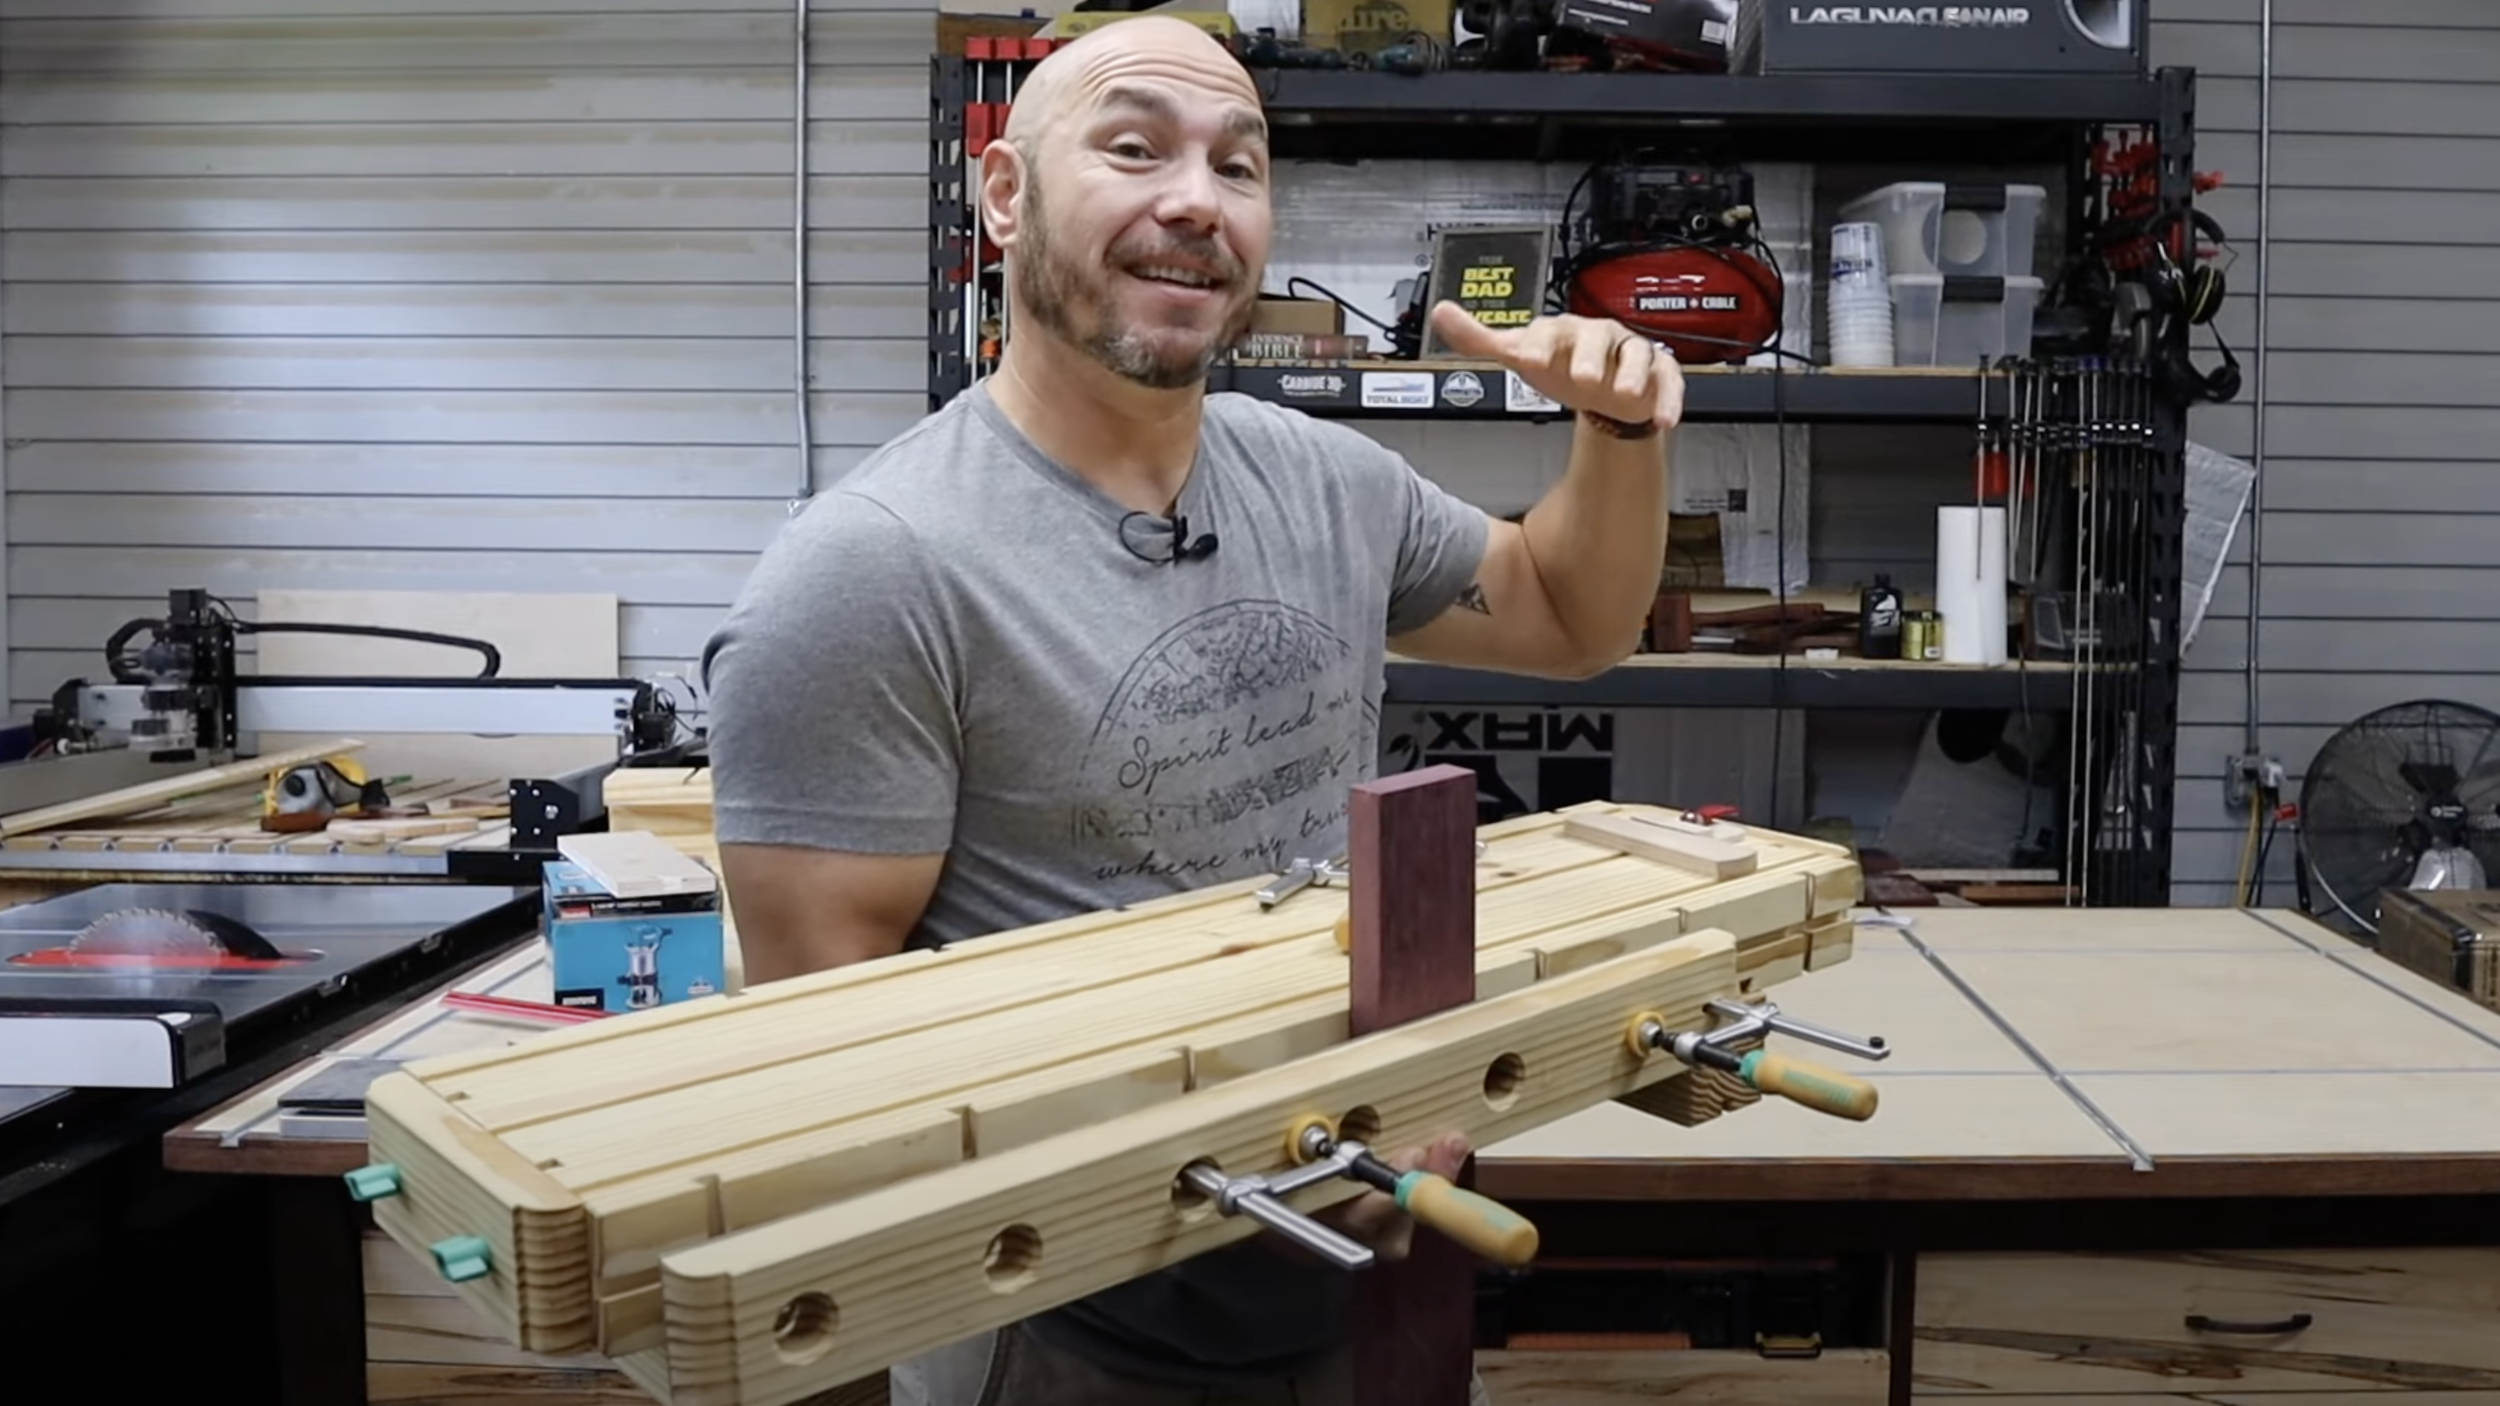
A Workbench That Fits in the Palm Of Your Hand!
You can build this mini workbench for less than $20 in lumber. It only weighs about 20 pounds! All it takes is two, eight foot 2x10 pine boards from your local lumber or big box store. You’ll need a small piece of hardwood for the wedge and clamping cam that we will build in this easy woodworking project. I used the MicroJig Matchfit system for this build because it is so versatile. I’ve previously used it on my jointing jig and table saw cross-cut sled and find that it works extremely well for these applications. Mike Taylor at TayTools.com came up with this workbench design and shared it with me to make a video and plans. He put together a supply bundle for building this workbench that you can see here: https://lddy.no/10up3 If you use code 731MICROJIG10 on his website, you’ll save 10% on any MicroJig purchase.
I built a mini portable workbench that you can use just about anywhere. You can attach this workbench to an existing assembly or outfeed table, saw horses, the tailgate of a truck, deck railing, even your dining table!
Check out full resolution images as well as instructions for building below the video.
FULL BUILD VIDEO HERE:
Build Photos, Supplies and Details:
Supplies used in this project:
Use code 731MICROJIG10 at TayTools.com to save 10% on all Microjig products!
Workbench Supply Bundle: https://lddy.no/10up3
Matchfit Clamps: https://lddy.no/10up4
Matchfit Hardware: https://lddy.no/10up5
Matchfit Dovetail Bit: https://lddy.no/10up6
Framing Square Fence: https://lddy.no/10up7
Stick on Cork: https://lddy.no/10up8
Cam Lock model number K0005.05014A1X20: https://social.731wood.works/DF0Xul1_
DeWalt Router: https://amzn.to/2X1bLOj RZ Mask: https://tidd.ly/3zSfk7u
Bessey Revo Clamps: https://amzn.to/2YG0K5u
1 Inch Forstner Bit: https://amzn.to/3yWDvQQ
To start this build you’ll need to cut your 2x10 into two 34 1/2” pieces. This will be the main portion of your workbench.

I planed my boards down to get them as flat as possible. However, you don’t need a planer for the project. If you don’t have a planer, be sure to select the flattest boards possible when you are buying them.

Next glue up your two 34 1/2” boards face to face. If you don’t have clamps, you can stack some type of heavy objects on top of the boards on a flat surface. Let the glue dry for a few hours. I let mine dry for about 4 hours.

After the glue is set, I used my table saw to rip the edges off of both sides. Final width of the workbench should be 9 inches.

Once the edges have been cut on each side, it is time to route the dovetail grooves that will make up the clamping capabilities of this workbench. Set the dovetail bit depth to 3/8” and route the grooves. Check the build plans for all of the grooves locations.

Kreg Set Up Blocks: https://amzn.to/3l9f4ee


RZ Mask for protection of that router dust! Get one here: https://tidd.ly/3zSfk7u


This framing square fence came in clutch for cutting across the workbench. It turns the framing square into a straight edge for the router, that you can clamp to the bench. Check them out here: https://lddy.no/10up7

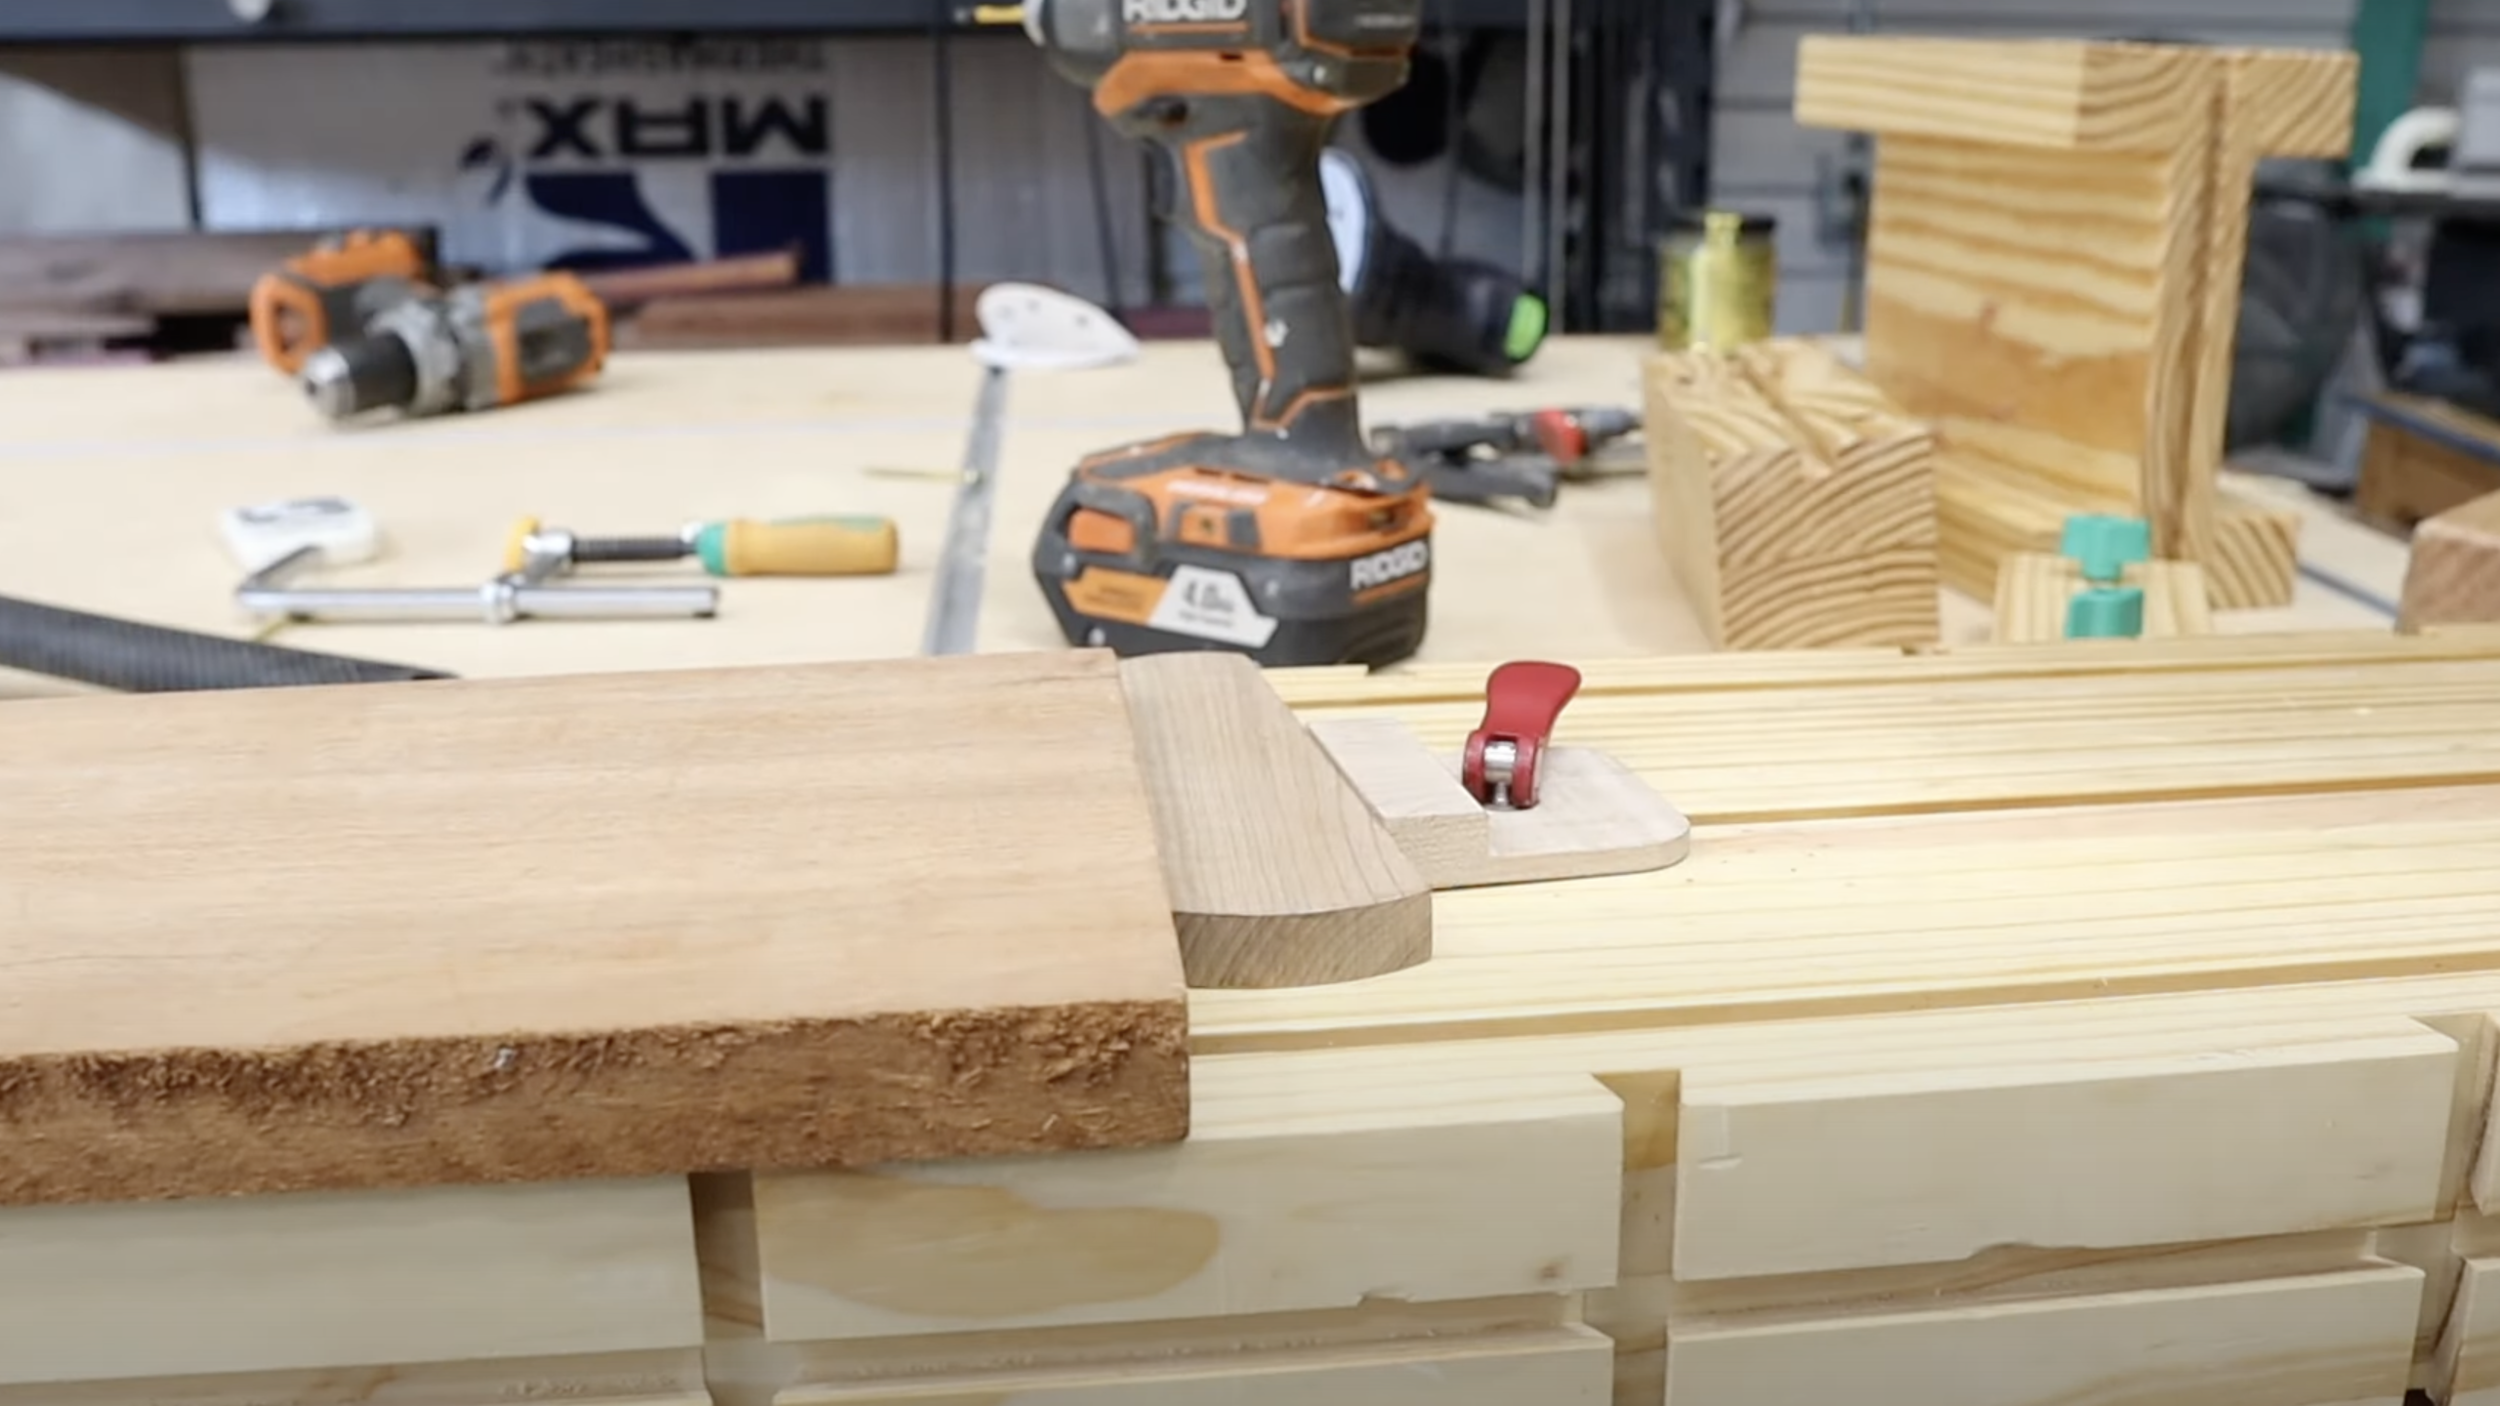
This is the short riser feet. I laminated these two parts together at the same time as I did the workbench. Rip the edges on each side of this one as well. Route a dovetail groove down the center of the length of this piece before cutting them to size. They should be 9 inches, the same as the workbench width.

You’ll need to drill holes in these small feet to accept the match fit hardware so they can be attached to the workbench.


These are the I-beam style feet for a larger workbench. These aren’t necessary for the workbench to function but if you want a taller bench, these are just the ticket. I cut dados in two sides, and glued them together.

Once the glue is dried, these tall feet attach to the bottom of the workbench using screws.

Of course you can always use the workbench flat on the surface without the feet.

For the vise jaw, you’ll drill 1 inch holes along the face of the vise. Attach cork on one side before drilling the holes. I got this stick on cork from https://lddy.no/10up8 also.


This traditional style woodworking vise is what makes this workbench so versatile!

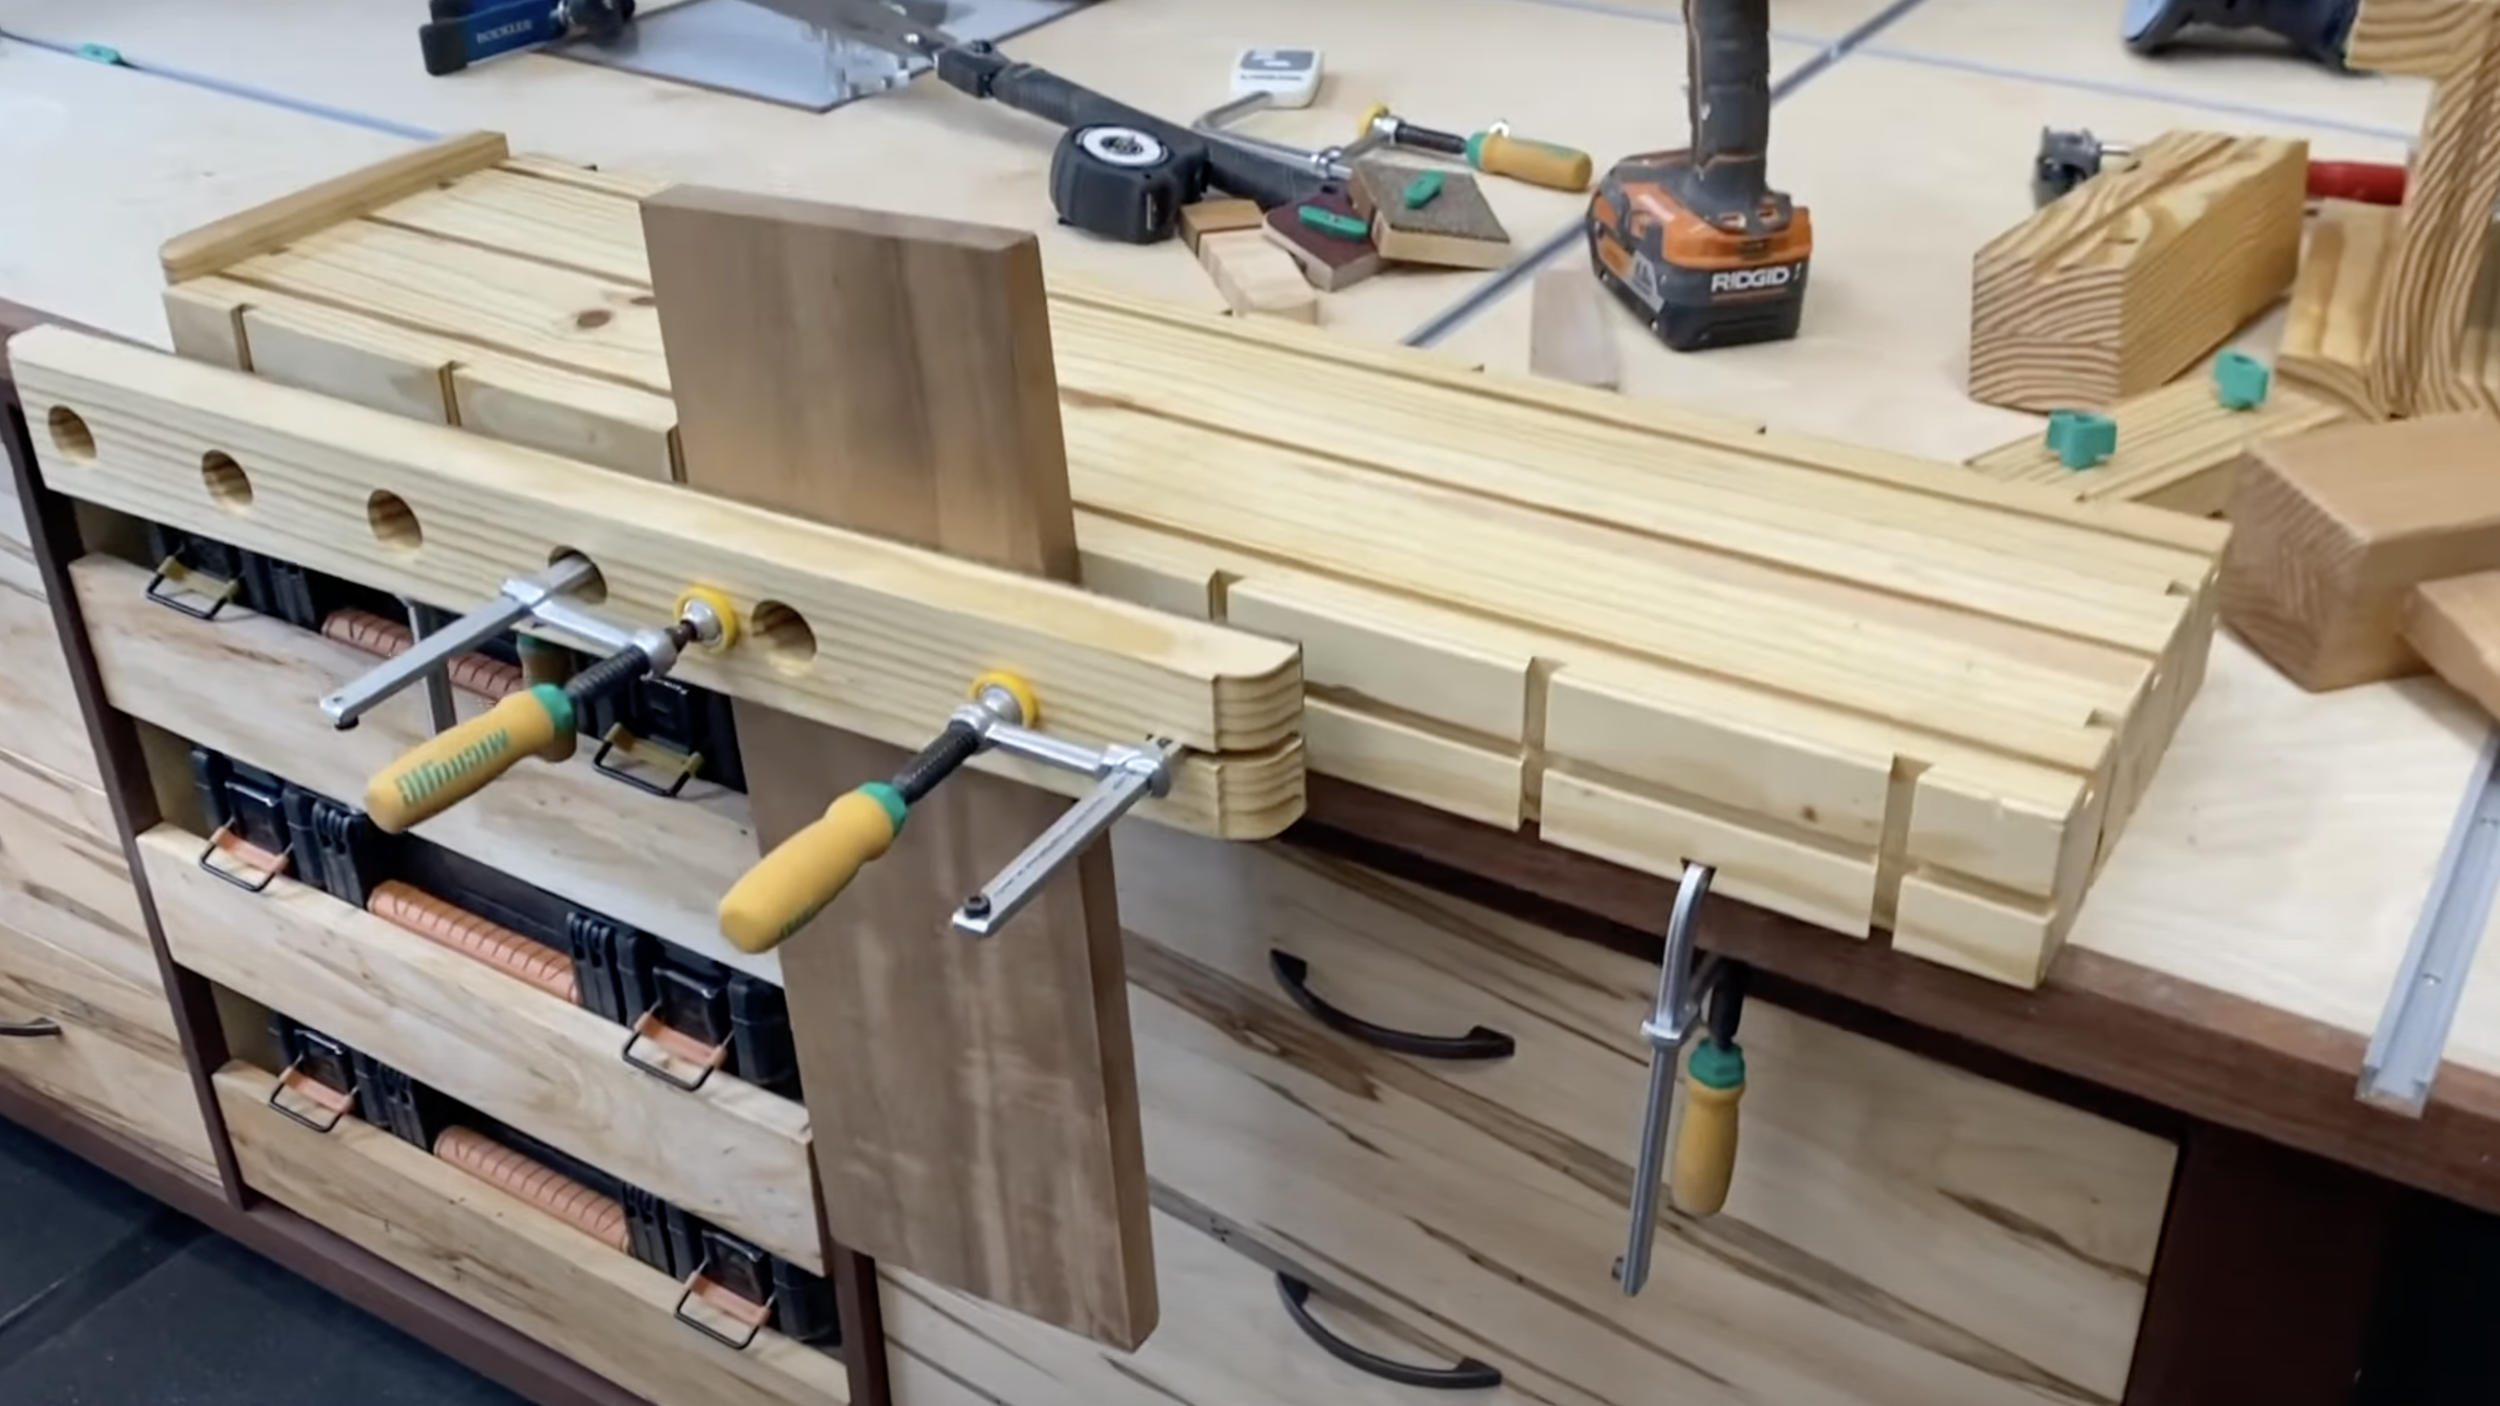
For the plane stops, rip them so that they are one inch thick. You’ll drill holes for the MatchFit hardware to fit in the vertical dovetail grooves you routed on each end of the workbench.


The cam and the wedge need to be made from hardwood. I used scraps from a cutting board build for mine. You can use cherry, oak, walnut, maple, or any good hardwood. You have to cut a 5 degree angle on one side of the wedge and on one side of the cam block. This allows you to drive the wedge between the cam block and the stock you are working on and lock it against a plane stop on the workbench. I got the cam lever from this website. It has a terrible user interface. You actually place the order on the website, then they call you to get your payment information. This is the only place Mike and I could find that sells this cam (one with this thread type).


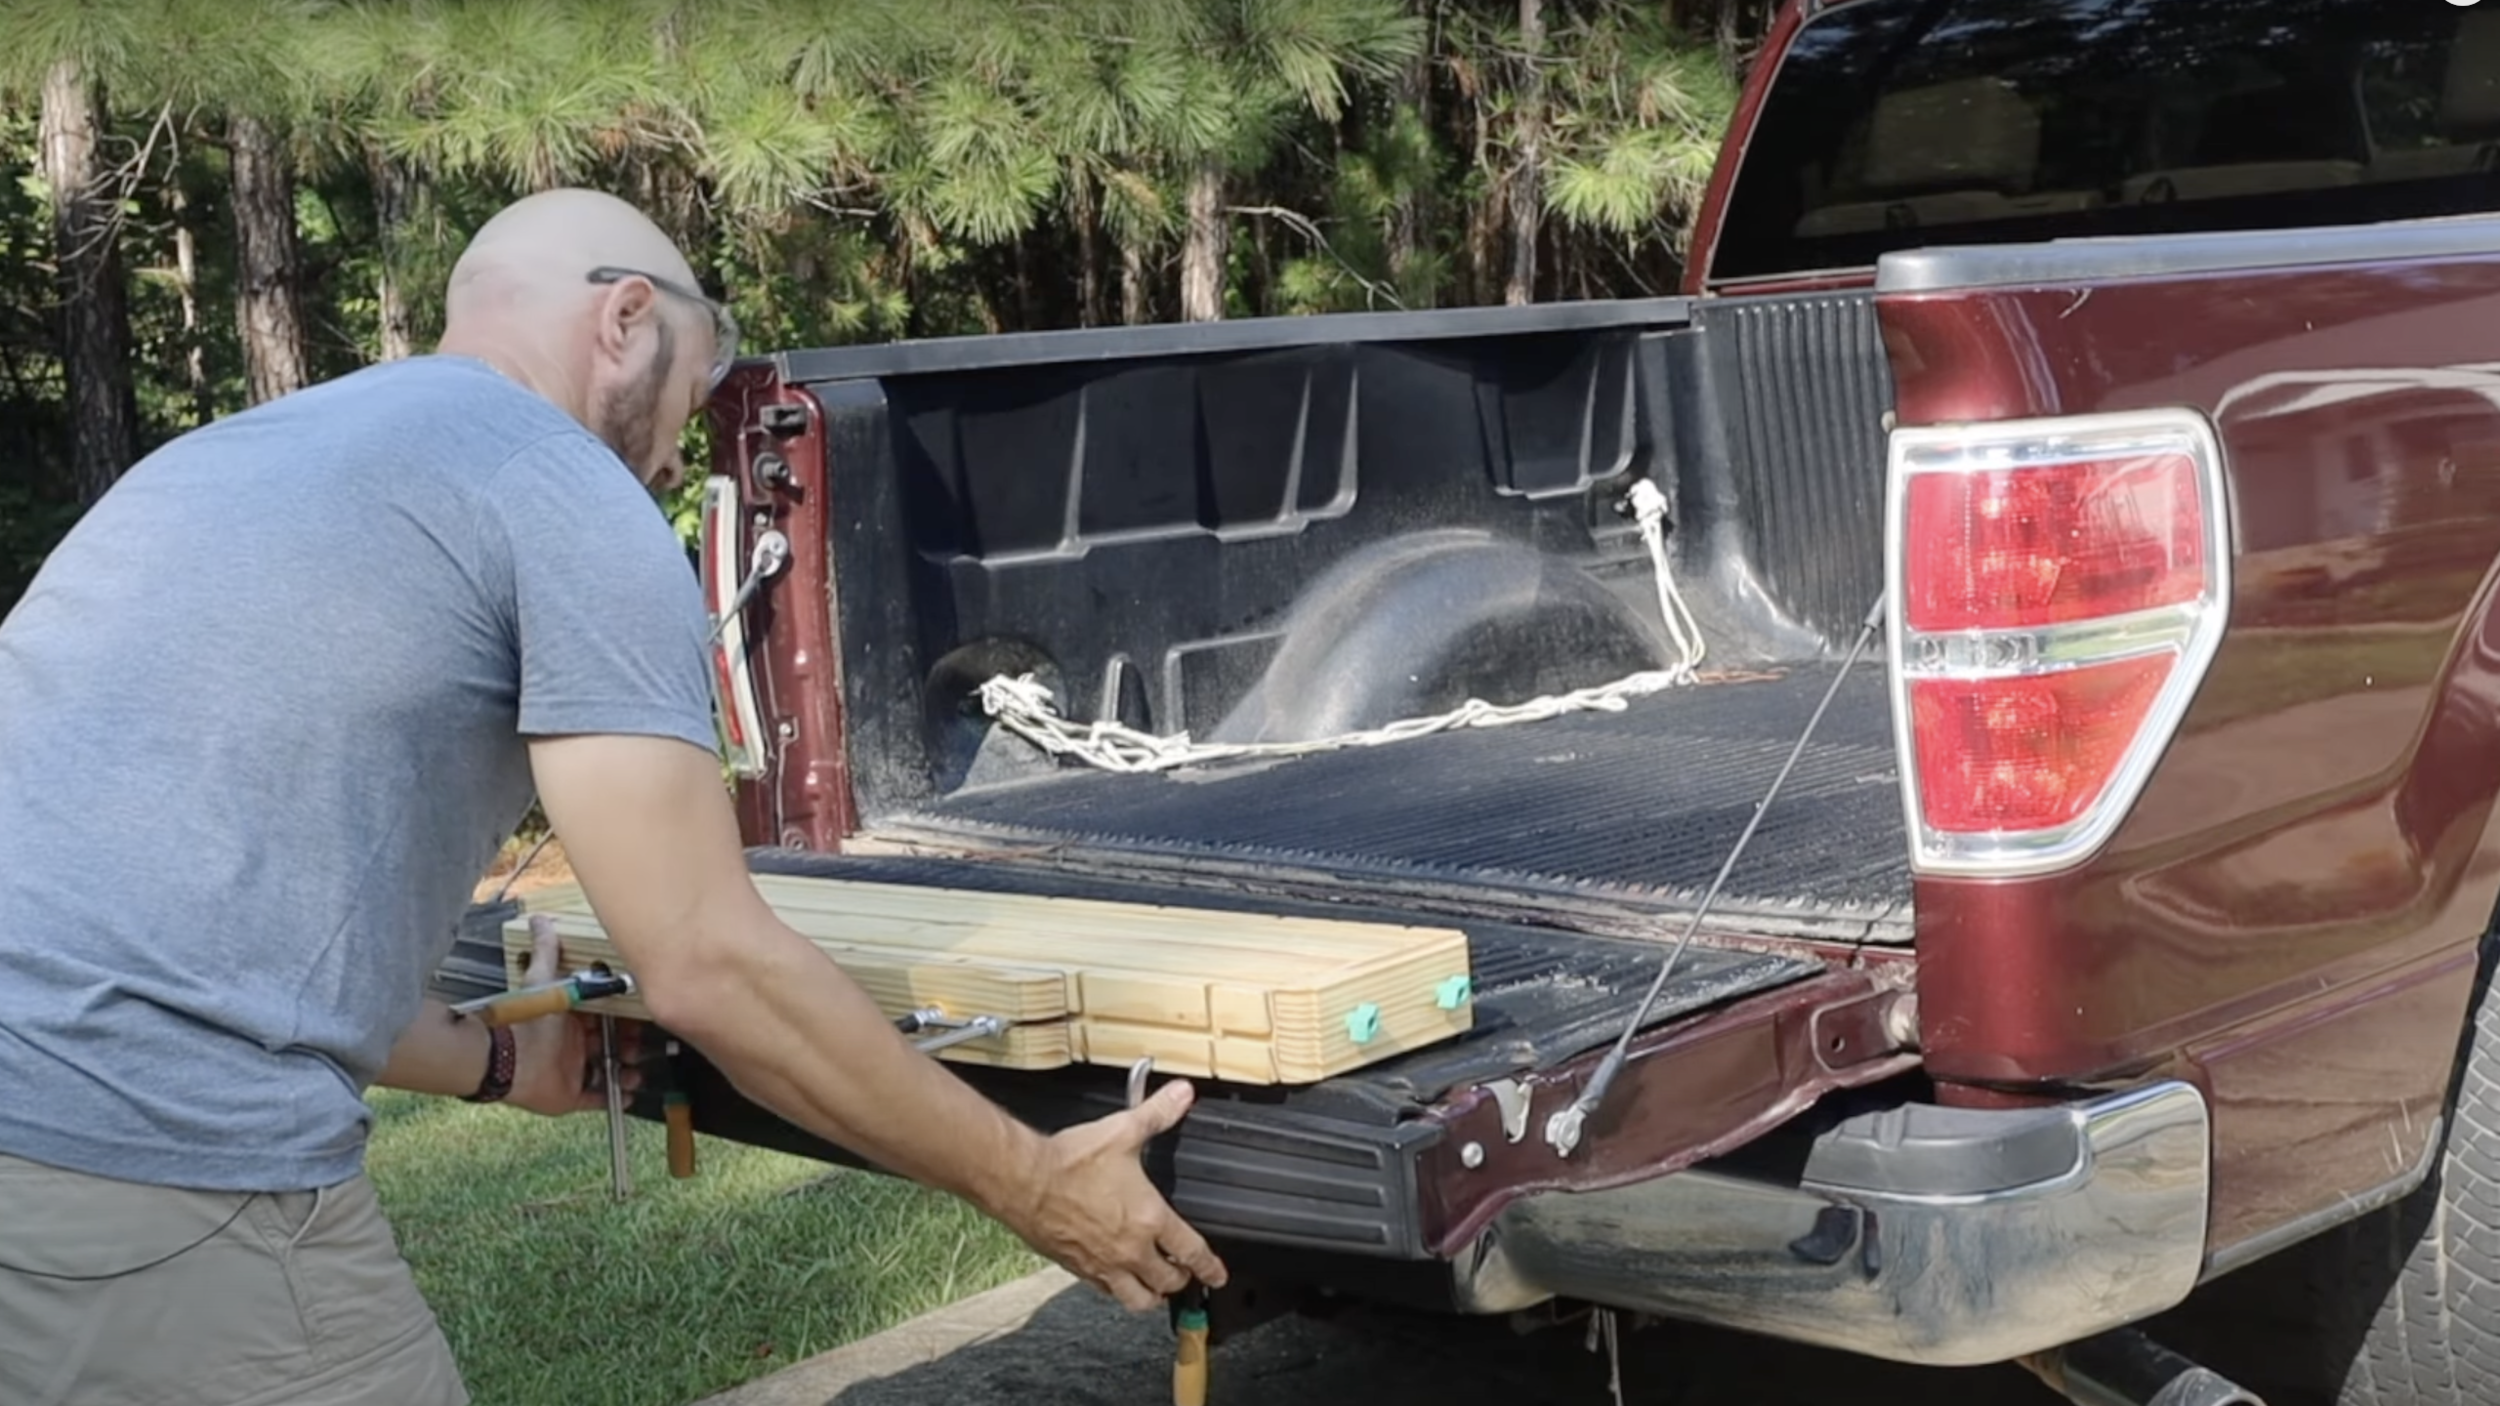
The beauty of this mini workbench is that you can take it with you and use it just about anywhere. You can clamp it to saw horses on the job site or your tailgate. I will caution you though that clamps can dent tailgates. I would recommend using this on a utility type truck bed.


Don’t tell Mrs. 731 that I clamped the workbench to our dining table!
Happy building! 👊
A full list of tools and supplies I use and recommend here: https://www.731woodworks.com/recommended-tools