How to Build a Miter Saw Stand

I’ll show you how to build a miter station for a small shop. I have easy to follow, step-by-step build plans for this project.
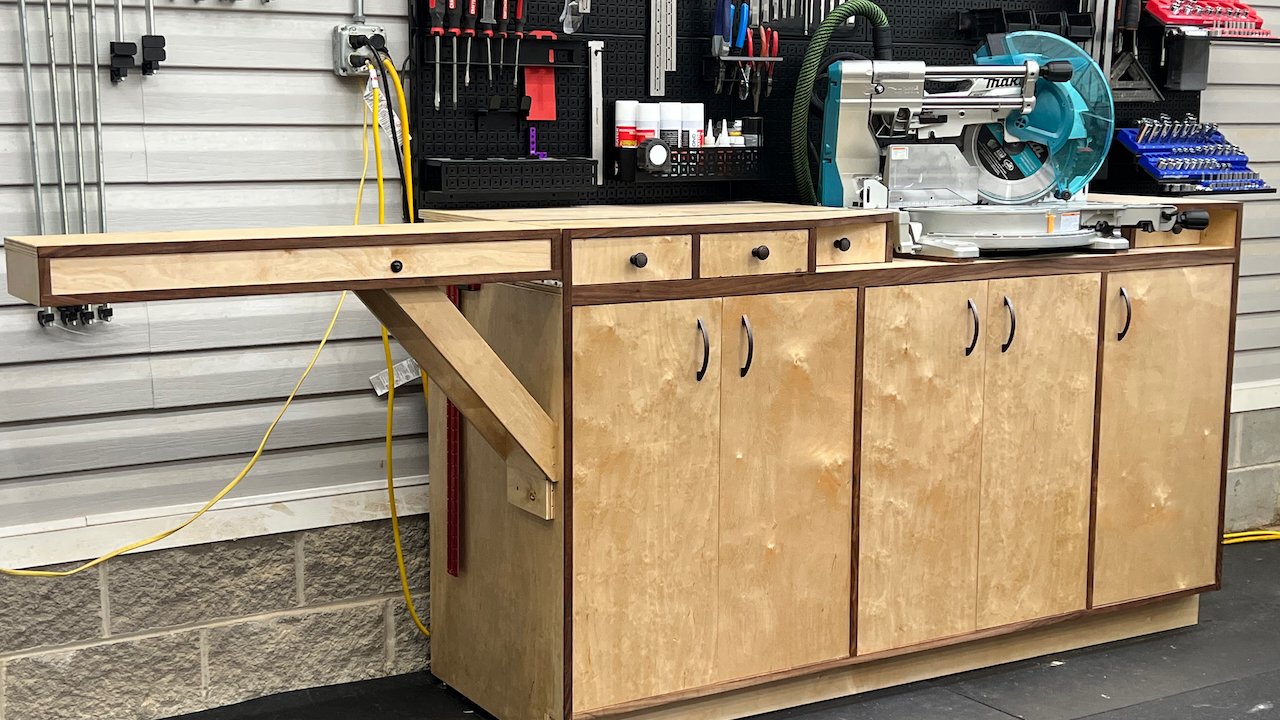
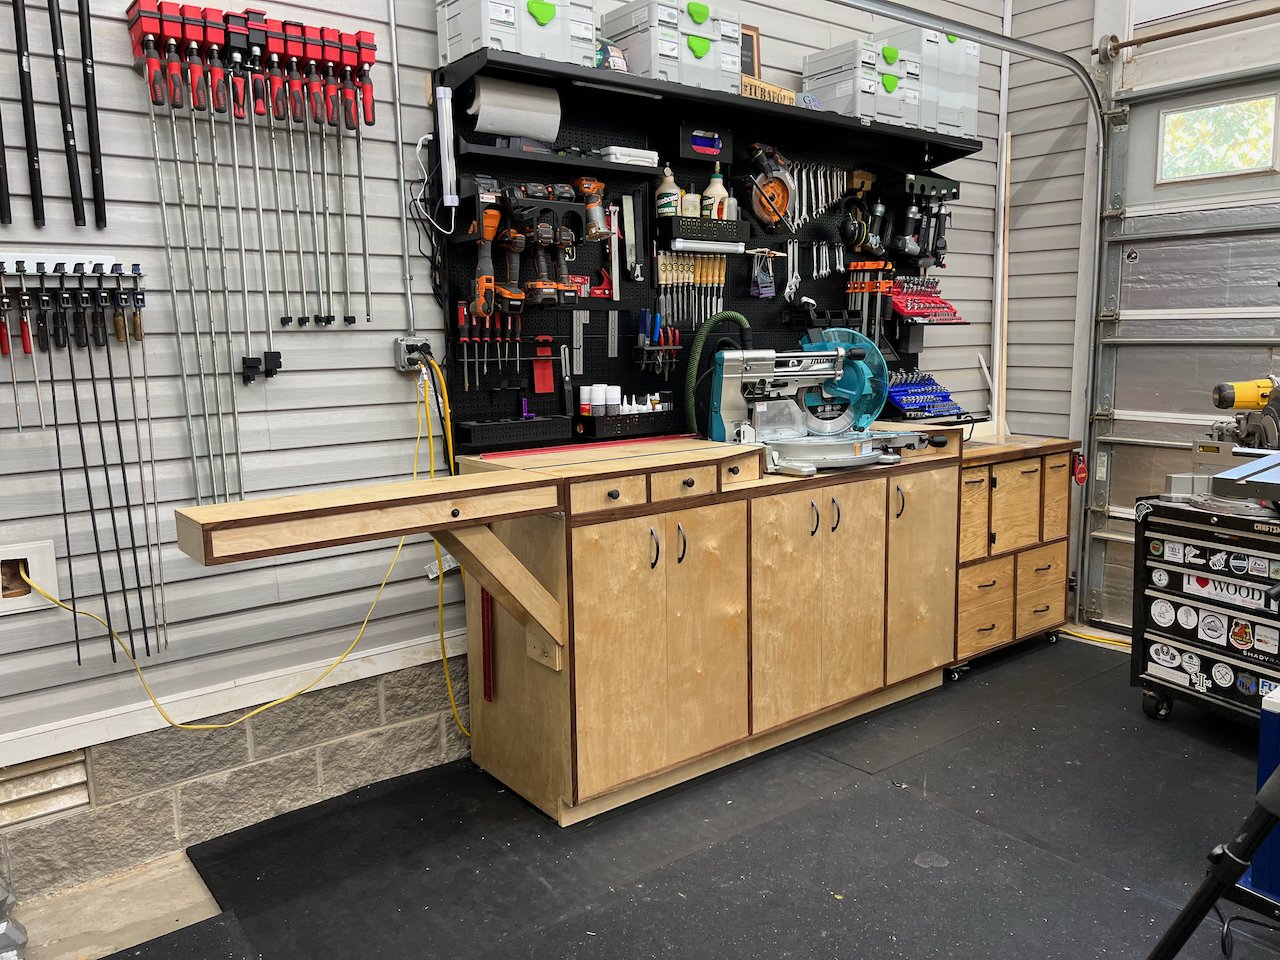
My shop is a two car garage, so space is at a premium. I built this miter station with an extension wing that folds up to give added support for longer boards and folds down when not needed to conserve space. I also added the OmniWall storage system to help me organzie my shop and maximize storage in a small space.
The first thing I had to do was plan out where I wanted the miter station to sit, how far away from the wall, and how long the station would be. I placed my saw on the floor and rolled my router table to the right and the bandsaw to the left side of the wall storage. This gave me a clear picture of where the new miter station would sit.

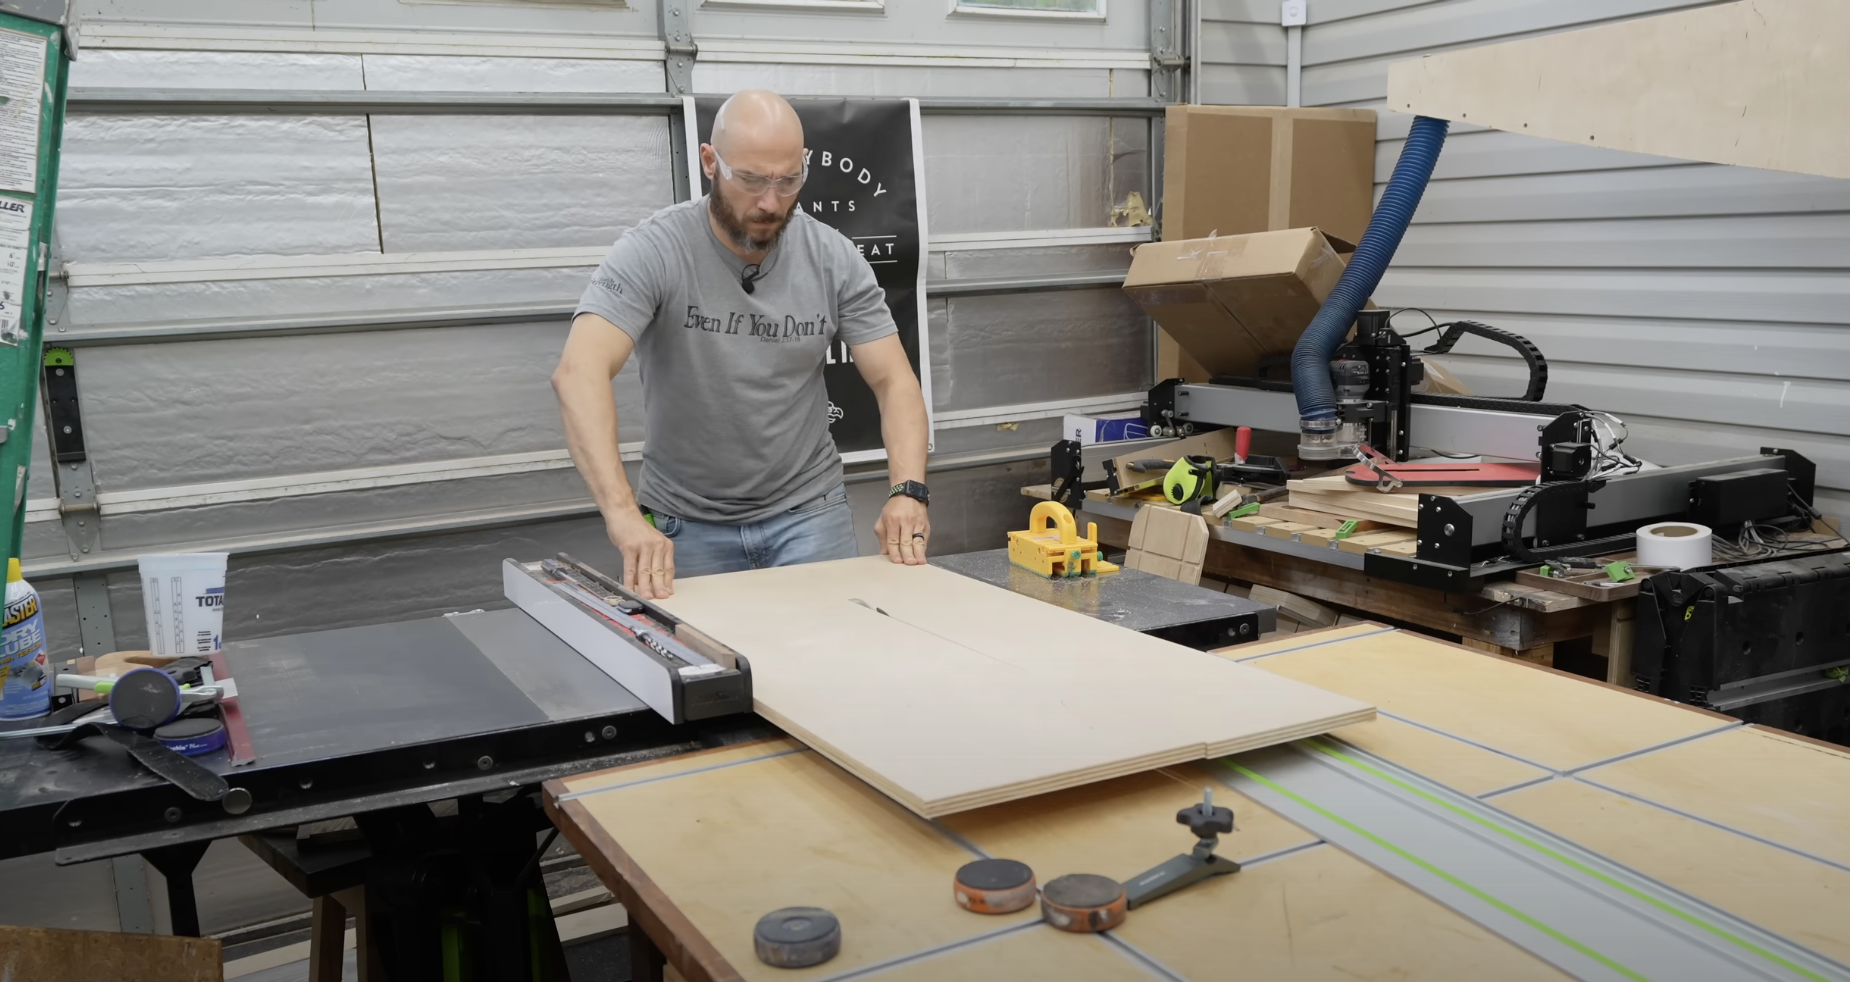
For this project, I used four 4x8 sheets of 3/4” plywood and one 4x8 sheet of 1/4” plywood. I started the project by cutting the plywood into manageable pieces. I used my track saw to make these cuts, but you can use a table saw or a circular saw with a straight edge. I used my table saw to cut the small 3 inch strips that would be used for the cabinet bracing.


I used my Massca M2 pocket hole jig to drill several pocket holes in the pieces for joinery. This makes quick work when building cabinets. Pocket hole joinery is strong and quick to do, making it perfect for shop projects like this. Simply set the jig on the 3/4” setting, set the depth collar on the drill bit to the same, and drill pocket holes. I drilled two on each end of the braces and four on each side of the bottoms of the cabinets. Using 1 1/4” pocket hole screws and wood glue to complete the joint.


For the cabinet back, first, I checked to ensure the cabinet was square. Taking a measurement from one corner to the other at a diagonal. If the measurements match, it’s square. I then cut a piece of the 1/4” plywood to fit the back of the cabinet from the top, to just below the bottom panels. There should still be about 3” of space that isn’t covered on the back, across the bottom. I used glue and brad nails to attach it to the frame.
I put the miter station in place and installed leveling feet to the bottom. I used my 48” level to ensure the frame was level side-to-side, as well as front to back.


After the miter stand was level, I cut a piece of plywood to fit the top and secured it in place using 1” screws from underweight. This will serve as the base for your miter saw to sit on.


When installing the risers on the top, ensure that your saw will have plenty of room to swivel right and left. Also ensure that these are installed square to the front edge. If these aren’t square, it will cause issues later when trying to add drawers to those spaces. I attached these with glue and pocket screws.


Install the drawer slides now. If you put the top of the miter station now, getting the drawer slides installed will be very difficult. Don’t ask me how I know :) I used 20” drawer slides on my miter station.
After the drawer slides are installed, install the top of the miter station. I just used brad nails to secure this in place.

I built my my station side wings to be about 1/2” taller than my actual miter saw. This allows me to shim the miter saw to the height of the table. Just a straight edge to get the shims just right.
After you get that set, you can install the toe kick. I ripped a strip of plywood to fit this space and attached it with glue and brad nails.

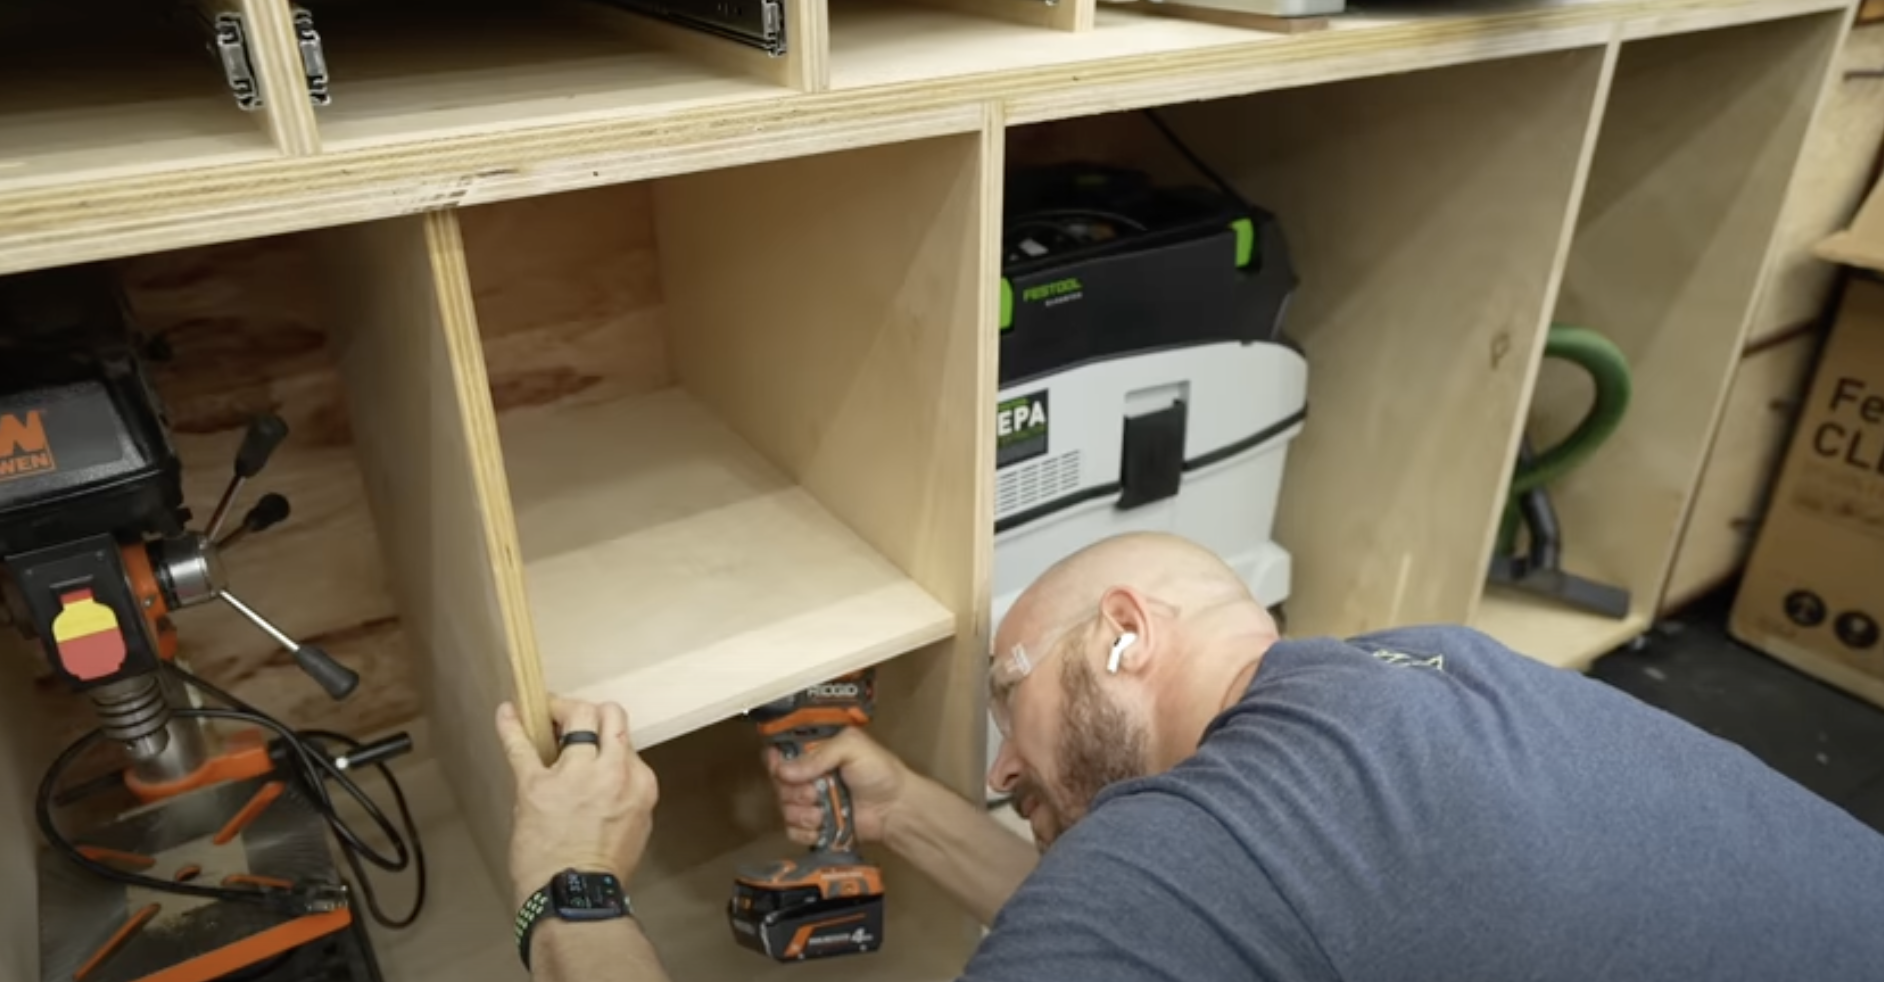
You can add dividers and shelves in the cabinets at this point. I elected to divide the left most cabinet into shelves. I used 3/4” plywood for this and secured them using pocket holes. To hide the plywood edge, I ripped walnut into 1/8” thick strips the width of the plywood and attached with wood glue and pin nails. You can use edge banding, or leave the plywood edge if you wish.


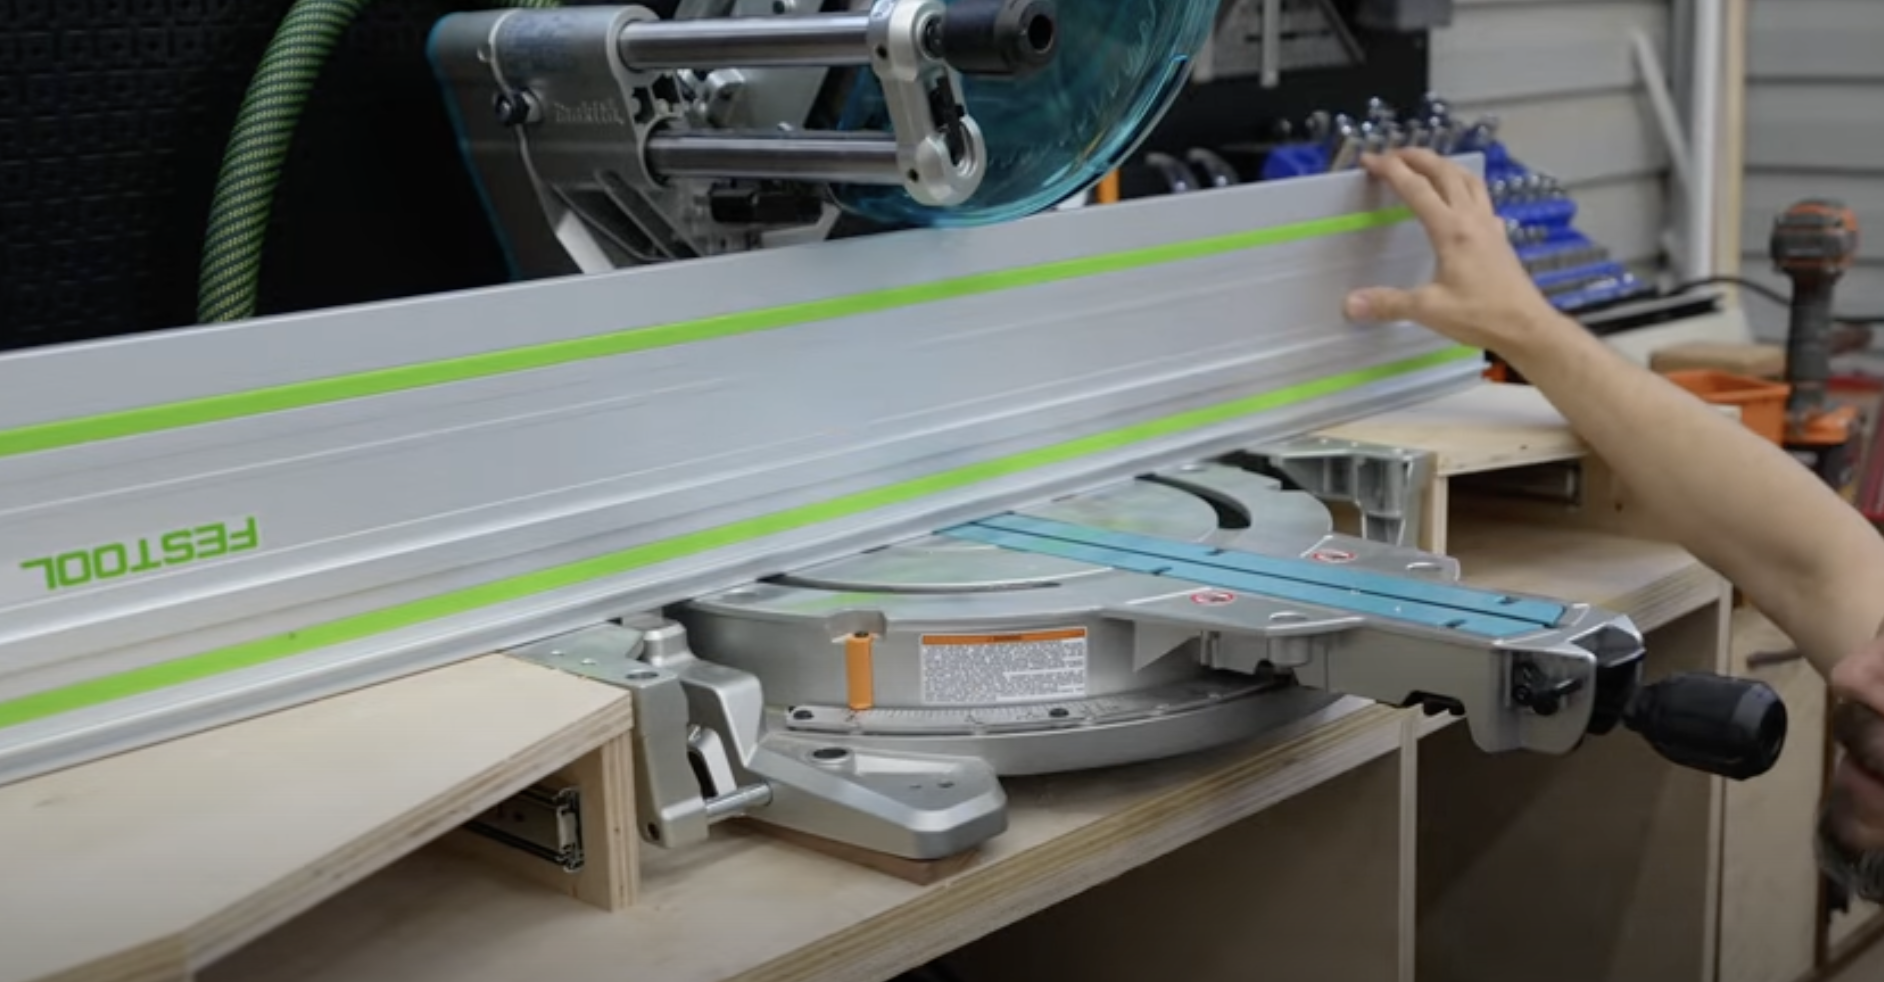
I wanted a stop block on my miter station to make repeatable cuts. I installed a t-track using a 3/4” straight router bit. I set the depth using the t-track itself. Use a straight edge to guide the router and cut the groove. I used CA glue and screws to secure the t-track in place.

I cut the cabinet doors out of 3/4” plywood. I cut them about an 1/8” narrower than the openings. For for the left and center cabinet, I divided the space into two parts so there would be two doors per cabinet. The right cabinet has just one door.
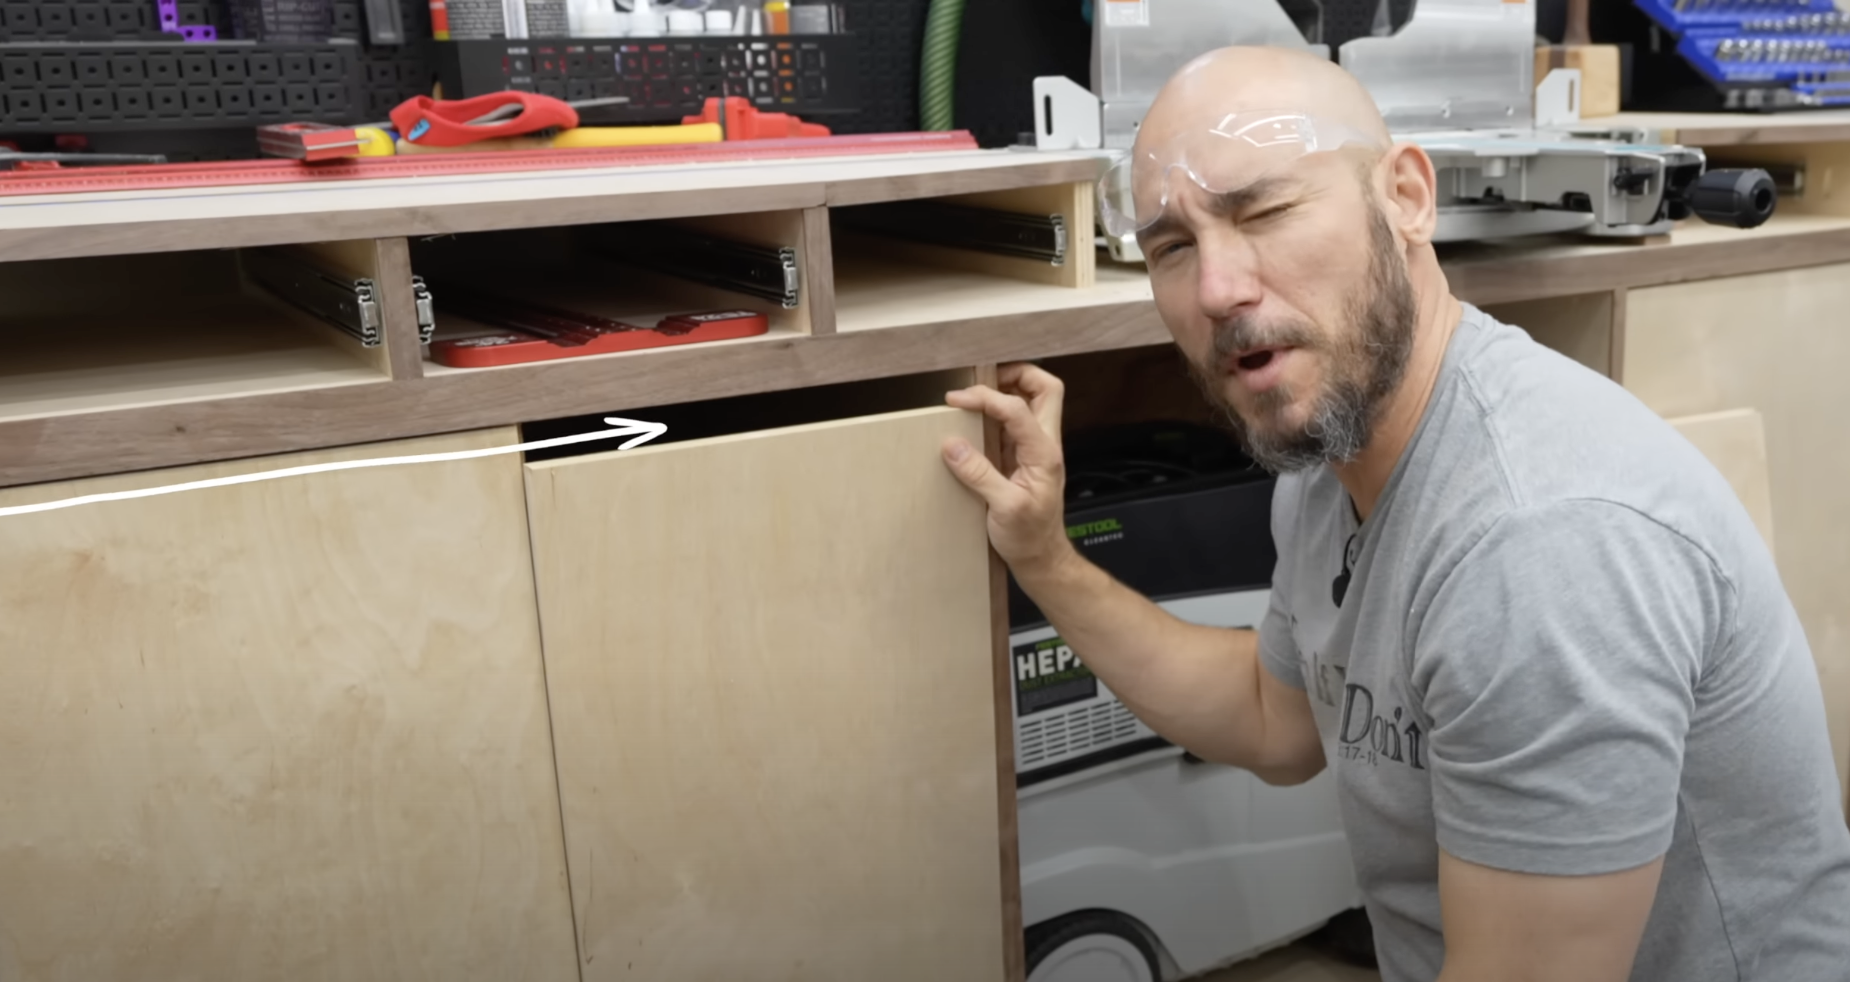
I should have measured twice and cut once. HA! That one was 1 inch too short.
Using the Kreg cabinet hinge jig made installing European Blum hinges a cinch! I highly recommend this jig. It pre-drills the hole for the hinge as well as gives you the exact spot to pre-drill for the mounting hardware. I like these European Blum hinges because you can easily take the doors off if you ever needed to.


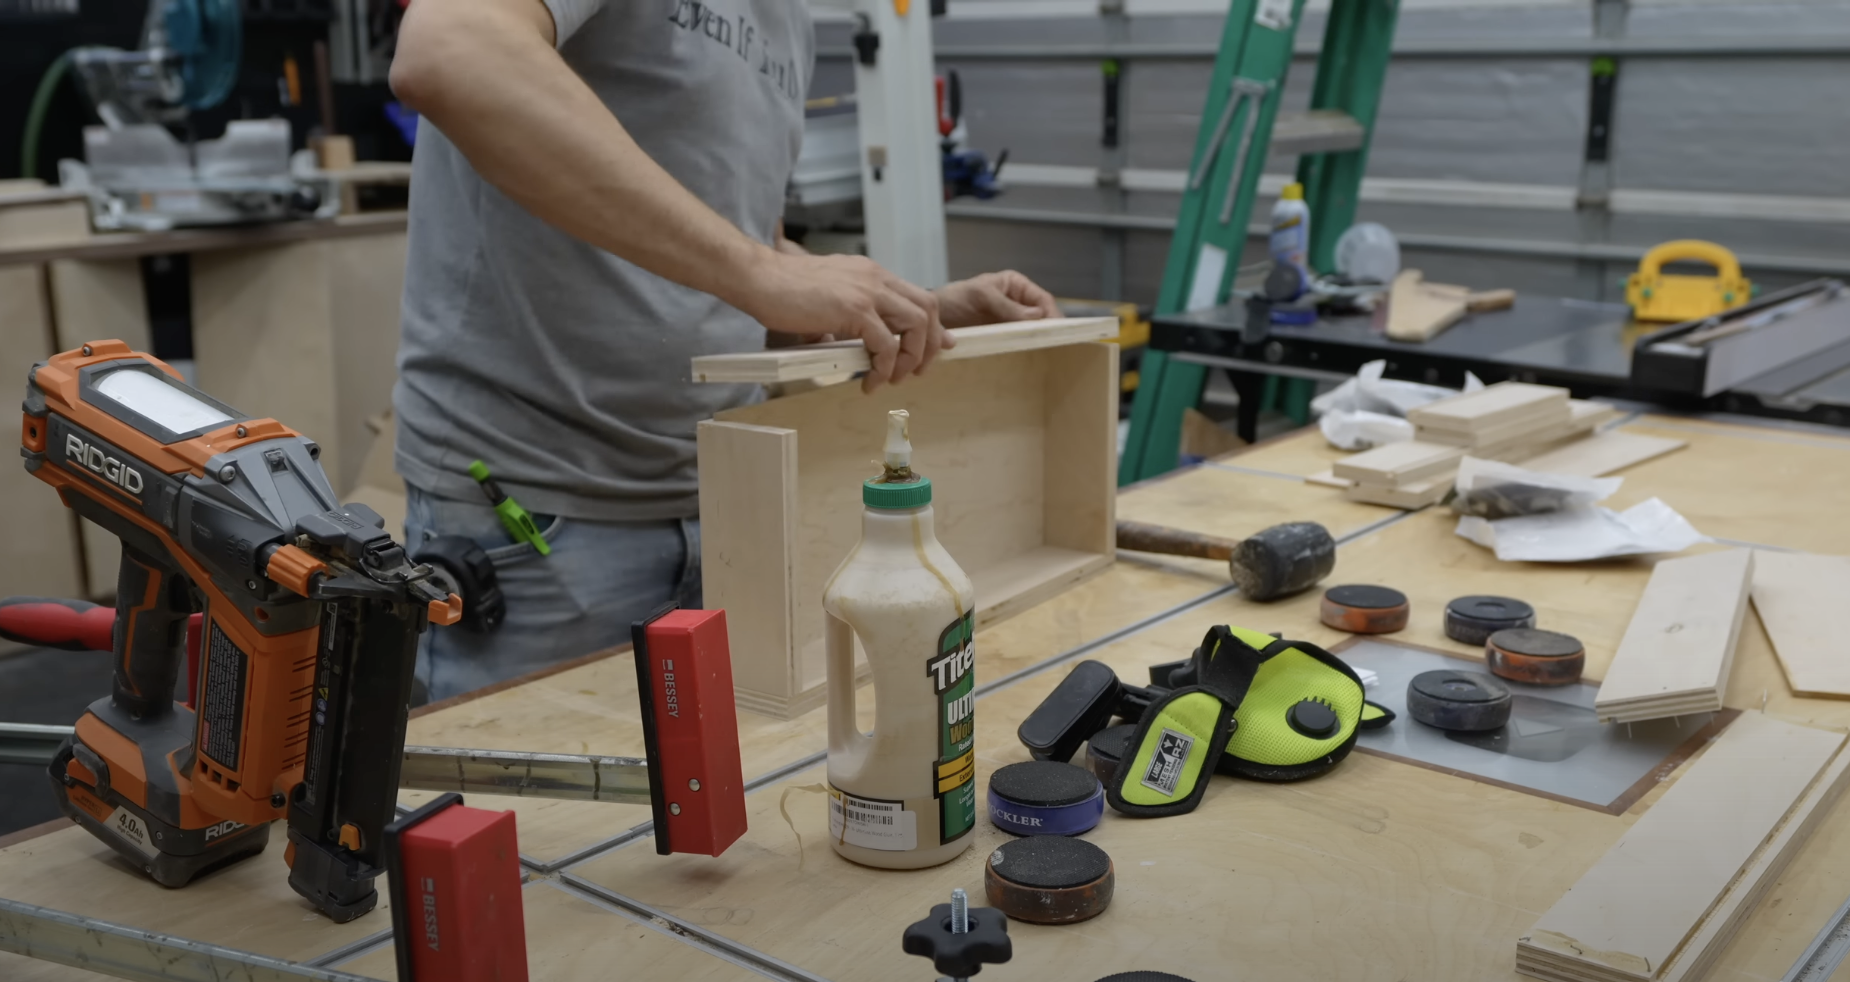
I built my own drawers for this miter station. Drawers are actually very easy to make. Check out this video to see three ways to make drawers.
I wanted to add an extension to my miter stand to allow me to work with longer boards from time to time. I don’t always need this, so it needed to be able to easily store away when not in use.


I used my bandsaw to cut a radius on one end of the extension braces. I smoothed up the ends with a sander. If you cut both pieces at the same time by sticking them together with double sided tape, you’ll ensure that both pieces are the same.
I attached the braces to the extension wing and ensured that it was level with the top of the miter station.

To finish the miter station I used Outlaw’s Board Butter to give it a nice protective coat. You can use whatever finish you feel comfortable with.

Check out the full build video below.