
Power Tool Mistakes: 6 Tools, Every Beginner Mistake in One Place
Every mistake in this guide is one I have made myself. I had a table saw kick back and hit me right in the hipbone. I broke my thumb on a miter saw four years ago and that knuckle still hurts today. Neither one was a freak accident. Both came from bad habits nobody ever warned me about.
The short answer
- Six tools, every mistake: circular saw, table saw, screws, miter saw, router, and drill.
- Nearly 97% of circular saw injuries happen in home shops and DIY projects, not job sites.
- The biggest table saw mistake happens before you turn the saw on: the fence and blade are not parallel to the miter slot.
- Your screws strip because Phillips heads were engineered in the 1930s to cam out on purpose. Switch to Torx.
- The most dangerous thing in this whole guide is not a blade. It is leaving a battery on the charger unattended, and it has burned down shops.
How to Use a Table Saw Safely
This is the tool that scares people the most, and it absolutely should. But the most dangerous thing that happens on a table saw happens before you ever turn the saw on. This is the longest section here and it is the one you should not skip.
The three types of table saws
Job site saws are small and portable, and the good ones have plenty of power and accuracy for most of what you will do in a wood shop. They shine in small shops and anywhere you have to carry the saw in and out.
Contractor saws are a step up in size, usually with a bigger table, often cast iron, a little more power, and a different fence style. The extra weight buys you stability.
Cabinet saws are what most woodworkers aspire to. Very powerful, very large, rip capacity from 30 inches up to 52 inches. They cost a lot more but they are top tier. Above those sit sliding table saws running $50,000 and up, which is worth mentioning only so you know they exist.
Know the parts before you cut
The fence. If you cannot get the fence running exactly parallel to the blade, the saw is not worth anything. My very first table saw was a $100 Delta Shopmaster and I could never get that fence right. It was genuinely scary to use. Modern job site saws use a rack and pinion fence, gear driven front and back so it moves at the same rate on both ends and stays parallel. You will also hear about T-style or Biesemeyer style fences, which glide in a groove and lock down square. Avoid the cheap fences that try to imitate a T-style and never quite line up.
Some fences also have a low and high position. Flip the face over and lock it down to cut thinner stock near the blade, or extend it out for material support on wider pieces. Whatever you have, lock the fence before every cut.
The throat plate is the insert around the blade. A zero clearance throat plate has been cut through by your own blade, so the opening is exactly the width of the kerf. That gives you cleaner cuts on the underside and keeps small offcuts from dropping down inside and jamming things up.
The arbor is the shaft and nut holding the blade on. On most table saws it is 5/8 inch, which is the size you shop for in blades.
The riving knife is required on all modern table saws and it is the single most important safety part on the machine. It keeps the kerf from closing and pinching the blade, which is what causes kickback. Always use it, with the only exception being when you run a dado stack.
The blade guard is the clear shroud over the blade. Its job is keeping your hands off the blade, and on some saws it helps with dust collection. You will not see it in most of my cut footage so you can actually see what is happening, but use yours whenever you can.
Miter slots are the grooves in the table. Most are the standard 3/4 inch. A few saws use 3/8 inch, which muddies things up when you start buying accessories, so check yours before you order anything.
The three cuts you will make
A rip cut runs down the length of the board, with the grain. A crosscut goes across the grain. Sheet goods just means plywood, MDF, and anything else that comes in full sheets.
Picking the right blade
The blade that came with your saw is probably not the blade you want. Even the SawStop ships with a blade that is not my favorite. Some brands do send genuinely good blades, but most beginners will want to upgrade sooner rather than later.
You will see grind types listed on the blade or packaging. FTG is flat tooth grind, where the tooth top is flat and leaves a flat bottomed groove. ATB is alternate top bevel, where teeth are beveled in alternating directions and leave a V shape. Lower tooth count blades are often flat tooth grind, which makes them useful for widening grooves when you are not cutting all the way through.
Tooth count matters more for beginners. A 40 tooth blade is the general purpose pick and does both rip cuts and crosscuts well. That is the one to buy if you only buy one. A 24 tooth is a dedicated ripping blade. An 80 tooth, or a 60 tooth in a pinch, is what you want for crosscuts and for plywood with thin face veneers.
Kerf just means blade thickness. Job site and contractor saws almost always come with thin kerf blades, around 1/16 inch, because a thinner kerf needs less power to push through wood. A standard or full kerf blade runs closer to 1/8 inch and belongs on a bigger, more powerful saw.
And before you assume a blade is dull, check whether it is just dirty. I fought this early on. New blade, several cuts, then fraying and burning. It was not dull, it was covered in pitch from cutting pine. Spray it with Simple Green, let it sit, and brush it off. The valley between two teeth, by the way, is called the gullet.
A dado stack cuts wide grooves in one pass, which is a huge time saver for shelving and joinery. Not every saw can run one. Small 8-1/4 inch saws usually have an arbor too short to fit a stack. Some job site saws take a partial stack. Cabinet saws handle them fine. You will need a matching throat plate either way.
Changing the blade
Unplug the saw. Every time. You do not want it coming on while your hands are near that blade. Some saws have an arbor lock button, others need two wrenches. When the new blade goes back on, snug is enough. Do not crank down on it with everything you have or you will fight it later after the saw has gone through a few heat cycles. Ask me how I know.
And read the manual for your specific saw. They all operate a little differently. If yours is missing, you can almost always find it online.
Mistake 1: Skipping setup, which is the big one
Before you ever hit the switch, the saw has to be set up right. This is the most dangerous mistake beginners make and it does not look dangerous at all.
Reference everything off the miter slot. A lot of people set the fence parallel to the blade instead. I set the blade parallel to the miter slot and the fence parallel to the miter slot, because every accessory you will ever add rides in that slot. If the blade is not parallel to the slot, you get pinching and kickback, and kickback does not just hit you with the ejected board, it can drag your hand toward the blade as the piece leaves.
To check it, use a ruler or a combination square you trust. Do not use a tape measure, because the hook on the end floats slightly and will throw you off. Hook the combination square into the edge of the miter slot and measure to the blade body at the front and again at the back, staying off the teeth since they stick out past the plate. Slide the square from front to back and you will see any error. Then flip it around and check the fence the same way. Your manual will tell you where the adjustment screws are.
While you are at it, check that the blade is 90 degrees to the table with a square or a digital angle gauge, and check your miter gauge against the blade. I have pulled brand new miter gauges out of the box set to zero that were not actually at zero.
Mistake 2: Loose clothing
I have seen injuries online where a sleeve got caught and pulled someone into the blade. If it is cold, wear something with tight cuffs. A lot of people also take off watches and rings. I wear a silicone ring so it breaks instead of catching, but I still do not want my hand near the blade.
Mistake 3: Wrong blade height
There is some debate on this one. I raise the blade just above the gullet, so the teeth clear the material and carry the dust out, but there is not an inch of exposed blade sitting above the cut waiting on my hand. Some folks run it higher so the teeth strike at a flatter angle. I have never seen a difference in cut quality, so I keep mine low.
Mistake 4: Dull or dirty blades
A dull blade means you push harder, which puts more force on the board against the blade and invites kickback. It also burns, splinters, and lets the blade wander. A sharp, clean blade is both safer and more accurate.
Mistake 5: Removing the riving knife
It prevents pinching and it prevents kickback. Leave it in unless you are running a dado stack, where it cannot do anything anyway.
Mistake 6: Cutting bowed or warped wood
If the board rocks on the table, it will move during the cut even if it started flat, and anything moving against that blade is a kickback waiting to happen. Get your stock as flat and straight as you can before it touches the saw.
Mistake 7: Standing in the no zone
This is the one I paid for personally. The kickback zone is directly behind the blade, in line with the cut. Anything that comes off that saw is coming through there. I was standing right in it when a board caught, and it hit me on the top of the hipbone. Green bruise on that hip joint for a very long time.
Stand to the left of the blade for most cuts. You can still see everything, and if something does bind, it flies past you instead of into you.
Mistake 8: Using a push stick wrong
On a long board, do not have the push stick in your hand at the start of the cut. Pushing on the back end while the front is unsupported lifts the front of the board. Lay the push stick nearby, start the cut by hand, get the whole board on the table, then pick up the push stick and place it on the back left of the workpiece so you are pushing forward and toward the fence at the same time.
Mistake 9: Reaching over the blade
Once the cut is done, do not reach across the spinning blade to grab your piece. Beyond the obvious, this is where a lot of kickback happens. You stop right at the end of the cut, reach for the piece, it grazes the top of the blade on the way up, and it rakes back and pulls your hand down with it. Step to the side, pull the piece away, and wait for the blade to stop before you reach in.
Mistake 10: Freehanding a cut
No fence, no miter gauge, just lining it up and pushing it through. This is not a bandsaw. A table saw is meant to be used with a fence or a miter gauge supporting the work. Freehanding is an extreme kickback risk. I see people do it on Instagram and I think they are crazy.
Mistake 11: No outfeed support
On a long or wide board, the weight hanging off the back lifts the infeed end while you are cutting. That is inaccurate and it invites kickback. It also means both halves drop to the floor when you finish, which damages parts. That is exactly why people build outfeed tables. A roller stand works too.
Mistake 12: Cutting parts that are too small
A table saw is not built for tiny pieces. Use a small parts sled that rides in the miter slot, or build your own. And never set the fence so close that the blade cuts into it.
Mistake 13: Rushing
You are losing daylight, you want the project done, so you hurry. That is when accidents happen. Slow down. If it does not feel right in the gut, do not make the cut.
Mistake 14: Wrestling a full sheet of plywood
A full 4x8 sheet on a small job site saw is not a fun day. Break the sheet down first with a circular saw and a straight edge or a track saw guide, get it close to final size, and then bring it to the table saw. Safer and more accurate.
Mistake 15: Grabbing offcuts while the blade spins
Anything sitting next to a spinning blade stays where it is until the blade stops. That is just good business.
Mistake 16: Leaving the blade up and the saw plugged in
If you have kids around the house, unplug the saw and drop the blade below the table when you are done. Takes five seconds.
Mistake 17: Using the fence as a crosscut stop
If you crosscut with the piece trapped between the blade and the fence, that little offcut has nowhere to go and it becomes a projectile straight back at you.
Instead, clamp a spacer block to the fence well ahead of the blade. I use a 1-2-3 setup block because it is exactly one inch thick and heavy enough that it does not shift. Set your measurement off the block, make the cut, and the offcut falls free with clearance. Shut the saw off, remove the piece, and repeat for dead accurate results every single time. A scrap block of known thickness works just as well.
Mistake 18: The hand on the fence push
I see this constantly online. Someone runs a cut with their bare hand riding the fence, pushing the board through like it is another day in the neighborhood. Why? If that board binds, or the internal tension in the wood closes the kerf, kickback pushes it back and often lifts it, and your hand goes right into the blade. Your fingers are worth more than looking relaxed. Use a push stick. That is what they are there for.
Mistake 19: Arrogance
Every time I make a safety video, somebody comments that they have done this for 30 or 40 years without an accident. Well, the Titanic was not supposed to sink either. It can happen to me today. It can happen to you. The machine does not care whether it hurts you, but I do.
Upgrades worth making
The blade, first. If your saw came with a bad one, that is the single best dollar you can spend.
A better push stick. The plastic ones that ship with saws get brittle, especially if they live somewhere hot and cold, and they can shatter if they contact the blade. I like a bow style push stick with a foam tip, since the blade just cuts foam if it touches. I have used and recommended the MicroJig GRR-Ripper for years, especially for thin rips, because it supports both sides of the cut and keeps your hand up and over. The Milescraft Grabber Pro is a good option in that same style with slightly different ergonomics.
A real miter gauge. The ones included with most saws are not great. Even my SawStop came with one I would call hot garbage for the price of that machine. You do not have to spend hundreds. There are very good budget options that are accurate and well built.
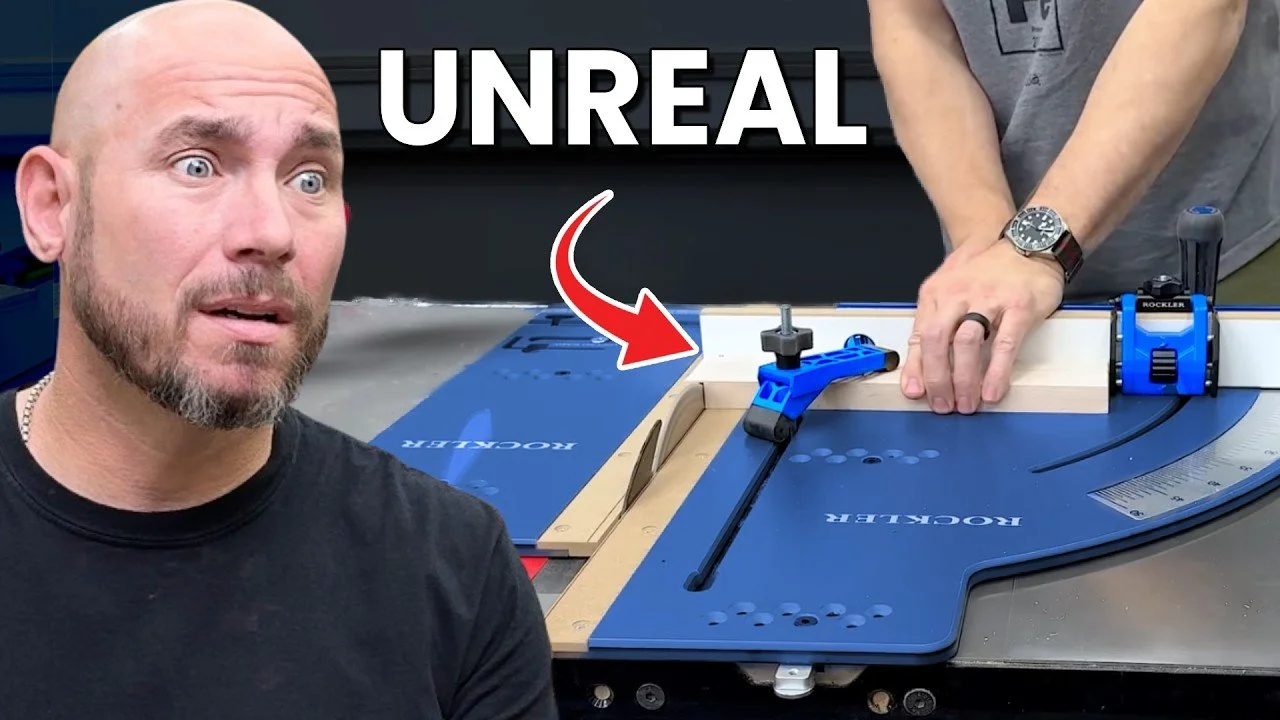
A thin rip jig for consistent narrow strips, and a featherboard to hold pressure against the fence and cut down on kickback. I like the ones with foam inserts that will not mar the wood.
Fence add-ons. The Bow extender fence lets you run featherboards for downward pressure and pressure against the fence at the same time, plus infeed and outfeed support on a small saw. JessEm stock guides bolt onto an existing fence and do the same two jobs. And there are direct replacement fences available for some popular job site saws if yours is the weak link.
Which table saw should you buy?
I started with borrowed tools and worked my way up, buying tools with money from projects I sold. It took me a while to save for my first table saw, so I know exactly how this decision feels.
Tightest space: the 8-1/4 inch DEWALT. Excellent value, dead accurate, plenty of power, and light enough to move around. The only real limit is cut depth on thicker stock.
Best saw under $350: the SKIL 10 inch. Full size blade, rack and pinion fence, fold out legs so it brings its own stand, and I have now reviewed it twice. They improved the throat plate and made the riving knife easy to remove for dado stacks. The blade it ships with is the weak point, so buy a good blade at the same time.
Other solid job site picks: the Hercules from Harbor Freight, the Kobalt from Lowe's, and the Milwaukee M18 if you want cordless. The Evolution has some nice features like built in outfeed support and a sliding function, but the price has climbed enough that you may do better elsewhere.
Best saw under $1,000 if you have the space: the Delta 36-725T2. I started on the non-T2 version. Contractor saw, cast iron top, Biesemeyer style fence. One of the best purchases I made early on.
Cabinet saw: the 3 horsepower SawStop PCS is what sits in my shop, and it has been an amazing machine. The skin sensing brake drops the blade below the table on contact. You may get nicked but it is designed not to cut you. Their job site version is fine, though the fence felt a little floppy to me.
What I would avoid: any saw with a fence that will not stay parallel. That includes some of the older imitation T-style fences. If a saw is very cheap, look hard at the fence before you buy. Saving up a little longer for a better one is worth it.
Your first cut checklist
- Blade and fence are parallel to the miter slot, blade is 90 degrees to the table.
- Hearing and eye protection on. Job site saws are loud.
- Fence positioned and locked.
- Blade height set just above the gullet.
- Riving knife installed, blade guard on.
- Clear path for the offcut so it is not falling to the floor.
- You are standing to the left of the blade, out of the no zone.
- Start the cut and finish it with confidence. Respect the saw, do not be scared of it. Jittery hands add risk.
A word on dust
I started with a shop vac and a dust separator so the vac did not fill up every ten minutes. If you work outside, the dust blows away. Inside, collect it however you can. Some species are genuinely irritating, wenge and even walnut bother a lot of people, so a dust mask or respirator is worth having. Honestly, breathing any of it is not great.
If you take one thing from this section: get the saw set up square and put a good blade on it. That is it. You do not need a featherboard, a fence upgrade, or an expensive push block on day one. Those come later as you find you need them. Use the saw you can afford, set up correctly, and build things.
Table saw tools and links
Some links below are affiliate links. If you buy through them we may earn a small commission at no extra cost to you.
Blades
- DEWALT table saw blade 2 pack
- Diablo table saw blade
- 24 tooth ripping blade
- 40 tooth general purpose blade
- 80 tooth crosscut blade
- CMT Orange Chrome 40 tooth
- CMT dado stack
- Blade cleaning system
- Simple Green cleaner
Setup and measuring
Push blocks and safety
- MicroJig GRR-Ripper
- Milescraft Grabber Pro
- Bow push stick
- Allred Woodworks wood push stick
- Bow featherboard
- Dust mask
Fence and accessory upgrades
- Bow Xtender fence bundle
- JessEm stock guides
- TSO fence upgrade for the SKIL 10 inch
- TSO fence upgrade for DEWALT job site saws
- WEN miter gauge
- VEVOR miter gauge with fence
- Thin rip jig
Table saws
Get the daily tool deals email
Tools are expensive. I send out The Morning Cut every single morning with the best tool deals I can find, and it is completely free.
Sign up freeWhy Your Screws Keep Stripping
This is one of the most frustrating things in woodworking, and it has nothing to do with your drill, your bit, or your technique. You are buying the wrong screws.
The Phillips head was designed to strip
In the 1930s, auto engineers needed a screw that could not be overtightened. Henry Phillips developed the Phillips head so that once it hit a certain torque, the bit would cam out of the head. That is a feature, not a flaw. It was doing exactly what it was built to do on an assembly line.
Fast forward to today and woodworkers are using a screw engineered for 1930s auto manufacturing, then wondering why it keeps stripping.
Drive a Phillips screw into soft pine and watch it cam out. Switch to a Torx head, same drill, same speed, same pressure, and a 4 inch screw goes all the way home smoothly. Torx gives you six points of contact instead of four. Switching from Phillips to Torx is the single biggest upgrade a beginner can make.
Drywall screws are not wood screws
No matter how many times you put one in wood, it is still a drywall screw. They are plain steel so they rust outdoors, but the real problem is that they are brittle hardened steel. I drove three screws partway into a board and hit all three with a hammer. The others bent. The drywall screw sheared clean off. Any lateral load in a project and it snaps.
People buy them because they are dirt cheap by the bucket. Use them for drywall, which is what they are for.
Screw anatomy, in plain terms
Coarse vs fine thread. Coarse threads sit farther apart and grip soft wood better, which is what you want most of the time in woodworking. Fine threads are for hardwood joinery, which is why pocket hole screws come in both.
Self tapping tips. That little notch at the tip is a small drill bit. It helps the screw bite and keeps it from wandering. It does not prevent splitting near the end of a board. Drive a screw into the end of a piece of maple and it will split like crazy. Drill a pilot hole slightly smaller than the screw and it will not.
Partial vs full thread. If the threads run all the way to the head, the screw grabs both boards at once and tries to pull them together while pushing them apart. A partial thread screw has a smooth shoulder under the head, so the threads bite only the bottom board and pull the top board down tight against it. Use partial thread screws when you are joining two boards.
Head types. A bugle head is tapered and pushes the wood fibers down so the head sits flush or just below the surface. A flat head stops on top of the wood and stays proud.
The three drive types
Phillips is still around mostly because it has been around for a century. It is one of the worst picks for general woodworking, with one exception: hinges, drawer slides, and hardware, where you are nowhere near the torque that would cam it out.
Square drive, called Robertson in Canada, gives four points of contact. Almost all pocket hole screws use it.
Torx, sometimes called star drive, gives six points of contact and the geometry actually pulls the bit into the head and holds it. You can hang a Torx screw off the bit and it stays put. Try that with a non-magnetized Phillips. Torx is the best general purpose choice for woodworking and structural work like decks.
Pocket hole screws are their own thing
Do not put a regular wood screw in a pocket hole. That bugle or V shaped head just keeps driving and blows out the bottom of the pocket. A pocket hole screw has a flat head that grabs the shoulder of the pocket and pulls the workpiece down tight into the mating board. Use the right one.
Indoor vs outdoor screws
A standard screw outdoors will rust and eventually break. For structural outdoor connections like deck framing and pergolas, use screws rated for it. Near water, on docks, or in high humidity, look at stainless steel so rust is not a factor at all. For pocket holes outdoors, the blue coated exterior pocket hole screws are what I have used on every outdoor project I have built.
The box store assortment trap
The random screw assortment tub is what most beginners buy, because it is cheap and it feels like being prepared. It is going to cost you, either in failed joints or in the time you spend extracting a stripped screw from a finished project.
Buy these four instead:
- Torx wood screws in a few common lengths. I keep mine in small parts organizers so I can see when I am running low.
- Pocket hole screws, including exterior ones, in a couple of lengths.
- Coated exterior structural screws for deck rails and anything outdoors.
- Stainless steel screws for wet or high humidity locations.
Here is your homework. Go into your shop and take an assessment of what you actually have. If you still have that Folgers coffee can from 1982 full of rusty drywall screws, throw them out and get some real screws.
Screws and screw driving tools
Some links below are affiliate links. If you buy through them we may earn a small commission at no extra cost to you.
Screws
Driving and joinery
Organization
Miter Saw Mistakes and Fixes
I broke my thumb using a miter saw. Not because the saw malfunctioned, and not because it randomly kicked back. Because I was using it wrong. That is the scary thing about miter saws. They do not look dangerous, so people get comfortable with them fast.
Start with the right routine
Turn the saw on, let the blade come to full speed, bring it down through the cut, then release the trigger and let the blade come to a complete stop before you raise it back up. That one habit gives you cleaner cuts and keeps the board from getting jumped or thrown.
Mistake 1: Cutting past the saw's angle limits
Every miter saw has limits. If you need 65 degrees and the saw stops at 60, a lot of beginners will just make a mark and freehand it. That is dangerous. Nothing is supporting the board, so it moves, binds, or the blade grabs it and pulls it under, which pulls your hand toward the blade. The cut looks terrible too. There is an easy jig for this, coming up in the fixes.
Mistake 2: Crossing your arms
People reach across with their off hand to hold stock on the far side of the blade while operating the saw with their dominant hand. Hold the stock on the same side it lives on, and run the saw with the other hand. Crossing puts both arms too close to the blade.
Mistake 3: Cutting warped or twisted boards
Big box lumber that rocks like a rocking chair will bind the blade, damage the blade, and hurt you. Secure it with the clamp that came with your saw before you cut. If the board rocks, accuracy drops.
Mistake 4: Cutting tiny parts
This is how I broke my thumb. I held a small piece with my thumb, brought the saw down, and it kicked the piece back and jammed my thumb into that knuckle. Four years later it still hurts. And I knew before I made the cut that it did not feel right. I did it anyway.
Mistake 5: Rushing the cut
Slamming the blade through throws dust everywhere, blows out the back and bottom of the cut, deflects the blade, and gives you an inaccurate result. It takes two seconds to let the blade spin up. Take them.
Mistake 6: Chasing a micro adjustment with a pencil line
When a piece is a hair too long, do not try to eyeball a mark. Drop the saw head down, bump the board against the stopped blade, raise the head, then make the cut. You shave off just the amount the teeth project. Repeat until it is dead on. I do this all the time.
Mistake 7: Trapping material against a stop block
Stop blocks are how you get repeatable parts, and they are great. The problem is raising the blade while it is still spinning with the offcut trapped between the blade and the block. The blade spins away from you, so it throws the piece into the fence and back at you, like a kickback ricochet. I have also had a small piece jam up between the blade and the shroud, which is a pain to clear and can damage the blade and the saw.
Cut, release the trigger, let the blade come to a full stop, then raise it. Every time.
Mistake 8: Loose clothing
Same as the table saw. I have seen some very gnarly injuries where a sleeve got into the blade and pulled an arm in with it. If you have to wear layers, keep your arms well away from the blade.
Fix 1: A jig for extreme angles
Take a 2x6 about the same width as the bed of your saw and stick it to the bed with double stick tape. It holds fine and pops off clean later. Turn the saw 45 degrees one way and cut, then 45 the other way and cut. Now the cut faces of that board are your new fence, sitting at 45 degrees when the saw reads zero.
Need 65 degrees? Swing the saw to 20 and you have it. I built a coffee table with extreme angle X braces and cut all eight of them this way, safely and repeatably.
Fix 2: Clamp instead of holding
On short pieces especially, use the clamp. Some saws come with an excellent clamp, others come with one that will not tighten well. You can also clamp narrow stock to the fence.
Fix 3: Build a miter saw sled
You have seen table saw sleds. You can do almost the same thing on a miter saw, and it is what I should have built before I broke my thumb.
Cut a piece of 1/2 inch MDF or plywood a couple inches longer than the base of your saw. Rip a few 4 inch pieces for the fence. Glue small blocks on each side of the base so the sled drops into the same spot every time you set it back on. Glue the fence on, and reinforce with screws if you are using plywood. Set the depth stop on your saw so you do not cut the sled in half, then score about 1/8 inch into the bed.
Now you have support right up against the cut on both sides and zero clearance underneath, which also cuts down on tear out. I use a push stick to keep my hand away from the blade, so if something goes wrong it hits the stick and not my thumb.
Fix 4: Zero clearance and bevel fence clearance
Most miter saws are built for construction, so the throat plate has a wide gap that causes tear out and swallows small parts. Zero clearance tape is cheap and works well, comes in strips, and you can reapply it when a bevel cut widens the opening. Some saws have aftermarket zero clearance inserts, and some dust collection upgrade kits include one.
Speaking of bevels, the upper fences on your saw slide for a reason. Bevel over with them in the way and the blade will cut into that thick aluminum fence, damaging the fence and your blade. Slide them out before every bevel cut.
Fix 5: Slide in the right direction
On a sliding saw, do not lower the blade at the back and pull the cut toward you. Just like a table saw, the teeth should be fed into the work. Pull the head fully out toward you, lower the blade at the outside edge, and push away from you through the cut. On thick stock, take it in stages rather than plunging the full depth and shoving it all the way back. Easier on the motor, cleaner cut.
Fix 6: A better blade
Most miter saws ship with a low tooth count blade for framing, where cut quality is not the priority. Miter saw work in a wood shop is almost all crosscutting, and crosscutting wants a high tooth count. I run 80 tooth blades on mine and I think that is the sweet spot for a miter saw.
Fix 7: Dust collection and a station
Miter saws are notorious for bad dust collection. Even the very expensive ones are just okay out of the box. Aftermarket upgrade kits add a zero clearance plate plus extra collection pieces, including a hose that pulls dust from inside the throat plate. It is not a miracle, but the difference with a good dust extractor hooked up is massive. If all you have is a shop vac, hook that up.
A miter saw station or a stand with wings gives you support on both sides of the blade so boards do not rock. I built my own, about 6 feet long with a fold out wing and built in stop blocks, and I have never regretted having it. Just get everything level when you set the saw in.
One more thing about sliding saws
Every sliding miter saw I have tested deflects at full extension if you push left or right. Even the expensive ones. Push straight down through the cut and you will not have the problem.
That knuckle still hurts. It was hurting this morning. I never went to the doctor, it just swelled up purple and gnarly and healed how it healed. The pain reminds me a few days a year: do not put your thumb that close to the blade. If it does not feel right in the gut, do not make the cut.
Which miter saw should you buy?
Best budget pick: the SKIL 10 inch. I think it is one of the most hidden gems in woodworking. Accurate, good cutting capacity, dual bevel, and it has one of the best clamps I have used on any miter saw at any price. Is 10 inch a downside compared to 12? I moved to a 10 inch as my primary and I have only missed the extra capacity a couple of times.
Also good on a budget: the Kobalt is a nice saw for the money. The WEN is okay if you are on an extreme budget, though I would put the SKIL and Kobalt above it.
Mid range, $300 to $500: the DEWALT DWS779. I have had mine since 2017. I have built decks, furniture, and hundreds of board feet of projects with it. It is a workhorse and I will not get rid of it. The DWS780 is the same saw with a laser line for over a hundred dollars more. If you want the line, get it. Otherwise the 779 is the buy. It goes on sale regularly, which is exactly the kind of thing my daily deals email catches.
Space saving: if the rails sticking out the back are a problem for wall mounting, look at a front sliding saw like the Delta Cruzer, Bosch Glide, Festool, or Makita. The Delta Cruzer is one of the smoothest sliding saws I have ever used, though its dust collection is genuinely bad.
What I would skip: a Festool miter saw at current prices, unless you are doing very fine detail work every day. I own one, I use it, I like it. But at that price I think it is hard to justify over a Makita or a DEWALT for most shops.
Miter saw tools and links
Some links below are affiliate links. If you buy through them we may earn a small commission at no extra cost to you.
Miter saws
- SKIL miter saw
- Kobalt miter saw
- WEN miter saw
- DEWALT DWS779
- DEWALT DWS780
- Makita 10 inch miter saw
- Makita 12 inch miter saw
- Delta CRUZER miter saw
- Bosch miter saw
- Festool miter saw
Blades
- CMT 80 tooth 10 inch blade
- CMT 80 tooth 12 inch blade
- DEWALT 10 inch 80 tooth blade
- DEWALT 10 inch blade 2 pack
- DEWALT 12 inch blade 2 pack
- Diablo 80 tooth blade
- Festool 80 tooth blade
Dust collection
- Inspire Woodcraft dust collection upgrades
- Festool dust extractor
- Milwaukee dust extractor, bare tool
- Milwaukee dust extractor kit
- DEWALT dust extractor
- Hercules dust extractor
- CRAFTSMAN shop vac
- Dust hose adapter kit
Stations, stands, and jig supplies
Router Mistakes for Beginners
When I started woodworking I was more scared of the router than anything else in the shop. The speed, the sound, and the very real potential for kickback, which I have had happen. Most router accidents come down to one thing: going the wrong direction.
Mistake 1: Routing the wrong way
Going the wrong direction is called a climb cut, because the bit climbs up the wood instead of cutting it, which behaves a lot like kickback. This confused me more than anything when I started.
Here is the trick. Make an L with your left hand, put it flat on the board, and your index finger points the direction you should route. Then keep going that same way all the way around the board until you get back to your starting point.
Think of the bit as a saw blade. The teeth have to meet the wood in the direction that lets them cut. Same as a table saw feeding stock into the teeth, same as pushing a circular saw through a board.
One exception: on an inside edge, like the opening of a picture frame, you go the opposite direction. Counterclockwise on the outside means clockwise on the inside.
Mistake 1B: Pausing at the corners
Rounding a corner, it feels natural to slow down or stop. That bit is spinning thousands of times a minute and it will burn the wood, and then you get to sand out the burn without deforming the edge. Keep a steady pace all the way around.
While you are at it, keep the workpiece from sliding. Set it on grippy pads like bench nuts or bench cookies so it stays put on the bench. A board that moves under a router makes your movement inconsistent and it is just not safe.
Mistake 2: Installing the bit wrong
Trim routers, also called palm routers, almost all have a 1/4 inch collet. Bigger routers usually come with both 1/4 inch and 1/2 inch collets. If you can choose, a 1/2 inch shank runs a little cooler and gives the collet more to hold onto. That said, I have never had a 1/4 inch bit slip when the router was tightened properly.
When you install the bit, bottom it out in the collet, then pull it back up slightly before tightening. Many bits, especially roundovers and chamfers, have a shank that widens near the cutter. You do not want that widened section down inside the collet. And always unplug the router or pull the battery before you touch the bit.
Keep bits clean, because a clean bit is a happy bit. A dirty bit burns and tears out instead of cutting. Spray them with a heavy duty cleaner, let it sit, and brush with a nylon brush, never metal.
Mistake 3: Wrong bit height
On roundovers and chamfers, set the bit so the profile starts just below the surface of the board. If the shoulder of the bit sits above the surface you will leave a small step or ledge on the edge. Sometimes that is exactly what you want, and I do it on purpose on end table tops. Usually it is not. Eyeball it, lock the router down, and always make a test cut on scrap first.
Mistake 4: Taking too big of a bite
Ever take a bite of a sandwich so big you cannot chew it? A router is the same way. I was in an airport once, took a massive bite of a sandwich, and a guy recognized me from the channel. Could not say a word to him. Sorry about that.
Here is the rule of thumb: cut no deeper than half the width of the bit. A 1/4 inch bit takes 1/8 inch passes. Drop down and repeat until you hit final depth. Dropping a 3/4 inch straight bit a full inch in one pass strains the router, strains the bit, gives you a bad cut, and can cause kickback. Heat is the enemy of everything sharp in woodworking.
Mistake 5: Wrong speed
Speed kills in routing too, and it is why your router has a speed dial on top.
The scariest thing that ever happened to me in woodworking was template routing on my router table with a big flush trim bit spinning as fast as that router could turn it. The bit touched the wood and boom, kickback. It scared the daylights out of me, and it could easily have pulled my hand into the bit. I should have been using hold blocks, but the real problem was the speed and a little too much material to remove.
Rule of thumb: the bigger the bit, the slower the speed. Small edge profiles like roundovers and chamfers can run wide open. Big bits get dialed down.
Feed rate matters too. If you shove the router along, you strain it, you get a messy cut, and you invite kickback. Listen to the motor. When it starts bogging down it is telling you to back off. A few newer cordless routers even blink an overload warning at you, and at least one has automatic kickback shutoff, which is a genuinely great feature.
Ease into the first contact with the wood rather than plunging in, then settle into a steady pace.
Mistake 6: Buying too many bits
My name is Matt and I bought too many router bits. If you are in that camp you know what I mean.
As a beginner you really need two: a roundover and a chamfer. A 1/8 inch roundover and a 45 degree chamfer will cover almost everything you build early on. After that, add a flush trim bit, which opens up pattern routing and template work. A dovetail bit is worth having if you want to build jigs. I built jointing jigs, a crosscut sled, and my whole clamping workbench with one.
Good individual bits run around $20 to $25 each and last a long time. Cheap ones dull fast, then you get burning and tear out and frustration. If you see a bit set with 50 or 100 bits in it, most of those will never come out of the case. There are good small sets, a 4 piece with roundover, chamfer, and two flush trim bits, or a 6 piece with the common profiles, and those are worth it. Otherwise buy one bit at a time as you need it.
Which router should you buy?
If you are already on a battery platform, just buy that brand's trim router. Most people will be perfectly happy. My favorite small router is the Milwaukee, mostly because I am a Milwaukee guy. The Bosch has a nice safety feature that kills the motor if you drop it.
For bigger jobs and corded, the Bosch 1617 and the DEWALT DW618 are two of the best routers you can buy. Get the fixed and plunge base combo version of either. I have owned both for years, with the Bosch living in my router station. Flip a coin. It really does come down to which color you like.
For heavy duty cordless, the DEWALT 2-1/4 peak horsepower plunge router is the king right now. Smooth, powerful, kickback shutoff, overload protection, and surprisingly good dust collection. Milwaukee makes a good M18 as well, though it is a bit top heavy for anything other than flat work.
Holding it steady
Trim routers come with a D style base or a round base. Use as much of the base as you can on the surface. On a D base I put a thumb out on the edge to keep it flat. On a round base you cannot do that safely near the bit, so hold it up top and keep a firm grip. If it tips, you get an uh-oh in the edge of your board.
One more thing. Some routers have a soft start and a brake, some do not. If yours does not, the bit will keep spinning for several seconds after you shut it off. Be aware of that before you set it down or reach around it.
Router tools and links
Some links below are affiliate links. If you buy through them we may earn a small commission at no extra cost to you.
Corded routers
- Bosch 1617 fixed base
- Bosch 1617 fixed and plunge base
- DEWALT DW618 fixed base
- DEWALT DW618 fixed and plunge base
- Makita trim router
- Bosch trim router
Cordless trim routers
- Milwaukee M18 trim router
- RYOBI 18V trim router
- Bosch 18V trim router
- DEWALT XR 20V trim router
- RIDGID 18V trim router
- CRAFTSMAN V20 trim router
- Makita 18V trim router
- Makita 40V trim router
Plunge routers
Router bits
- Whiteside 4 piece router bit set
- Bosch 6 piece router bit set
- Whiteside roundover bit
- Whiteside chamfer bit
- Whiteside flush trim bit
- Dovetail bit
- MicroJig Grid router guide
Accessories
- Bench Nuts
- Bench Cookies
- Kreg setup bars
- WEN precision router setup bars
- POWERTEC precision router setup bars
- Kreg router radius guide
- Simple Green
Bit storage and hearing protection
Drill Mistakes Almost Everyone Makes
The drill is probably the first power tool you ever owned, and I would bet money it is the one you are using wrong the most. I did it for years. Stripped screws, burnt up bits, batteries dead in a few months. I blamed the batteries, the brands, and the bits. Truth is, it was always me.
Stick with me for mistake 10, because it is probably costing you the most money and it is quite possibly the most dangerous thing you can do with a drill.
Mistake 1: Ignoring the clutch
The chuck is the part that grips the bit. Right behind it is a ring of numbers, sometimes up to 11, sometimes up to 16. That is the clutch, and I would bet most people have never touched it. They leave it on the highest number and go.
That is why your screws strip. That is why your bits break and your screws snap off.
Set the clutch to a lower number and drive a screw. When you hear it click, the clutch is doing its job and stopping the drill from overdriving. Need it to go deeper? Crank the number up until it clicks right as the screw head reaches the surface. Once you dial that in, you can drive a hundred screws and they will all sit exactly the same, unless you hit a knot.
The right setting depends on screw length, screw size, and the wood. A 4 inch screw into white oak needs a lot more than a 1-1/4 inch screw into pine. Back the torque off for the short one or you will strip out the wood fibers and it will just spin in the hole.
You will also see a drill bit icon and sometimes a hammer icon. Drill mode disables the clutch entirely, which is what you want for drilling holes. Hammer mode adds a percussive action for masonry work with masonry bits. Not every drill has it, so if you need it, check before you buy.
Mistake 2: Chucking the bit crooked
I still do this when I am in a hurry. On smaller round bits especially, only two of the three jaws can catch the bit and it goes in wobbly. That breaks bits and drills sloppy holes. Make sure all three jaws close evenly on the bit. Hex shank driver bits are much less likely to seat crooked because of their shape.
Mistake 3: Wrong speed setting
The switch on top of the drill, usually 1 and 2, sometimes 3, limits the top RPM.
For wood, faster is almost always cleaner. At slow speed the bit gnaws at the wood instead of cutting it. Pocket holes are a good example: run the bit as fast as it will go and you will get a much cleaner hole. Same with twist bits. Starting slow in a 2x4 tears the wood out around the entry. Going in at full speed leaves a much cleaner opening.
Slow speed is for metal. Less heat buildup, and you can apply more pressure. Heat is the enemy of every cutting tool you own. Big Forstner bits sometimes want less speed too, depending on the material, since spinning fast can burn the hole.
Mistake 4: Using an impact when you need a drill
These are not the same tool. An impact driver will drive deck screws and lag bolts like nobody's business. That is what it is for.
But for cabinet hardware, hinge screws, tiny brass screws, or pocket hole screws, you want a drill with a clutch. I have driven thousands of pocket hole screws with an impact and yes, I stripped some out. Getting a stripped pocket hole screw back out of a pocket hole is not a fun afternoon.
Rule of thumb: drill for holes and small screws, impact for big screws and lag bolts.
Mistake 5: Wrong bit for the job
Twist bits are your standard drill bits, good for pilot holes and general drilling. The small ones break often, so an assortment is handy.
Brad point bits are twist bits with a sharp center point that lands exactly on your mark and stays there. Perfect for wood.
Forstner bits belong in every wood shop. They cut extremely clean holes, they can drill at an angle, and they leave a flat bottom when you are not going all the way through. The premium wave cutter sets are expensive but stay sharp a long time. There are budget sets around $50 to $60 that cover every size up to about two inches, and those are excellent for a first set.
Auger style overdrive bits have a brad point and drill some of the fastest, cleanest holes I have ever seen, even on the back side. You can still blow out the exit if you push too hard, and a backer board helps.
Countersink bits create the pocket for a screw head to sit in. Get a good set.
Self centering bits are a lifesaver for cabinet hardware. Sit it in the hardware hole and drill, and it centers itself.
Step bits are for metal, great for opening up existing holes quickly.
Spade bits are for rough construction, like running wire or plumbing through studs. I own a set and rarely touch it in the wood shop.
Hole saws are annoying and they burn if they are not sharp, but nothing else gets you a big hole that fast.
Driver bits. My name is Matt and I have a driver bit problem. I own sets from every brand. If I see them, I buy them. But I always have the right bit when I need it.
Mistake 6: Skipping the setup tricks
A center punch puts a dimple exactly where the hole goes so the bit cannot walk. A spring loaded one is fast and cheap.
Painters tape as a depth stop. Wrap a piece around the bit at your target depth and stop when you reach it. I have used this dozens of times.
Backer boards stop the exit hole from blowing out. If you cannot use one, drill from the front until the tip just breaks the surface on the back, then flip the board and finish from the other side. Clean holes on both faces.
Pilot holes near the end of a board are not optional. Use a bit slightly smaller than the screw, drill all the way through, and the board will not split.
Mistake 7: Skipping the attachments
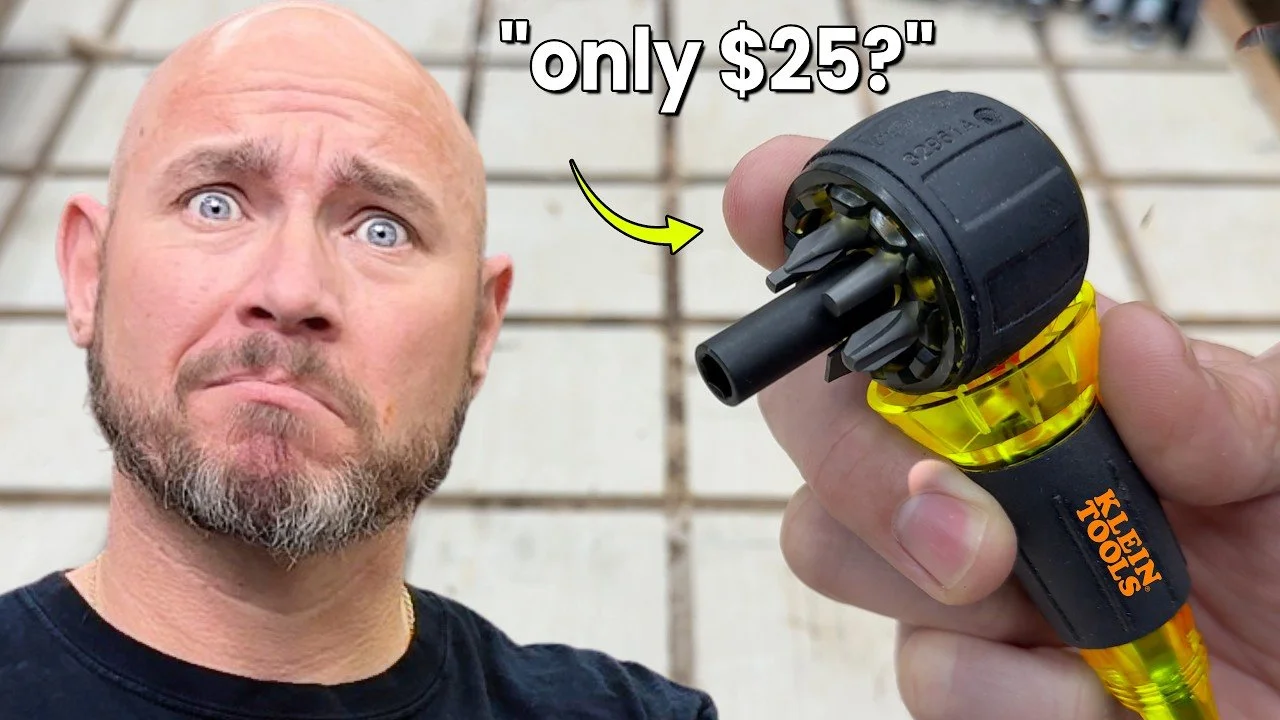
A right angle attachment is one of the best cheap tools in my shop. Bit goes in one end, the other end goes in your drill or impact, and now you can get into spaces you could not before. I use mine constantly on pocket hole projects when I have to drive a screw between two legs.
An installation driver or 5-in-1 drill takes it further, giving you a right angle head, an offset head, a standard chuck, and a hex driver head that all swap onto the same body. If you are buying your first drill and want something that does it all, one of these could be it.
A portable drill press or a drill guide gets you perfectly straight 90 degree holes every time, or repeatable angles. Very inexpensive for what it does. And dowel jigs are a good way to step up your joinery using a drill you already own.
Mistake 8: Buying the cheapest bits you can find
Bulk kits with a handful of bits for a couple dollars will not last and they drill bad holes. Better metal costs more, stays sharp longer, and cuts cleaner. Stick to the name brands.
Mistake 9: Eyeballing it
I do this all the time and it bites me. Make the mark. Use a center punch. Use a brad point bit. It takes ten seconds and it can save a project.
Mistake 10: Leaving batteries on the charger
This is the most dangerous thing in this entire guide, and it happens after you are done working.
You pop the battery off, drop it in the charger, and walk away for the night. A lot of people have lost shops and homes to fires because a charger or a battery failed to shut off and kept going until it overheated. I am not calling out any one brand. It has happened across all of them. I see it online regularly, and when they investigate, the culprit is a battery left charging unattended.
Set a timer. I only charge batteries while I am in the shop working, and I pull them before I go in for the day. I am guilty of forgetting sometimes too. Please try to remember.
It is also just bad for the pack. Batteries are meant to run down and charge back up, not sit at full forever. And keep them out of extremes. I threw a couple in the freezer once and tested them, and the power difference against room temperature packs was obvious. Excessive heat hurts them too. Batteries are not cheap in any brand, so take care of them.
Drill tools and links
Some links below are affiliate links. If you buy through them we may earn a small commission at no extra cost to you.
Drills and drivers
- DEWALT 3 speed drill
- Milwaukee M18 drill
- Milwaukee M12 drill
- RYOBI drill
- RIDGID drill
- Milwaukee 5-in-1 installation driver
- DEWALT 5-in-1 drill
Attachments and guides
Twist and brad point bits
Forstner and auger bits
- Irwin Forstner 8 piece set
- Irwin Forstner 14 piece set
- Fisch wave cutter Forstner set
- WoodOwl Overdrive 3 piece set
- WoodOwl Overdrive 7 piece set
Countersinks and specialty bits
- Countersink bit set
- W.L. Fuller countersink bit set
- Countersink bit with depth stop
- Irwin countersink bit set
- Self centering drill bits
- RYOBI titanium step bit set
- DEWALT spade bit set
- Milwaukee general purpose hole saw kit
- Hole saw for cornhole boards
Driver bits
Common Questions
What causes table saw kickback?
Kickback happens when the workpiece binds against the blade and the blade throws it back toward the operator. The most common causes are a fence that is not parallel to the blade, a missing riving knife, cutting warped stock that rocks, freehanding a cut without a fence or miter gauge, and trapping a crosscut offcut between the blade and the fence.
What tooth count blade should I use on a table saw?
A 40 tooth blade is the best all around choice and handles both rips and crosscuts well. Use 24 tooth for dedicated ripping and 60 to 80 tooth for crosscuts and plywood.
Why do my screws keep stripping?
Usually because you are using Phillips head screws, which were engineered in the 1930s to cam out on purpose so they could not be overtightened. Switch to Torx, which has six points of contact, and set your drill's clutch to a lower number instead of running it wide open.
Can I use drywall screws for woodworking?
No. Drywall screws are brittle hardened steel and they snap under lateral load instead of bending. They are also plain steel, so they rust outdoors. Use wood screws.
Which way do you move a router?
On the outside edge of a board, route counterclockwise so the bit cuts into the wood instead of climbing across it. On an inside edge, like a frame opening, reverse it and go clockwise.
How deep can I cut with a router bit in one pass?
A good rule of thumb is no deeper than half the width of the bit. A 1/4 inch bit takes 1/8 inch passes.
What does the clutch on a drill do?
The numbered ring behind the chuck limits how much torque the drill applies before it clicks and stops driving. Setting it correctly keeps you from overdriving screws, stripping heads, and snapping fasteners.
Is it safe to leave a battery on the charger overnight?
It is not a risk worth taking. Shop and house fires have been traced back to batteries left charging unattended. It also shortens battery life to sit at full charge constantly. Charge while you are in the shop and pull the pack before you leave.
Ready to sell your woodworking?
Sawdust Startups walks you through getting your first sale, from what to build to how to list it and photograph it. Your first seven days are free.
Join free for 7 daysThese are some of my favorite videos to make, because I know they make a difference for people who are starting out. Woodworking can feel intimidating at first, but the more you build, the more at ease you get around these tools. It is one of the best stress relievers there is. Get out there, have fun with it, and be safe.

Every mistake in this guide is one I have made myself. A table saw kickback to the hipbone, a broken thumb on a miter saw. Six tools, every beginner mistake, and the simple fix for each one.