
How to Make a Walnut Coffee Table with Breadboard Ends
I made this walnut coffee table with a walnut top and breadboard ends. Let me show you how you can make a coffee table like this.
Build Plans for this project can be found here: https://www.731woodworks.com/store/breadboardcoffeetable
I used a Festool Domino for the joinery on this project but you can use the same measurements to make it with pocket holes or dowel joinery.

Materials & Supplies
2 = 8 foot 4x4 Birch for the Legs and X Braces
2 = 10 foot 2x6 (#tubasix) for the Shelf Slats
4 = 8 foot 8/4 Walnut for the Top pieces, and Stretchers
One pack of Table top “Z” fasteners
Wood glue
Joinery method of your choice, I used Dominos.
Full Build Video
I finished the table based with the distressing method I’ve used before. Then finished it with a clear paste wax to give it a satin sheen and smooth to the touch.

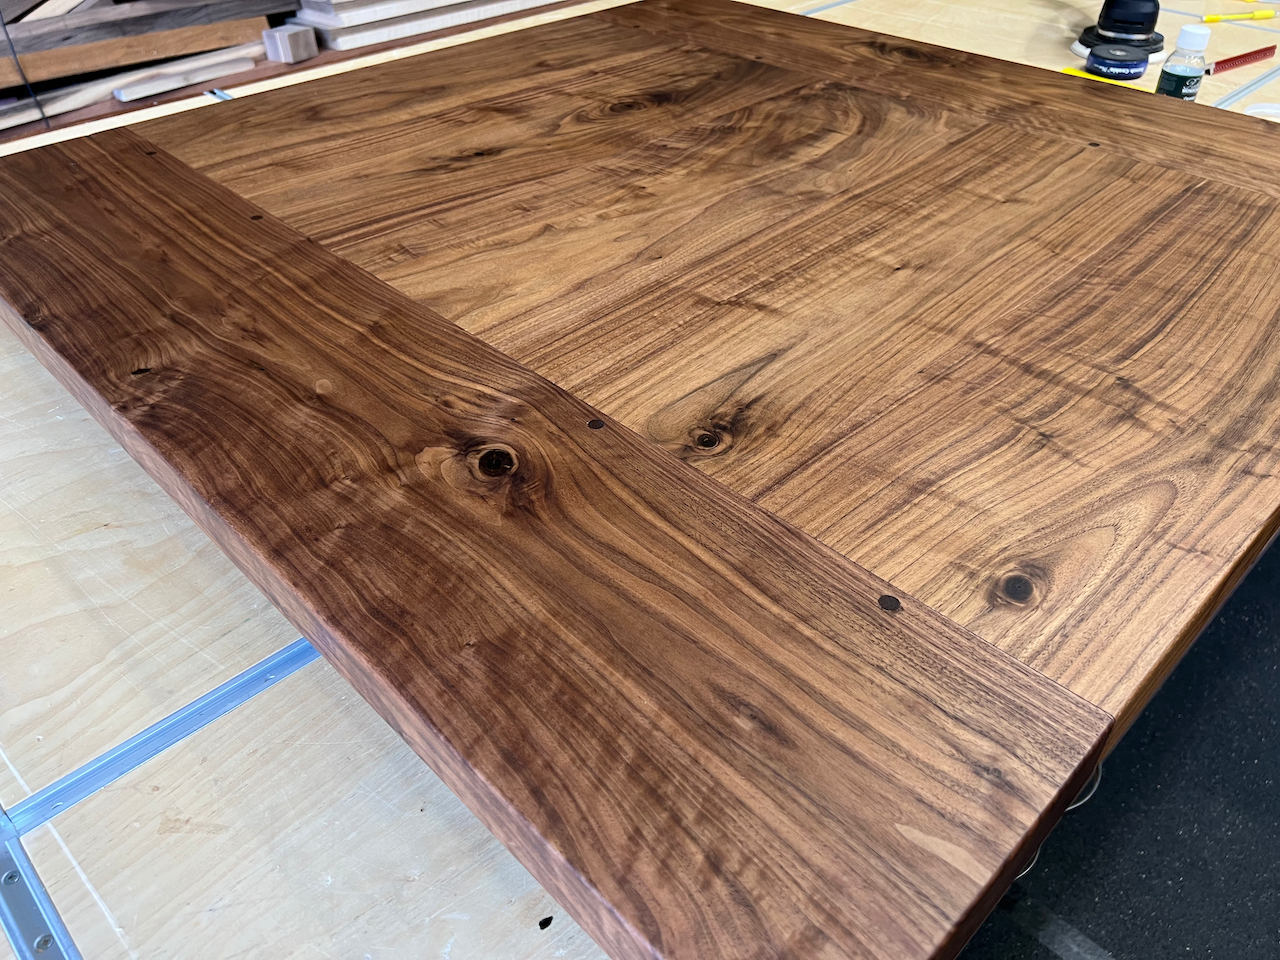
I finished the table top using Rubio Monocoat Pure. It keeps the natural color of the wood and looks amazing! I was very impressed with Rubio. It’s heat and water resistant, which makes it perfect for a coffee or dining table where hot dishes will be placed on top or a cold sweaty drink.
I bought my walnut from wtghardwoods.com. It was an awesome selection of lumber that I was shipped.

This is an exploded view of the parts to be assembled on this table

I used brown Starbond CA glue to fill the gaps, voids and knot holes.


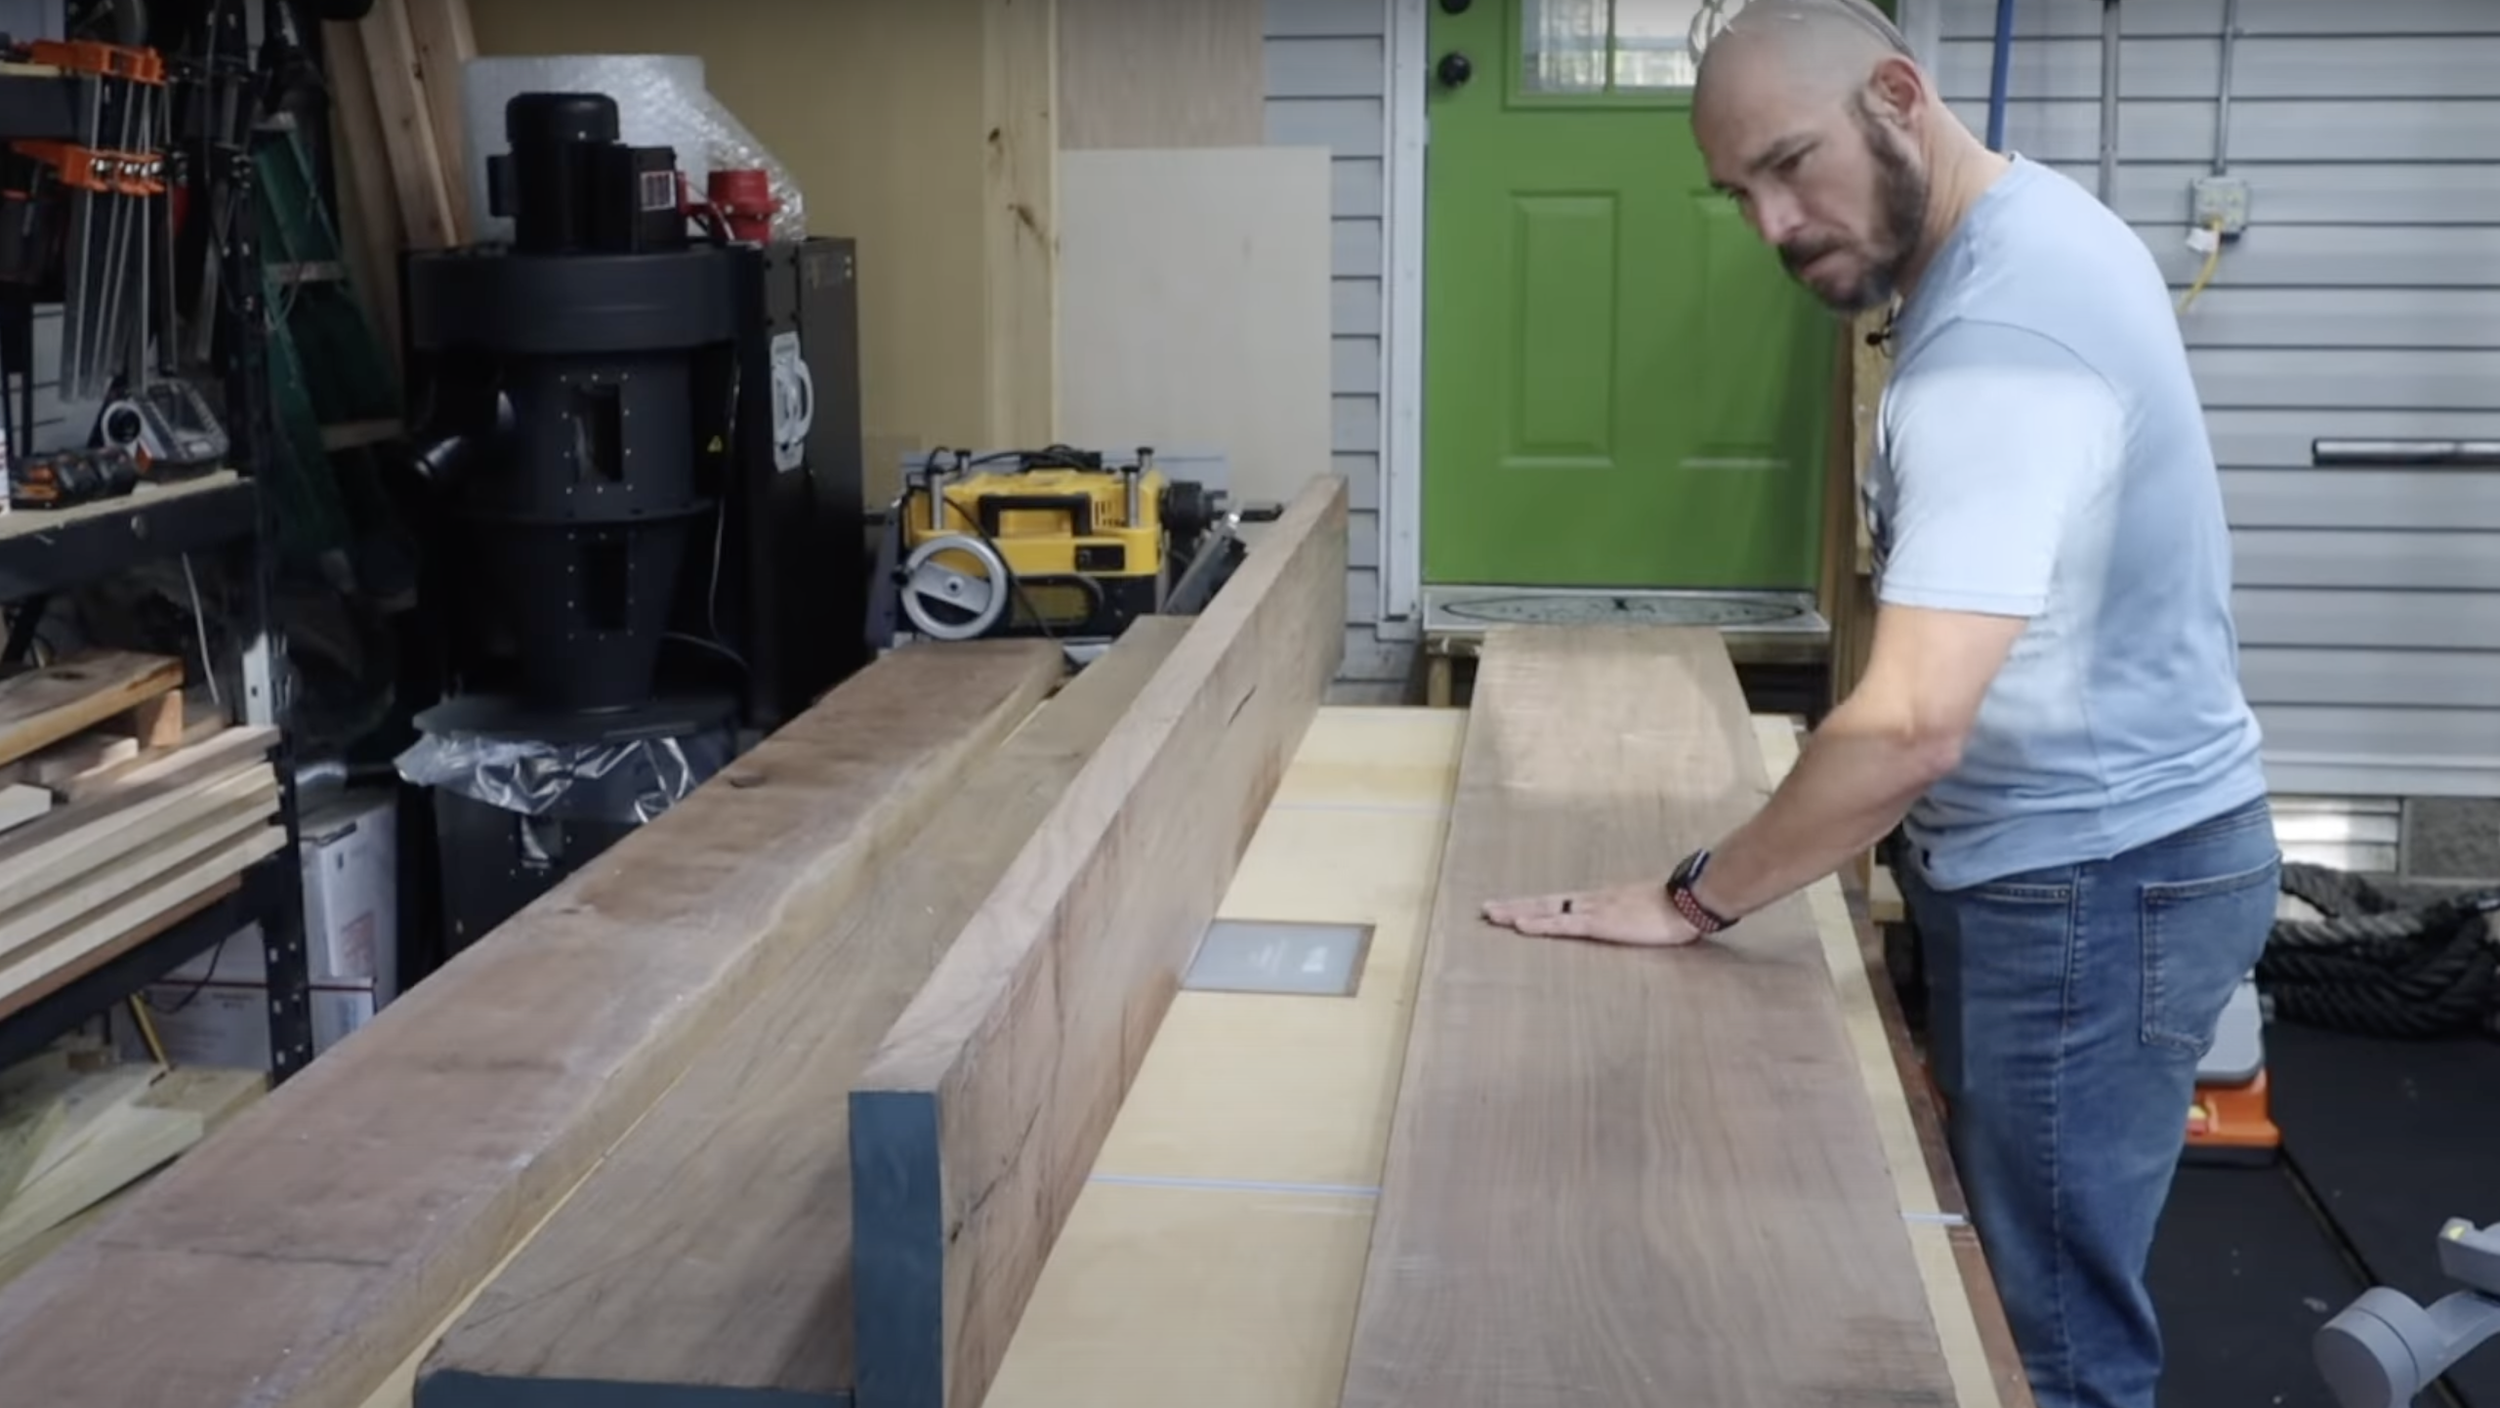
I milled down the walnut using my planer to 1 1/2” thick and then used my jointer to joint one edge.

After jointing one side I ripped the other side with the table saw. I then took them back to the jointer and used this method to get perfectly tight seams for the table top glue up.


I used this leveling trick to get one straight edge so the breadboard fist properly.
I used the Festool Domino to align the table top. This saves a lot of time sanding because it precisely aligns the top of each board. If you don't have a Domino, you can use dowels or just use cauls when you glue up your table top panel.

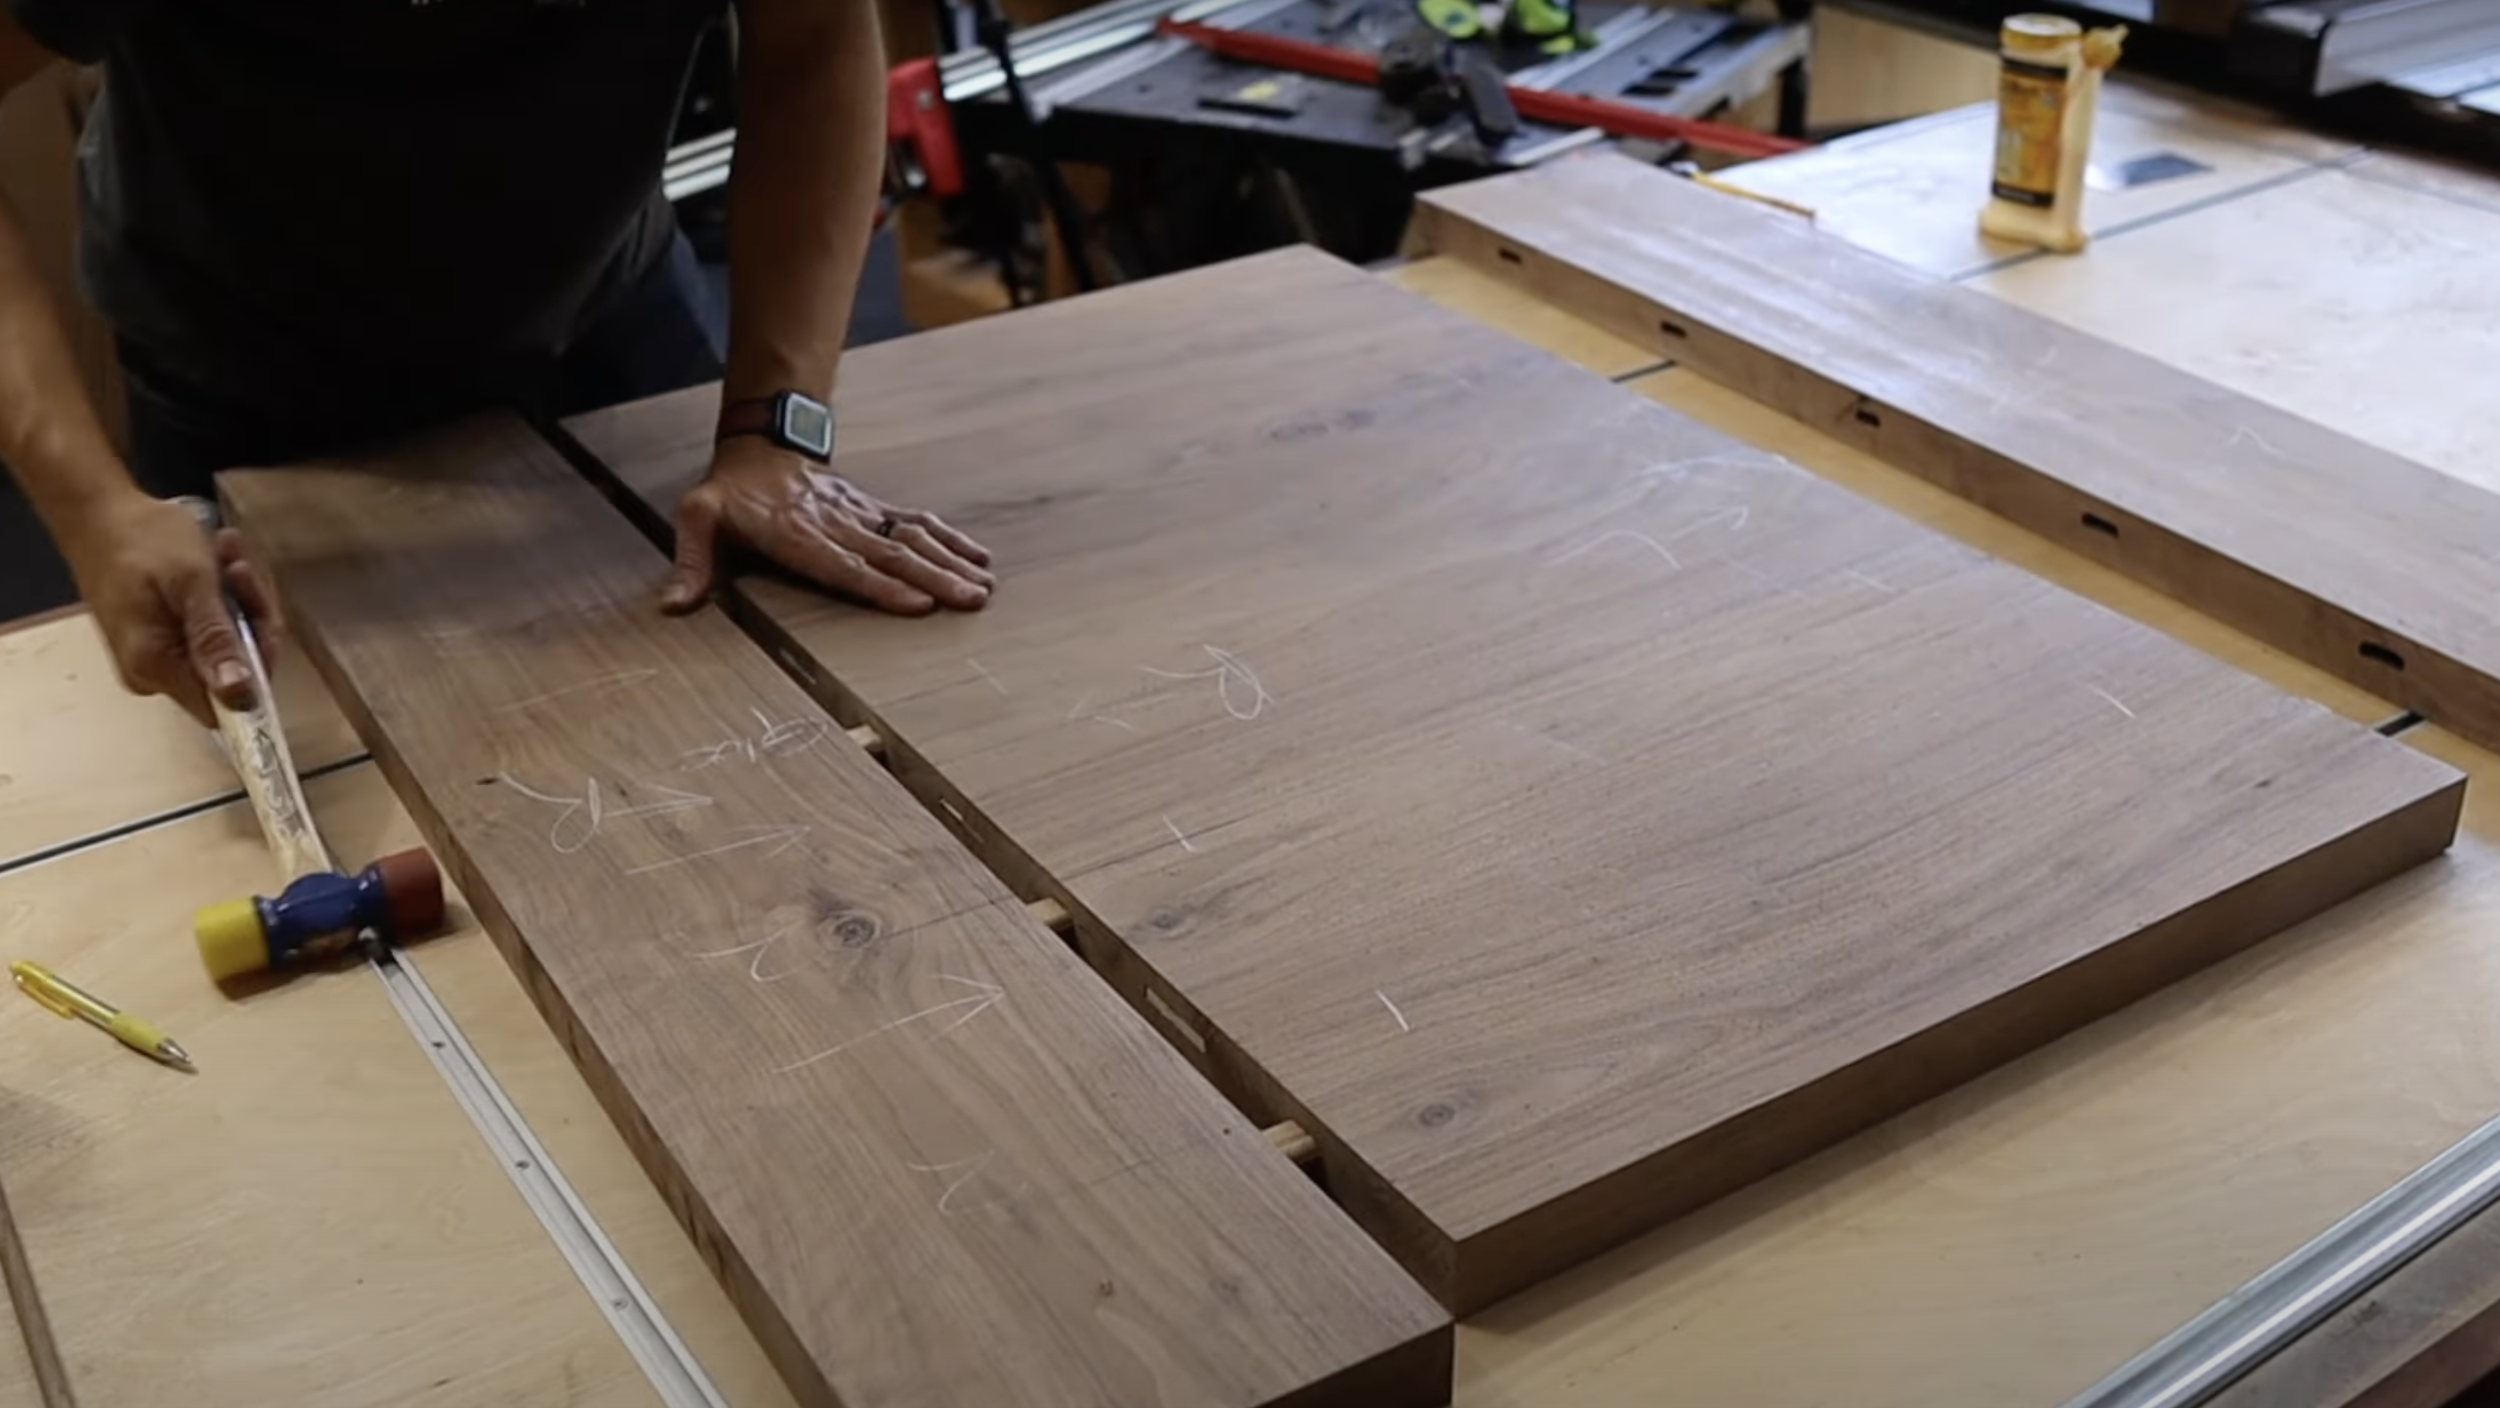
Watch the video linked at the top of this post to see how I did the breadboard ends.

I sanded the table top surface to 120 grit.


Your base should assemble like this
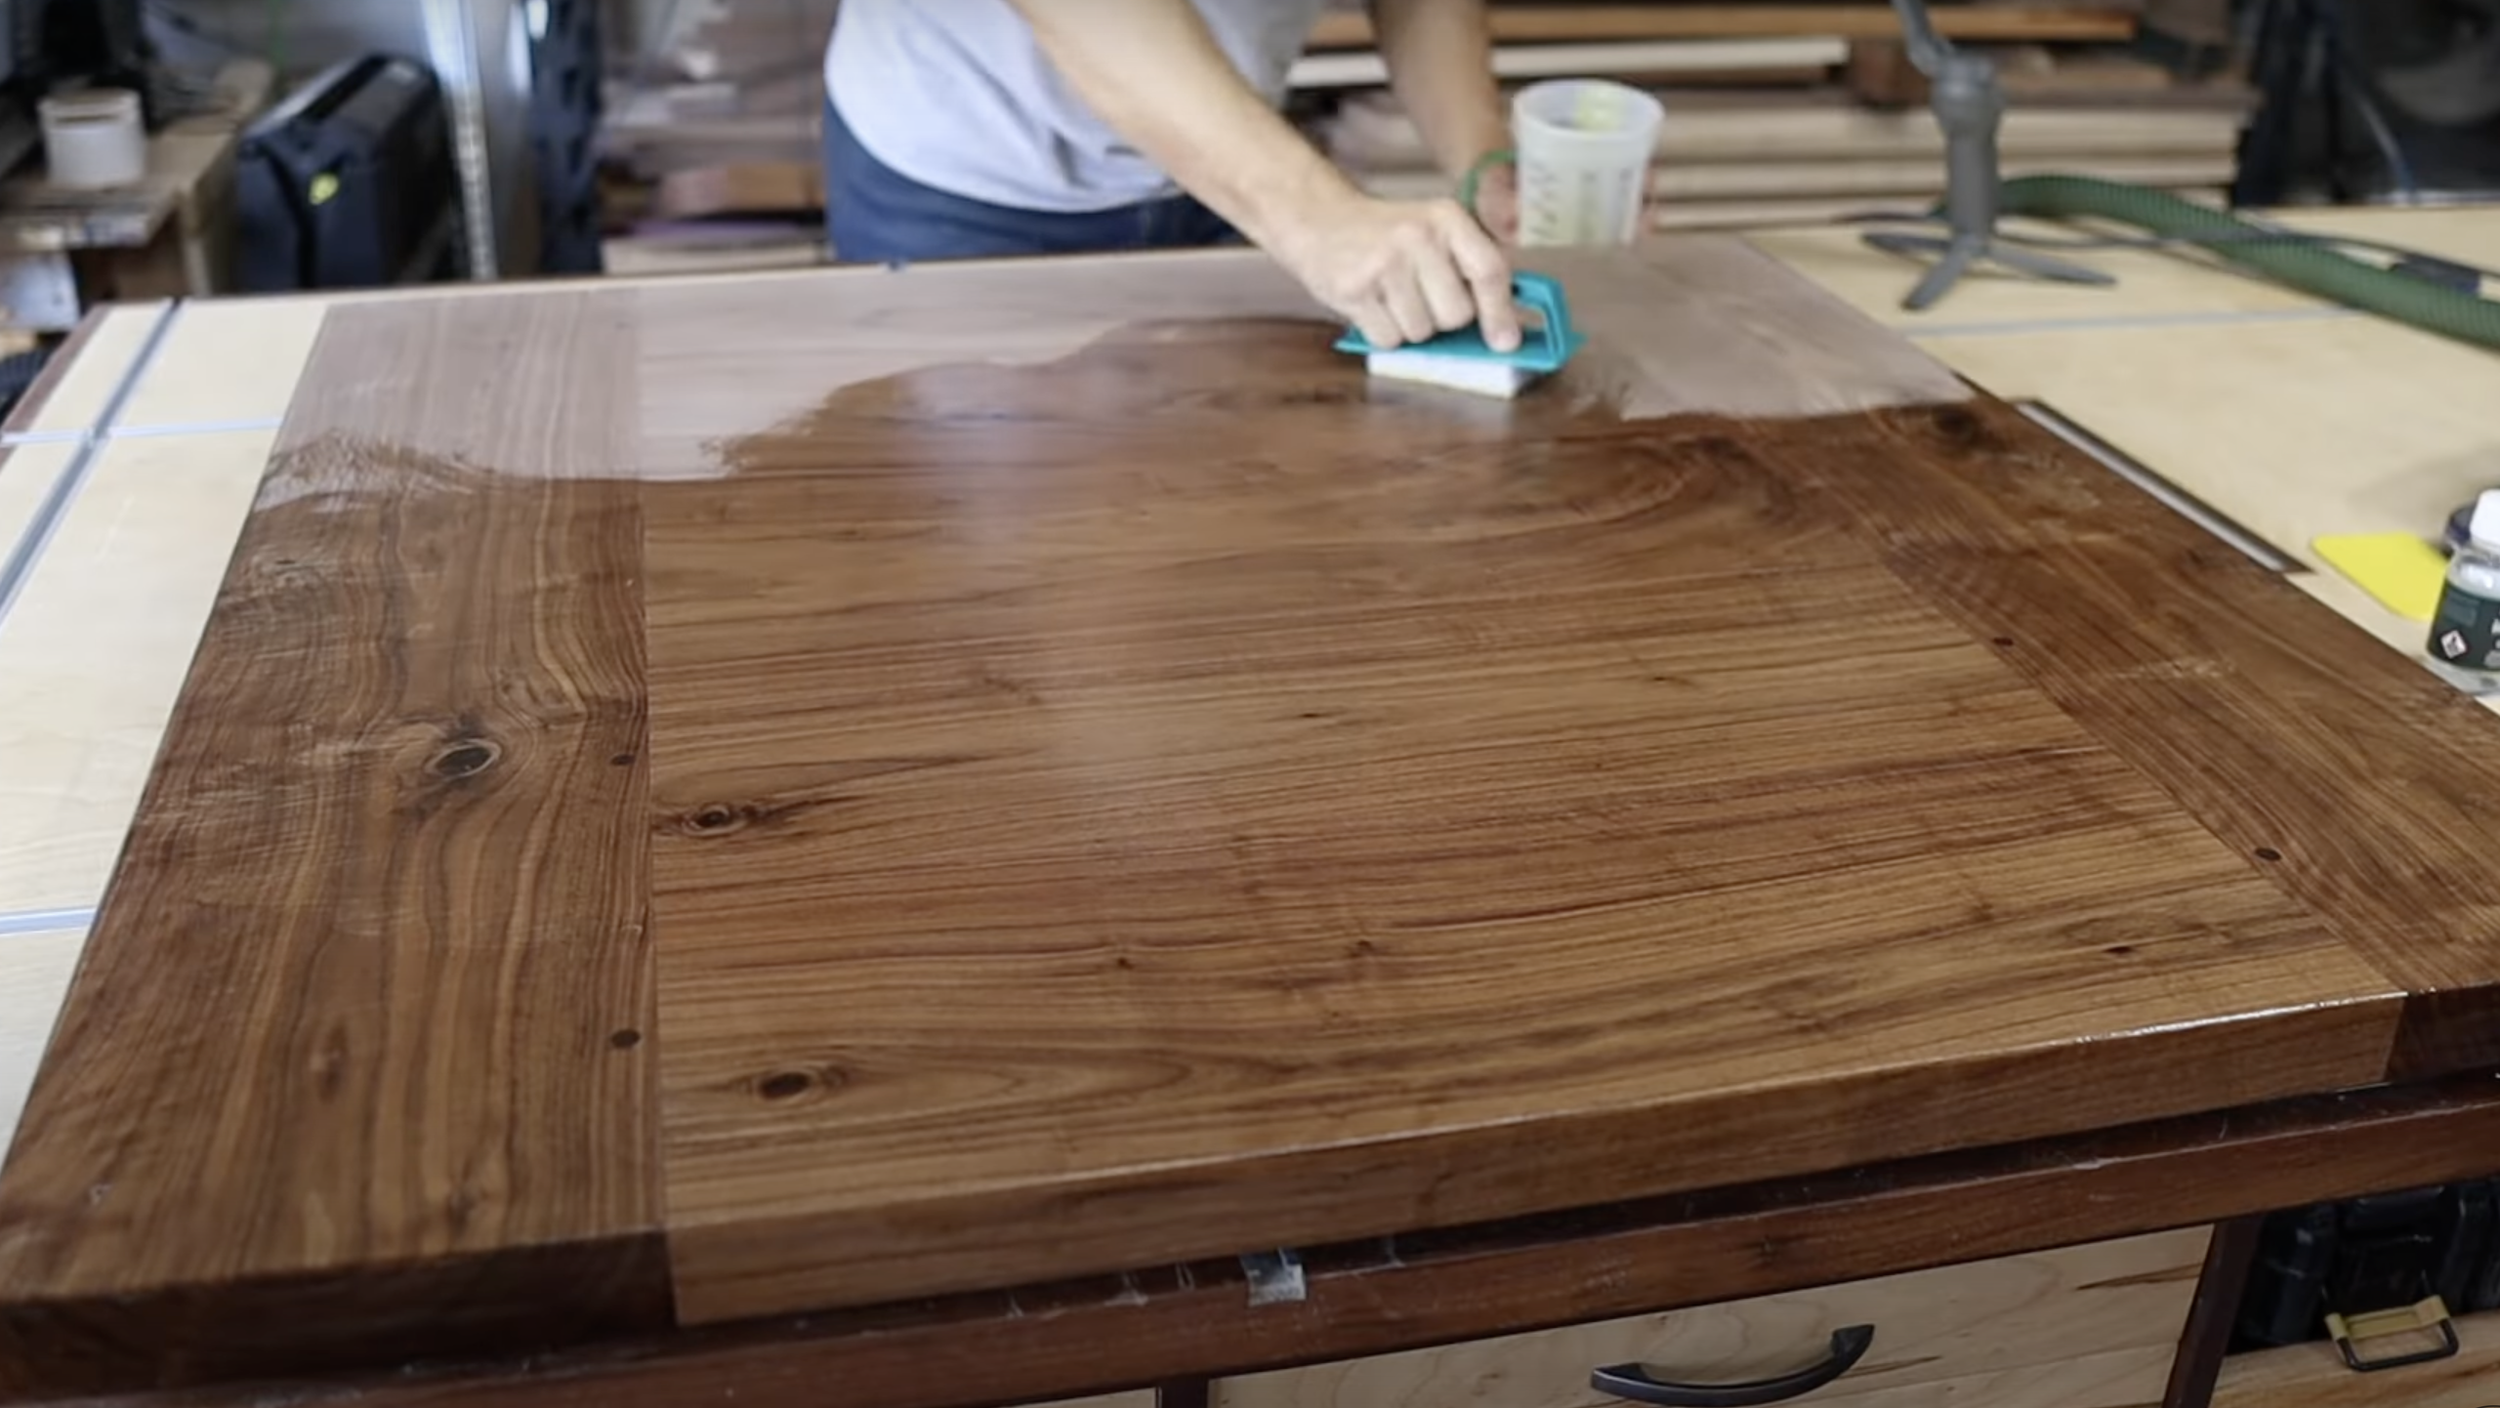
I finished the table top with Rubio Monocoat. I made a video on how to apply this finish. It’s very easy to use. You can see the video here.


I assembled the base in a similar way as I did the bread board ends to allow for wood expansion.

The finished base assembly should look like this


