
How to Use a Drill for Beginners: 10 Mistakes That Strip Screws, Break Bits, and Kill Batteries
Watching on TV? See all tool links from this video
Learning how to use a drill for beginners comes down to three controls most people never touch. I stripped screws, snapped bits, and killed batteries for years before I figured that out. This post covers the ten mistakes I see most, using drills like the DeWALT DCD1007WW1 and the RIDGID R86115K.
The Short Answer
- Set the clutch collar before you drive a screw. That row of numbers is what stops screws from stripping and bits from snapping.
- Use the drill icon on the clutch for drilling holes, and hammer mode only for concrete and masonry.
- High speed for wood, low speed for metal. Heat is what kills bits.
- Every fix here costs nothing. The only money I would spend is on better bits, and a budget Forstner set runs about $50 to $60.
- Never leave a battery on the charger unattended. That is the single most dangerous drill habit there is.
How to Use a Drill for Beginners: The Clutch Is Where to Start
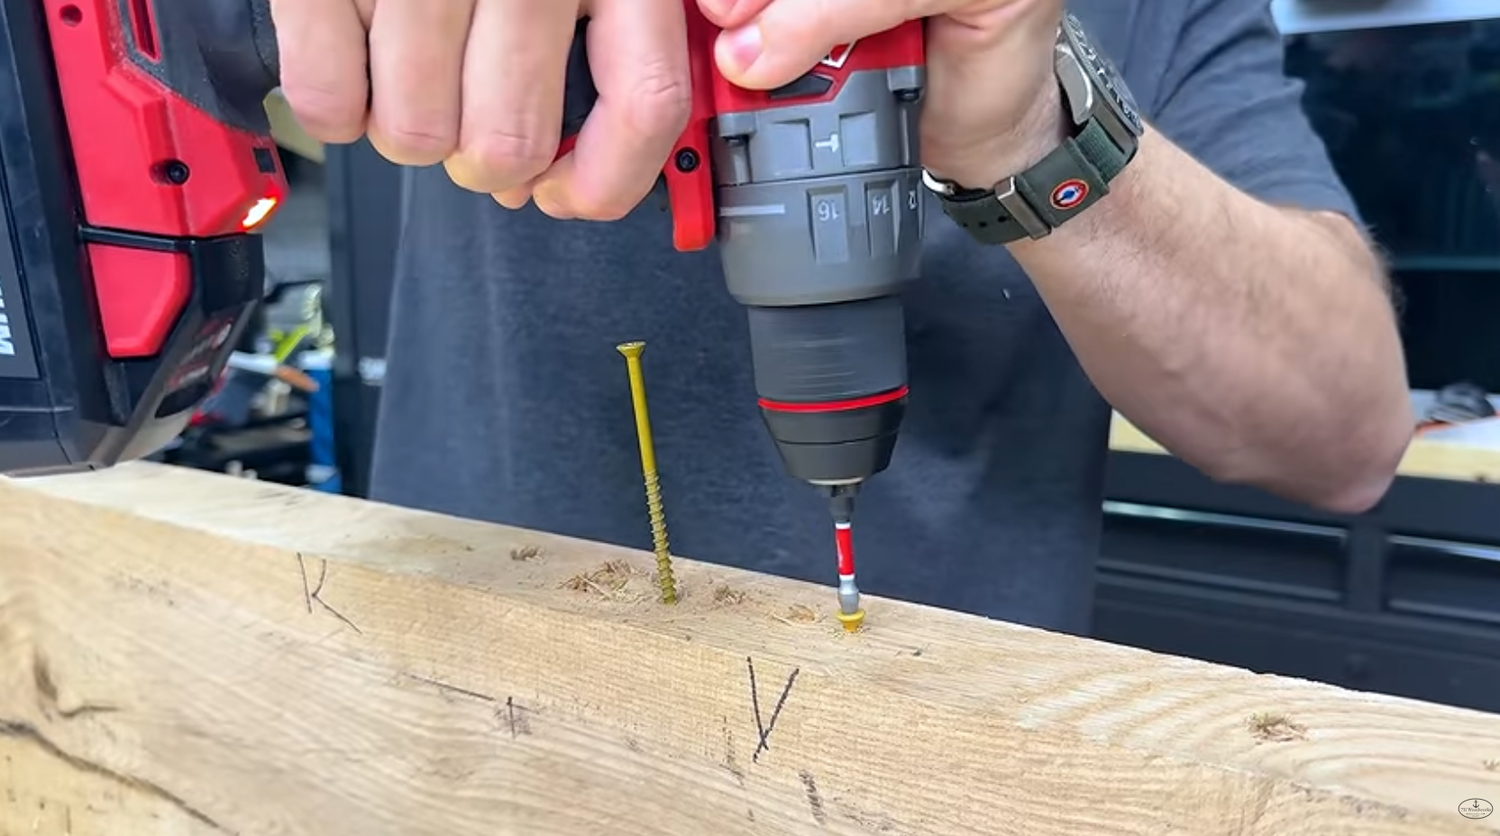
The ring right behind the chuck with numbers on it is the clutch. Depending on the drill, it runs from one to eleven or one to sixteen. Most people leave it cranked on the top number and never think about it again. That one habit is behind stripped screws, snapped screws, broken bits, and worn out drill bits.
The clutch limits how much torque the drill delivers before it gives up. When you hear that clicking sound, the clutch is doing its job and stopping the drill from overdriving. I set the clutch to five and drove a four inch screw into white oak. It clicked right as the screw head reached the surface of the wood. Want it to sink deeper, crank the number up. That is the whole system.
Once you dial in the right setting, you can drive a hundred screws and they will all sit the same. A knot in the wood might change things, but otherwise it is repeatable. The setting depends on three things: screw length, screw size, and the wood you are driving into. A four inch screw needs a lot more torque than an inch and a quarter screw. On the short screws I have to back the clutch off or it overdrives and strips out the wood fibers, and then the screw just spins in the hole.
What the Drill Bit and Hammer Icons on the Clutch Mean
Past the numbers you will see a drill bit icon, and on some models a hammer icon. Drill mode turns the clutch off so you can bore a hole cleanly without it clicking and cutting out mid hole. You can drive a screw in drill mode, but with no clutch to stop you, that is how screws get stripped.
Hammer mode is for masonry. With a masonry bit, it adds vibration to the bit so it works through concrete much easier. You can hear it working. It has an impact sound to it. Not every drill has it. The RIDGID R86115K I use only goes to drill mode, and if you are not paying attention in the store you can end up with a drill only model when you wanted a hammer drill. RIDGID makes hammer drills too, so check the collar before you buy.
See the DeWALT 3 Speed Drill DCD1007WW1 at Lowe's Affiliate link. We may earn a commission at no extra cost to you.
Watch the Full Breakdown
The clicking sound the clutch makes is hard to describe in text. In the video you can hear the difference between a clutch cutting out, a screw driven in drill mode, and the same screw driven in hammer mode.
Drill Speed Settings: When to Use 1, 2, or 3
On top of almost every drill is a flip switch marked one and two. Some, like the DeWALT DCD1007WW1, have three. That switch caps the top end of the RPM the drill will deliver. Your trigger is still variable, so a light pull barely moves the bit and a hard pull runs it out. The switch just sets the ceiling.
For wood, faster is almost always cleaner. At slow speed the bit gnaws its way through the wood instead of cutting it. Run it fast and you get shavings and a clean hole. Pocket holes are the clearest example. Max the speed out and the hole comes out noticeably cleaner. If you have been drilling pocket holes on the low setting and fighting tear out, that is why. Same with regular twist bits in a 2x4. Start slow and the top of the hole tears out ugly. Come in at full speed and the bit sucks right through it.
Metal is the opposite. Slow the bit down, add a little more pressure, and let the bit do the work. Heat builds slower at low speed, and heat is the enemy of every cutting tool I own. Big bits follow the same logic. A large Forstner bit spinning fast can scorch the hole depending on the material, so back the speed off.

The Wood Owl auger bits are the one exception I have run into. They drill some of the cleanest holes I have ever seen, and they generally want to spin fairly quickly. But in certain material I get a cleaner hole with the drill set on one.
See the Wood Owl Overdrive 3pc Set on Amazon or the Wood Owl Overdrive 7pc Set Affiliate links. We may earn a commission at no extra cost to you.
Drill vs Impact Driver: Which One Should You Use
These are not the same tool. Both drive screws, but they are built for different work. A drill has a clutch, so it can be dialed back for delicate screws. An impact hammers rotationally and does not care what it is driving into.
Use the drill for drilling holes and for small screws. Cabinet hardware, hinge screws, tiny brass screws, pocket hole screws. Use the impact for deck screws, lag bolts, and long fasteners. It will drive those like nobody's business. I have driven thousands of pocket hole screws with an impact and stripped plenty of them out, and getting a stripped screw back out of a pocket hole is miserable work.
| Job | Drill | Impact Driver | 5-in-1 Installation Driver |
|---|---|---|---|
| Drilling holes | Yes, what it is built for | No | Yes, with the chuck head |
| Adjustable clutch | Yes | No | Yes |
| Small and delicate screws | Best choice | Strips them easily | Works well |
| Lag bolts and long screws | Workable | Best choice | Not the strong suit |
| Tight spaces | Needs an attachment | Needs an attachment | Right angle head built in |
If you want one tool that covers most of it, a 5-in-1 style drill is worth a look. You get a right angle head, an offset head, a standard chuck, and a head that accepts quarter inch bits, all swapping onto the same drill body. For somebody starting out, that could honestly be the only drill you buy.
See the Milwaukee 5-in-1 Installation Driver 2505-22 at The Home Depot or the DeWALT 5-in-1 Drill Affiliate links. We may earn a commission at no extra cost to you.
If you would rather run a standard drill, the Milwaukee M18 3697-22 covers full size work and the M12 3497-22 handles lighter duty jobs in a smaller package.
See the Milwaukee M18 Drill 3697-22 at The Home Depot or the Milwaukee M12 Drill 3497-22 Affiliate links. We may earn a commission at no extra cost to you.
How to Chuck a Drill Bit Correctly
This is the mistake I still make. I get in a hurry, drop a bit in, and crank the chuck down without checking it. On smaller bits especially, the bit can sit wrong and only two of the three jaws grab it. Now it is wobbly.
A wobbly bit breaks, and it drills a wobbly hole. Sometimes it is barely off and you do not notice until the hole looks bad. Take the extra second and seat the bit so all three jaws come down on it with even pressure all the way around. If it is spinning visibly off center, back it out and reseat it.
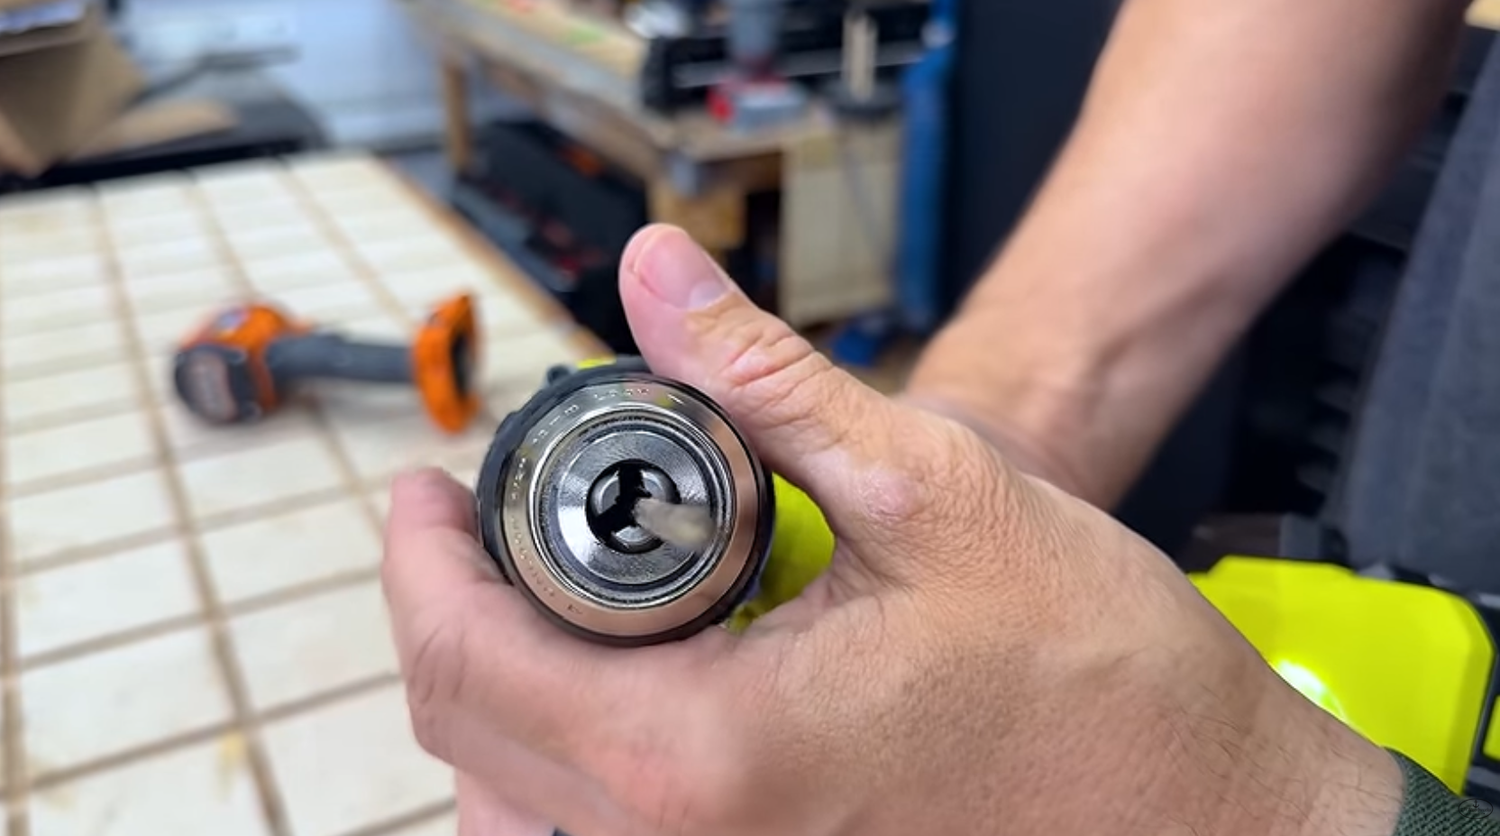
Driver bits and any bit with the quarter inch hex shank are much harder to get wrong. The shape seats evenly instead of rolling around like a round shank does. I use the drill itself to spin the chuck closed and speed things up, though plenty of people just twist it by hand. Either way works. Just be careful, because a spinning chuck will burn your hand if you are not expecting it.
Which Drill Bit Should You Use
The bit matters as much as the drill. Here is what each type is actually for.
Twist Bits
The standard drill bit. Pilot holes, general holes, everyday work. Every shop needs them. The small sizes break regularly, which is why I keep a large assortment on hand rather than a tidy little set. Having the size you need when you need it is about as handy as a shirt pocket.
See the 100pc Drill Bit Set on Amazon or the DeWALT Drill Bit Set Affiliate links. We may earn a commission at no extra cost to you.
Brad Point Bits
Same idea as a twist bit with a small point on the tip. That point is for precision. Mark your spot, and the brad point drops right in and stays there instead of walking. These are sharp enough that you often do not even need a punch mark first. Put the point on the line and go.
See the Brad Point Bit Set on Amazon Affiliate link. We may earn a commission at no extra cost to you.
Forstner Bits
Every wood shop should own a set. Forstner bits are the answer for flat bottom holes and for drilling on an angle. My Fisch wave cutter set is wildly expensive, and I have had it a few years. They cut extremely clean and stay sharp a long time because of the quality of the metal.
You do not have to start there. The Irwin set runs somewhere around $50 to $60 and covers the sizes up to about two inches that you actually need around the shop. For a first Forstner set, that is the one I would buy.
See the Irwin Forstner 8pc Bit Set on Amazon, the Irwin Forstner 14pc Set, or the Fisch Wave Cutter Forstner Set Affiliate links. We may earn a commission at no extra cost to you.
Auger Bits
The Wood Owl Overdrive bits have a brad point and drill the fastest, cleanest holes I have seen, even on the back side. You can still blow out the back if you push too hard or the material is not cooperating. A backer board makes them even better.
Countersink Bits
A countersink cuts the pocket that the screw head drops into. You drill your hole, then the countersink shapes the top so the head sits flush instead of standing proud. For anything you are going to plug or finish, it matters.
See the Counter Sink Bit Set on Amazon, the W.L. Fuller set, the Countersink Bit with Depth Stop, or the Irwin Countersink Set Affiliate links. We may earn a commission at no extra cost to you.
Self Centering Bits
If you do much cabinet work, these earn their keep fast. Set the bit against the hardware and drill. It centers itself in the hole every time, so your hinge screws land where they belong.
See the Self Centering Drill Bits on Amazon Affiliate link. We may earn a commission at no extra cost to you.
Step Bits
Metal work. Step bits widen an existing hole quickly and cleanly, and they do it well.
See the RYOBI Titanium Step Bit Set at The Home Depot Affiliate link. We may earn a commission at no extra cost to you.
Spade Bits
I am not a fan of spade bits in a wood shop. They are built for rough construction, like punching through a stud to run electrical or plumbing. I own a set and rarely reach for it, because every other bit I have mentioned is better suited to woodworking.
See the DeWALT Spade Bit Set on Amazon Affiliate link. We may earn a commission at no extra cost to you.
Hole Saws
Hole saws are a little annoying to use. They burn the wood when they are dull, and they do not stay sharp long. But they go bigger than a Forstner bit does, so a kit is worth keeping around for the jobs nothing else will handle.
See the Milwaukee General Purpose Hole Saw Kit at The Home Depot or the Hole Saw for Cornhole Boards on Amazon Affiliate links. We may earn a commission at no extra cost to you.
Driver Bits
My name is Matt and I have a driver bit problem. Milwaukee, Makita, DeWALT, RYOBI. If I see a set, I buy it. The upside is I have never once gone looking for a bit and come up empty.
See the Milwaukee Driver Bit Set at The Home Depot, the DeWALT Driver Bit Set, or the Makita Driver Bit Set Affiliate links. We may earn a commission at no extra cost to you.
Stop Buying Cheap Drill Bits
Buying bits by the hundreds for a couple of dollars is a false economy. They will not last, and they drill bad holes while they are alive. As a rule, the more the bits cost, the better the metal, and better metal stays sharp longer and cuts cleaner.
I do buy large kits, but I buy them for the right reason. The big set I keep in the shop has multiples of the same size, which is why I picked it up. Otherwise I stick to the name brands. DeWALT, Makita, Milwaukee, that tier.
Drill Attachments Worth Owning
A right angle attachment turns your drill into a tool that fits places it has no business fitting. Bit goes in the right angle side, the other side chucks into your drill or impact. I have had my DeWALT DWARA120 a long time, and the one before it lasted so long I still have it. They do not wear out, and they cost almost nothing for what they do. I reach for mine constantly when I am building with pocket holes and need to get between two legs of a project to drive a screw.
See the Right Angle Drill Attachment at Lowe's Affiliate link. We may earn a commission at no extra cost to you.
If you need holes that are dead straight every single time, or the same angle repeated over and over, a portable drill guide does that job. Your drill attaches to the guide and the guide keeps you at 90 degrees. Milescraft makes one, Kreg makes one, and several others do too. Dowel jigs are the next step up if you want to get into joinery with a drill.
See the Milescraft Drill Mate Pro 1348 on Amazon Affiliate link. We may earn a commission at no extra cost to you.
Drill Setup Tricks That Get Cleaner Results
These cost nothing and they solve most of the ugly results beginners get.
- Center punch. Put a dent exactly where the hole goes so the bit cannot walk. I use a spring loaded one constantly, and it works beautifully in wood.
- Painters tape depth stop. Wrap tape around the bit at the depth you need and stop when you reach it. I have used this trick dozens of times.
- Backer board. Drill through your workpiece into a scrap board behind it and the back side comes out clean instead of blowing out.
- Drill from both sides. No backer board handy, drill until the tip just breaks through the back, then flip the board and finish from the other side. Clean holes both faces.
- Pilot holes near the end of a board. Use a bit slightly smaller than the screw and drill all the way through. That is what keeps the end from splitting.
- Do not eyeball it. I still do this and I still miss. Mark it, punch it, use a brad point. A bad hole can ruin a project fast.
See the Spring Loaded Center Punch on Amazon Affiliate link. We may earn a commission at no extra cost to you.
Is It Bad to Leave a Drill Battery on the Charger
This is the worst thing you can do with a drill, and it happens after you are done using it. You pull the battery, drop it in the charger, and walk away. People have lost shops and homes to that habit. When a charger or a battery fails to shut itself off, it keeps charging, overheats, and goes up. I see it online regularly, and the investigation keeps landing on batteries left on a charger.
This is not a knock on any brand. I run DeWALT, Milwaukee, RYOBI, and RIDGID batteries. It has happened to people across all of them. Set a timer so you remember to come back. I try to only charge while I am in the shop working, and I pull batteries off the charger before I go in for the day. I forget sometimes too. I am trying to be better about it.
Sitting on the charger at full is also just not great for the battery. They are meant to run down some and then get charged back up. Temperature matters as well. Extreme cold and extreme heat both hurt them. I threw a couple batteries in the freezer and then tried to drill with them, and the power difference was obvious against room temperature batteries. Keep them dry and somewhere reasonable and they will last longer. Batteries are not cheap, no matter whose name is on them.
See the RYOBI Drill PBLHM102B at The Home Depot or the RIDGID Drill R86115K Affiliate links. We may earn a commission at no extra cost to you.
All Tools From This Video
Lowe's
The Home Depot
- Milwaukee M18 Drill
- Milwaukee M12 Drill
- Milwaukee 5-in-1 Installation Driver
- DeWALT 5-in-1 Drill
- RYOBI Drill
- RIDGID Drill
- Milwaukee General Purpose Hole Saw Kit
- RYOBI Titanium Step Bit Set
- Milwaukee Driver Bit Set
Amazon
- 100pc Drill Bit Set
- DeWALT Drill Bit Set
- Brad Point Bit Set
- Irwin Forstner 8pc Bit Set
- Irwin Forstner 14pc Bit Set
- Fisch Wave Cutter Forstner Bit Set
- Wood Owl Overdrive 3pc Set
- Wood Owl Overdrive 7pc Set
- Counter Sink Bit Set
- W.L. Fuller Counter Sink Bit Set
- Countersink Bit with Depth Stop
- Irwin Countersink Bit Set
- Self Centering Drill Bits
- Hole Saw for Cornhole Boards
- DeWALT Spade Bit Set
- DeWALT Driver Bit Set
- Makita Driver Bit Set
- Spring Loaded Center Punch
- Milescraft Drill Mate Pro
Want deals like these sent to you every day.
Join The Morning Cut. Free daily tool deal email from Matt.
Browse all current tool deals at 731woodworks.com.
See all tool reviews. Every post from the 731 Woodworks blog.
Frequently Asked Questions
What do the numbers on a drill mean?
Those numbers are the clutch, and they set how much torque the drill delivers before it slips. Low numbers for short or small screws, higher numbers for long screws and dense wood. When you hear clicking, the clutch has hit its limit and stopped driving. That clicking is what keeps you from stripping the screw or the wood around it.
What speed should I use to drill into wood?
High speed for almost all wood drilling. At low speed the bit gnaws the wood instead of cutting it, and you get tear out at the top of the hole. Pocket holes especially come out cleaner with the speed maxed. Slow down only for metal, for very large bits, or when a specific bit is scorching the material.
Can I use an impact driver instead of a drill?
For big screws and lag bolts, yes, and an impact will be faster. For small or delicate screws, no. There is no clutch on an impact, so hinge screws, cabinet hardware, and pocket hole screws strip easily. I have stripped plenty of pocket hole screws learning that the hard way.
Do I need a hammer drill?
Only if you drill into concrete or masonry. Hammer mode adds vibration to the bit so it works through hard material faster. For wood and general shop work you will never use it. Just check the clutch collar before you buy, because plenty of drills are drill and drive only.
Is it bad to leave a battery on the charger?
Yes, and it is the most dangerous thing on this list. If a charger or battery fails to shut off, it can overheat, and people have lost shops and houses that way. It also is not good for the cells to sit at full all the time. Set a timer and pull them off before you leave.
What drill bits do beginners actually need?
Start with a good assortment of twist bits for pilot holes and general drilling, plus a set of driver bits. Add brad point bits when you need holes to land exactly on a mark. A budget Forstner set is the next buy, since it handles flat bottom and angled holes nothing else does well. Skip the hundred piece bargain bits, because cheap metal dulls fast and drills ugly holes.
Some links in this post are affiliate links. 731 Woodworks may earn a small commission at no extra cost to you.
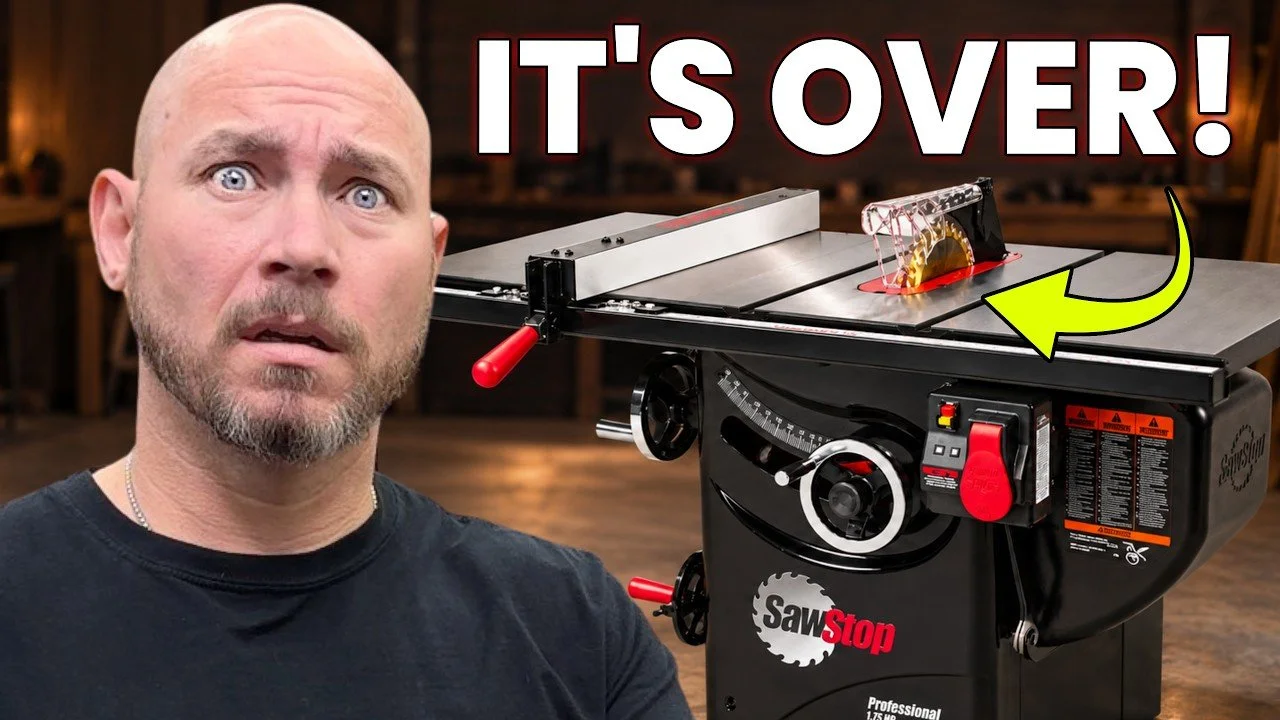

DeWALT sells three tiers of cordless tools and three tiers of batteries, and most buyers never hear about it. Here is what I would buy, what I would skip, and the DeWALT tools I would buy again.